WallPanels Studio
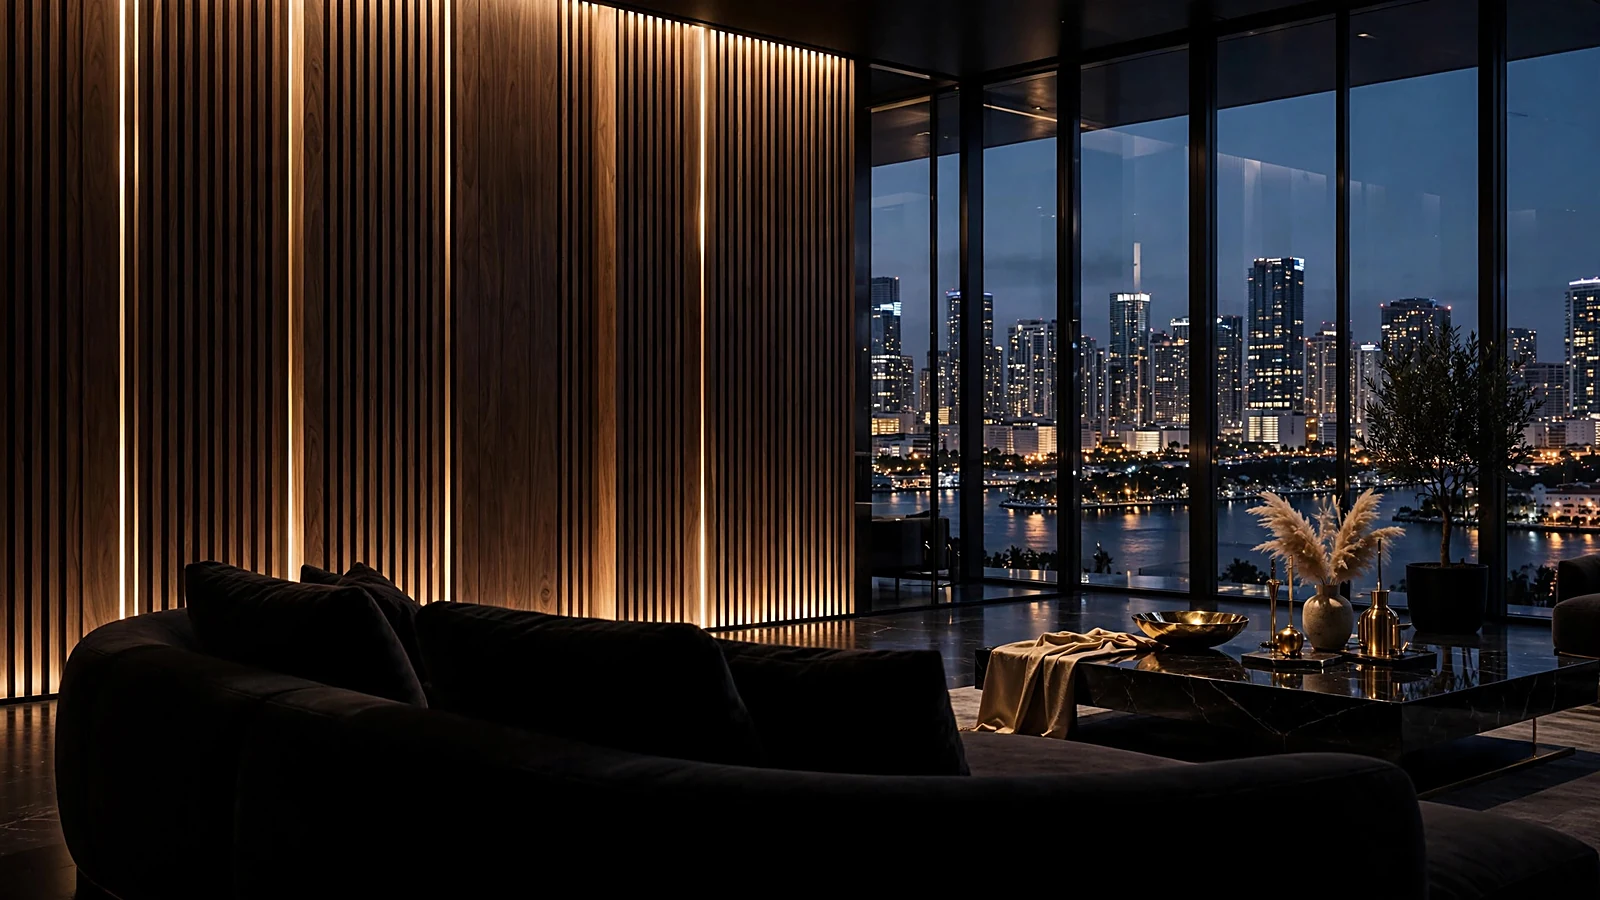
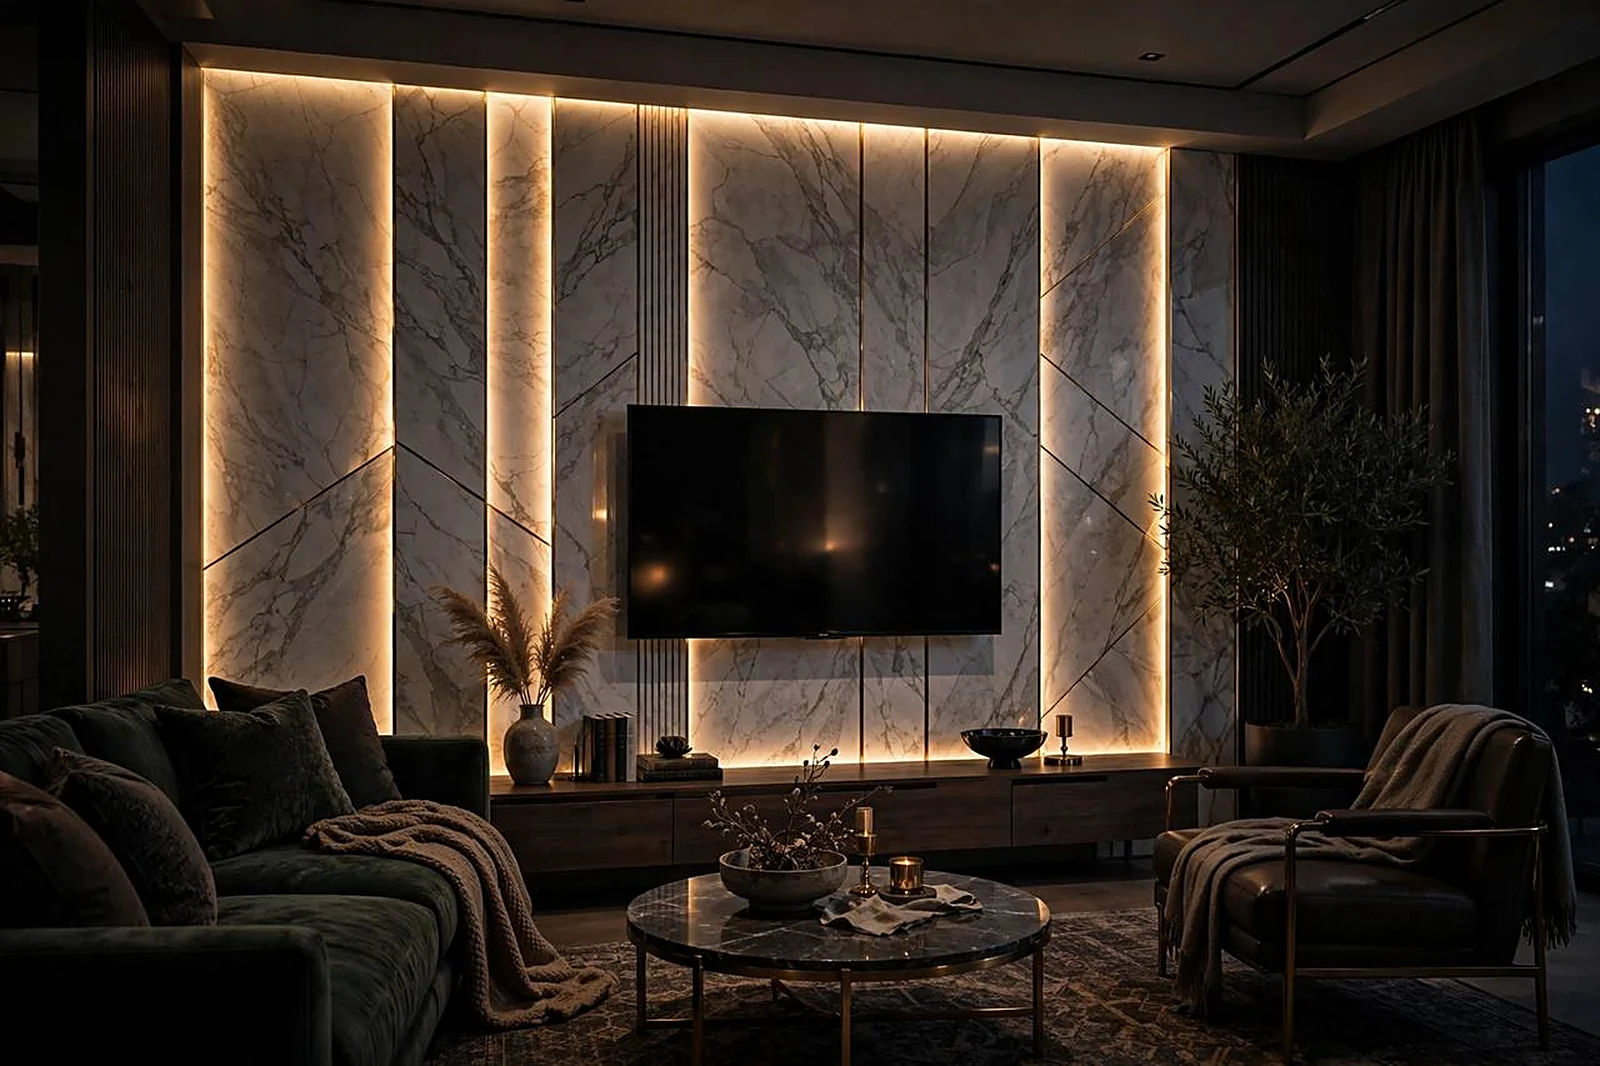
Contemporary living room with illuminated wood slat wall panels with a city view

Wall design & installation · South Florida

Walls That Look Like a Million

Photograph your wall, choose a style, and receive a custom design direction by email. We then refine materials, price and installation with you.

Choose Materials
South Florida · Fort Lauderdale · Broward · Boca Raton

One room, two possibilities

See the change clearly

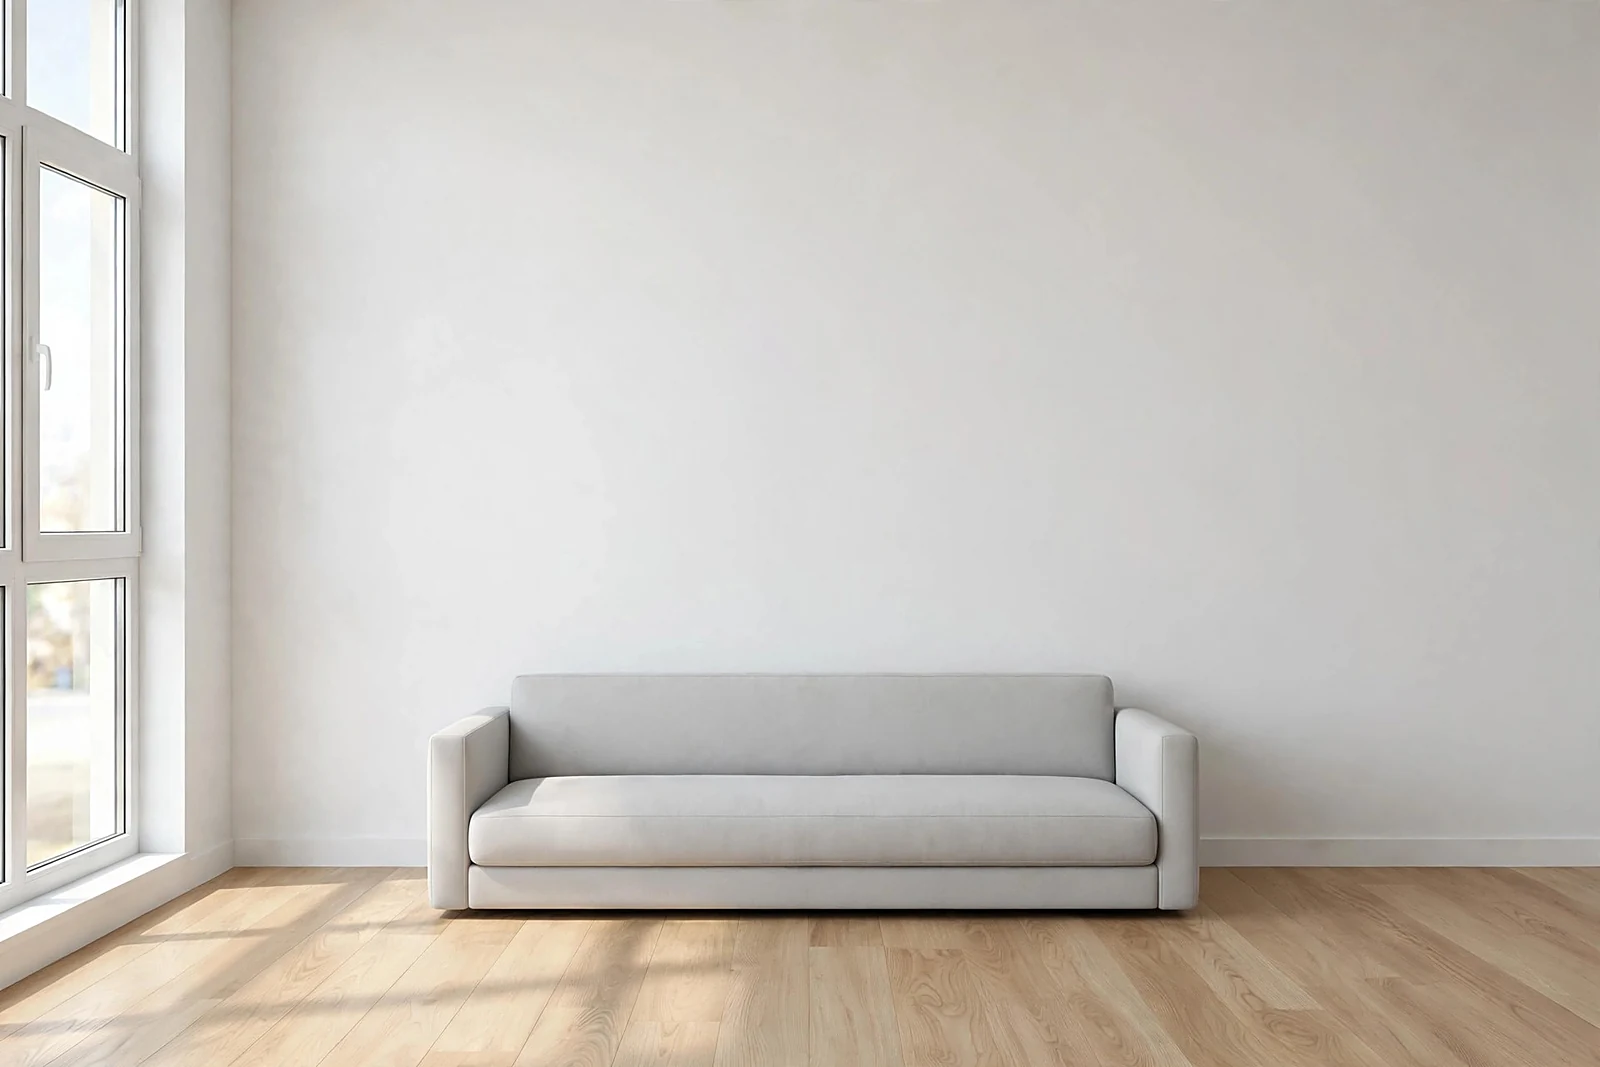
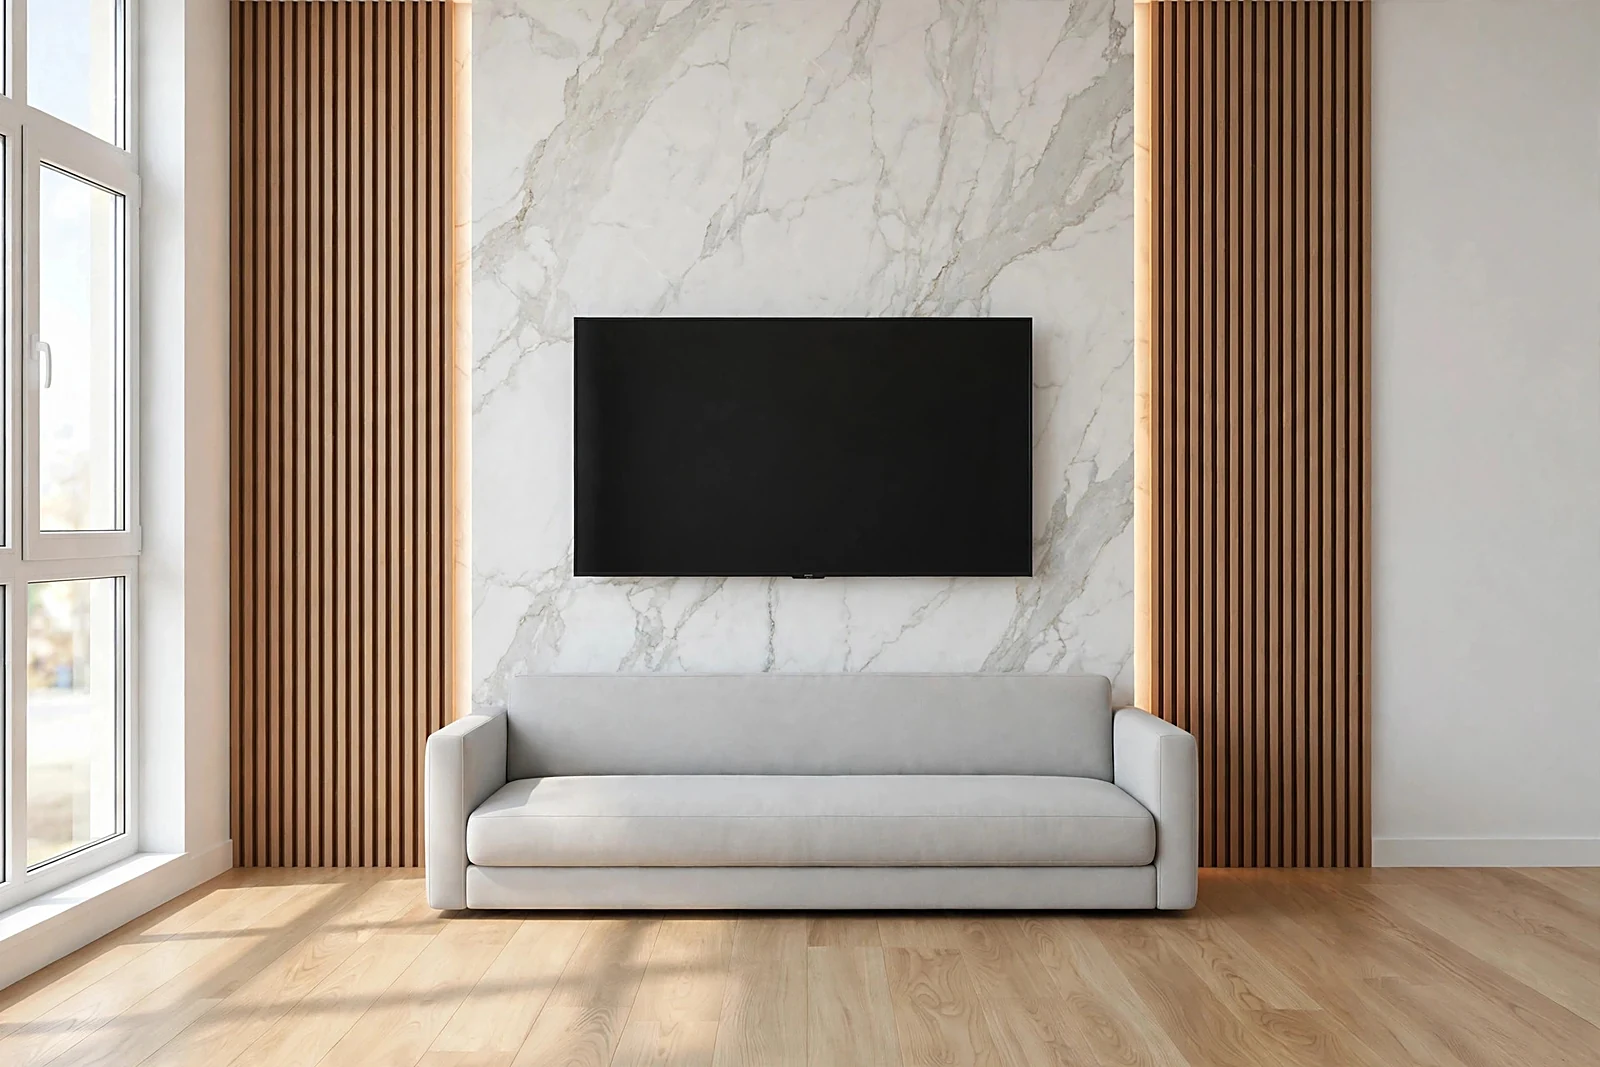
Move the divider to compare the same room before and with a marble-and-slat TV wall concept.

01
Send a wall photoUse a clear, straight-on image when possible.
02
Choose style and materialsTell us what feels right for your room.
03
Receive a custom design optionWe prepare a direction tailored to your wall.
04
Confirm materials, price and installationWe refine the practical details together.
Living room before wall treatment The same living room with a marble and slat TV wall design concept Before Design idea
Drag to compare

Example transformation for visual inspiration; not a completed project.

What we design & install

Wall panel services in South Florida

WallPanels Studio is a design-and-install studio in Hallandale Beach, Florida. We design, supply and install decorative wall panels and TV walls for homes and businesses across Broward County and Boca Raton — one team from the first sketch to the finished wall.

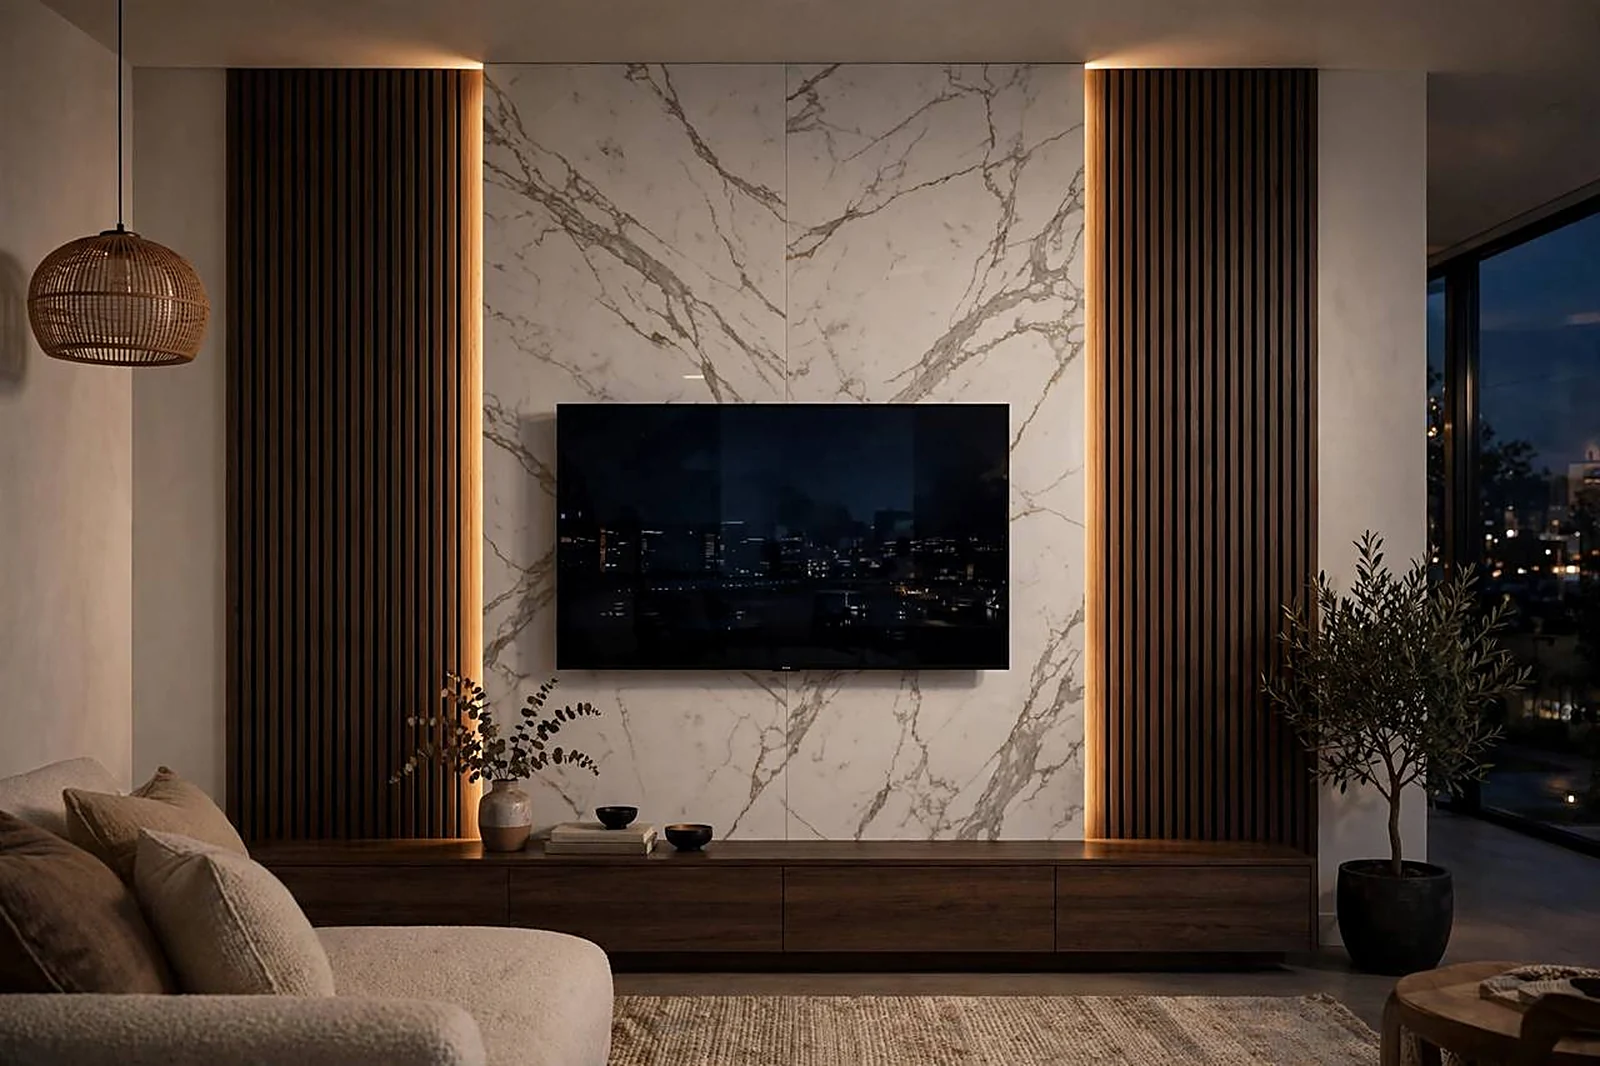
TV wall with wood slat panels and travertine-look sheets, concept visualization

TV Walls & Media Walls

A TV wall is a full composition, not a panel behind a screen: the wall is fitted around your TV size and viewing height, cables run in hidden channels, and a floating console and LED halo are planned from the start.

Popular builds pair Slat 800 wood slat panels (ND 894, ND 874) with travertine-look sheets (Travertine ND 488) or a brushed metal accent (Metal Collection ND 14).

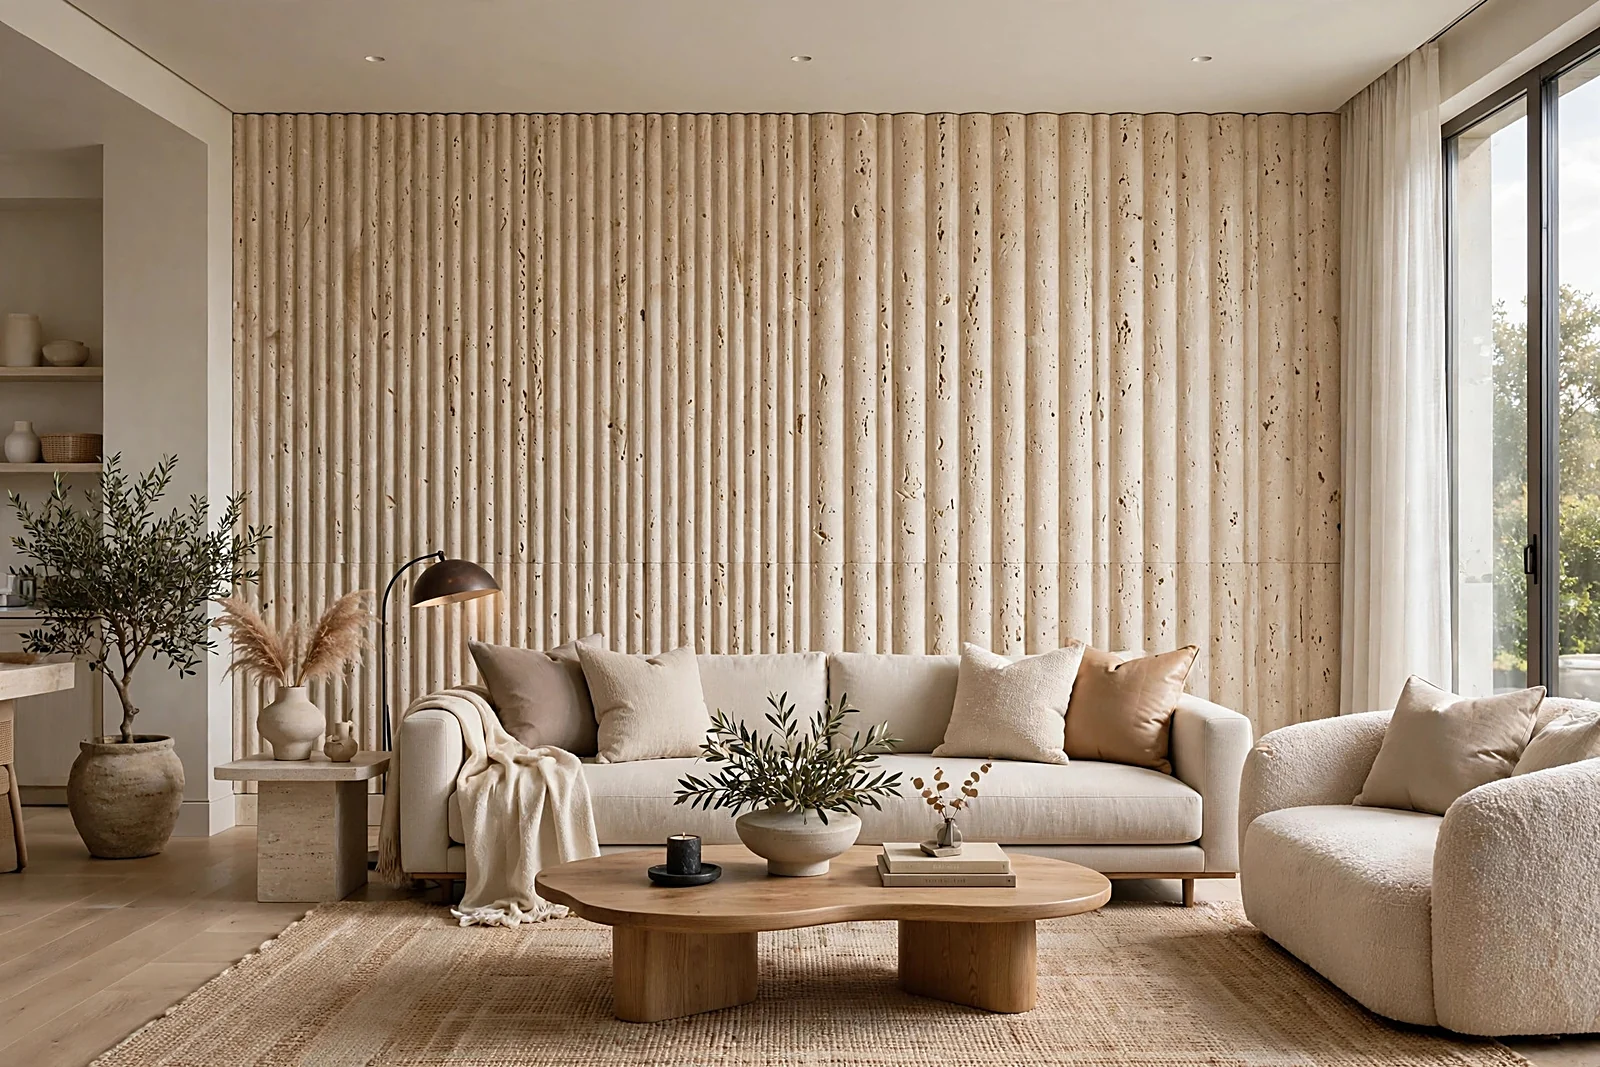
Travertine-look wall panels in a living room, concept visualization

Travertine & Stone-Look Walls

Floor-to-ceiling stone looks without stone weight or grout: large-format 48″ × 108″ sheets, 5 mm thin, read as one continuous surface with very few joints — honed travertine, Calacatta-style marble, matte stone.

Families: Travertine (ND 470, ND 480, ND 486), Matte Stone (ND 28, ND 112), Glossy Stone (ND 45–ND 49), Continuous Pattern (ND 242-3).

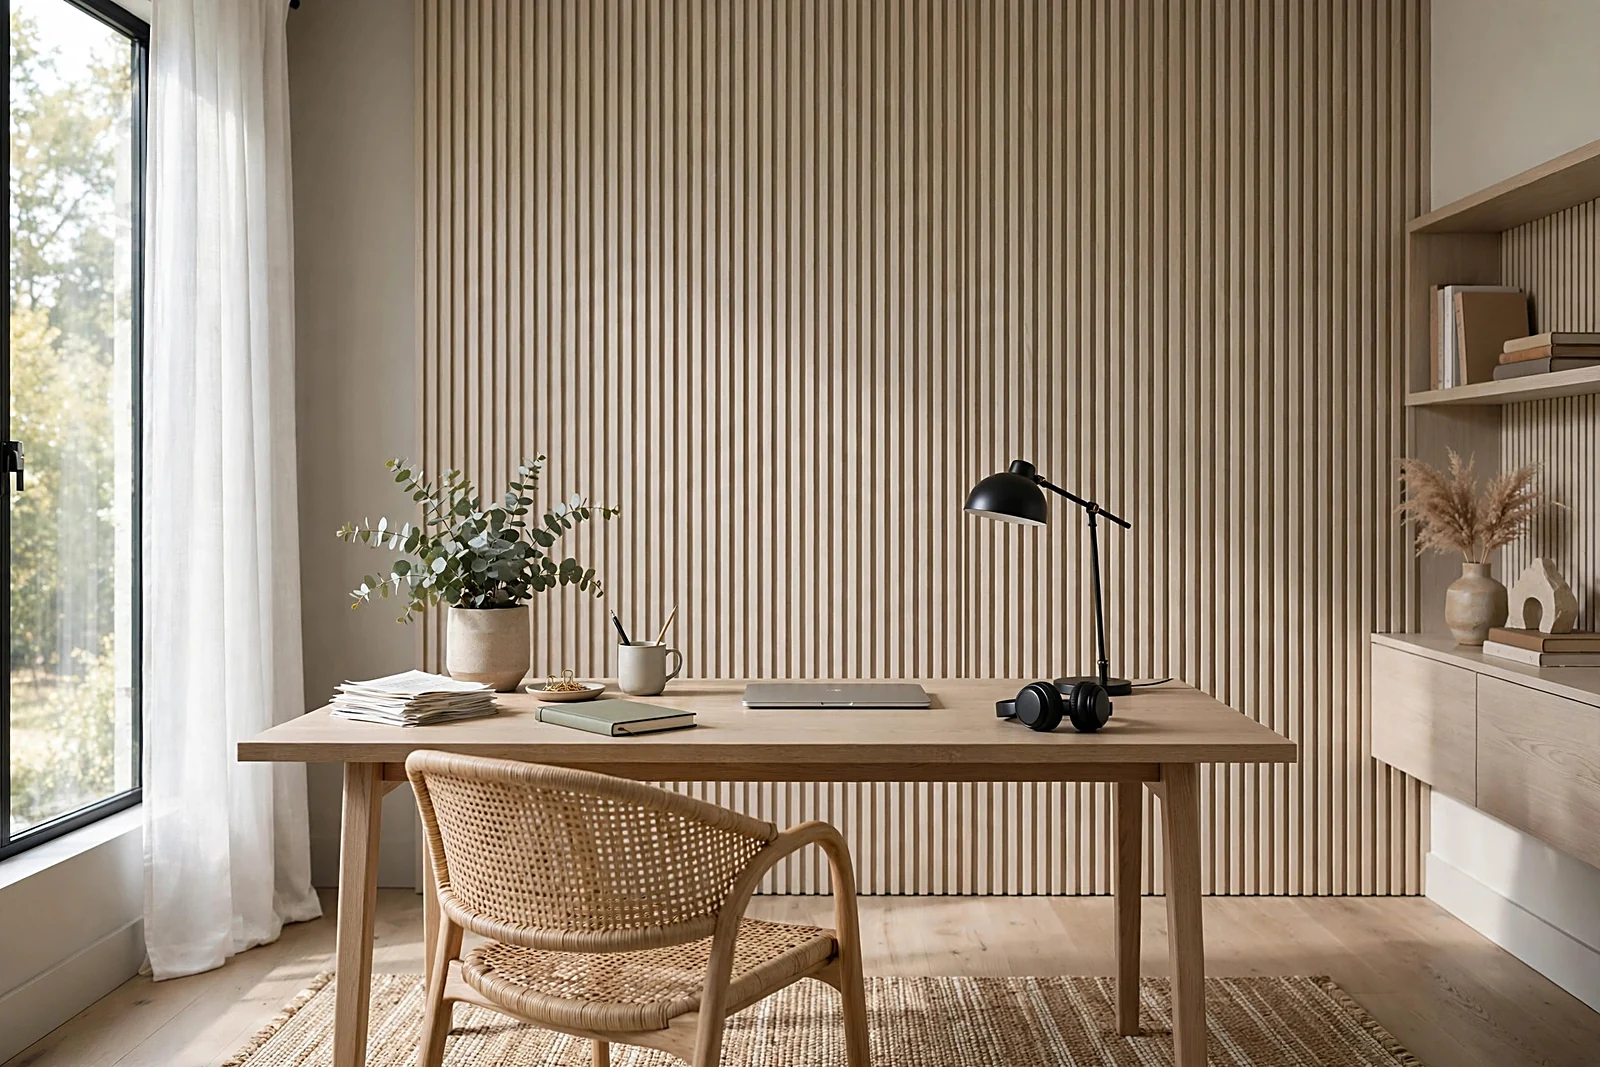
Wood slat and fluted wall panels behind a sofa, concept visualization

Wood Slat & Fluted Panels

Vertical wood slats add warmth, rhythm and real acoustic softness to living rooms, bedrooms and home offices — the felt-backed slat series calm echo on video calls and around the TV.

Families: Slat 700 (ND 750), Slat 800 (ND 874), Slat 900 (ND 974), Wood Collection veneers (ND 69, ND 71) and Bamboo Curves (ND 771).

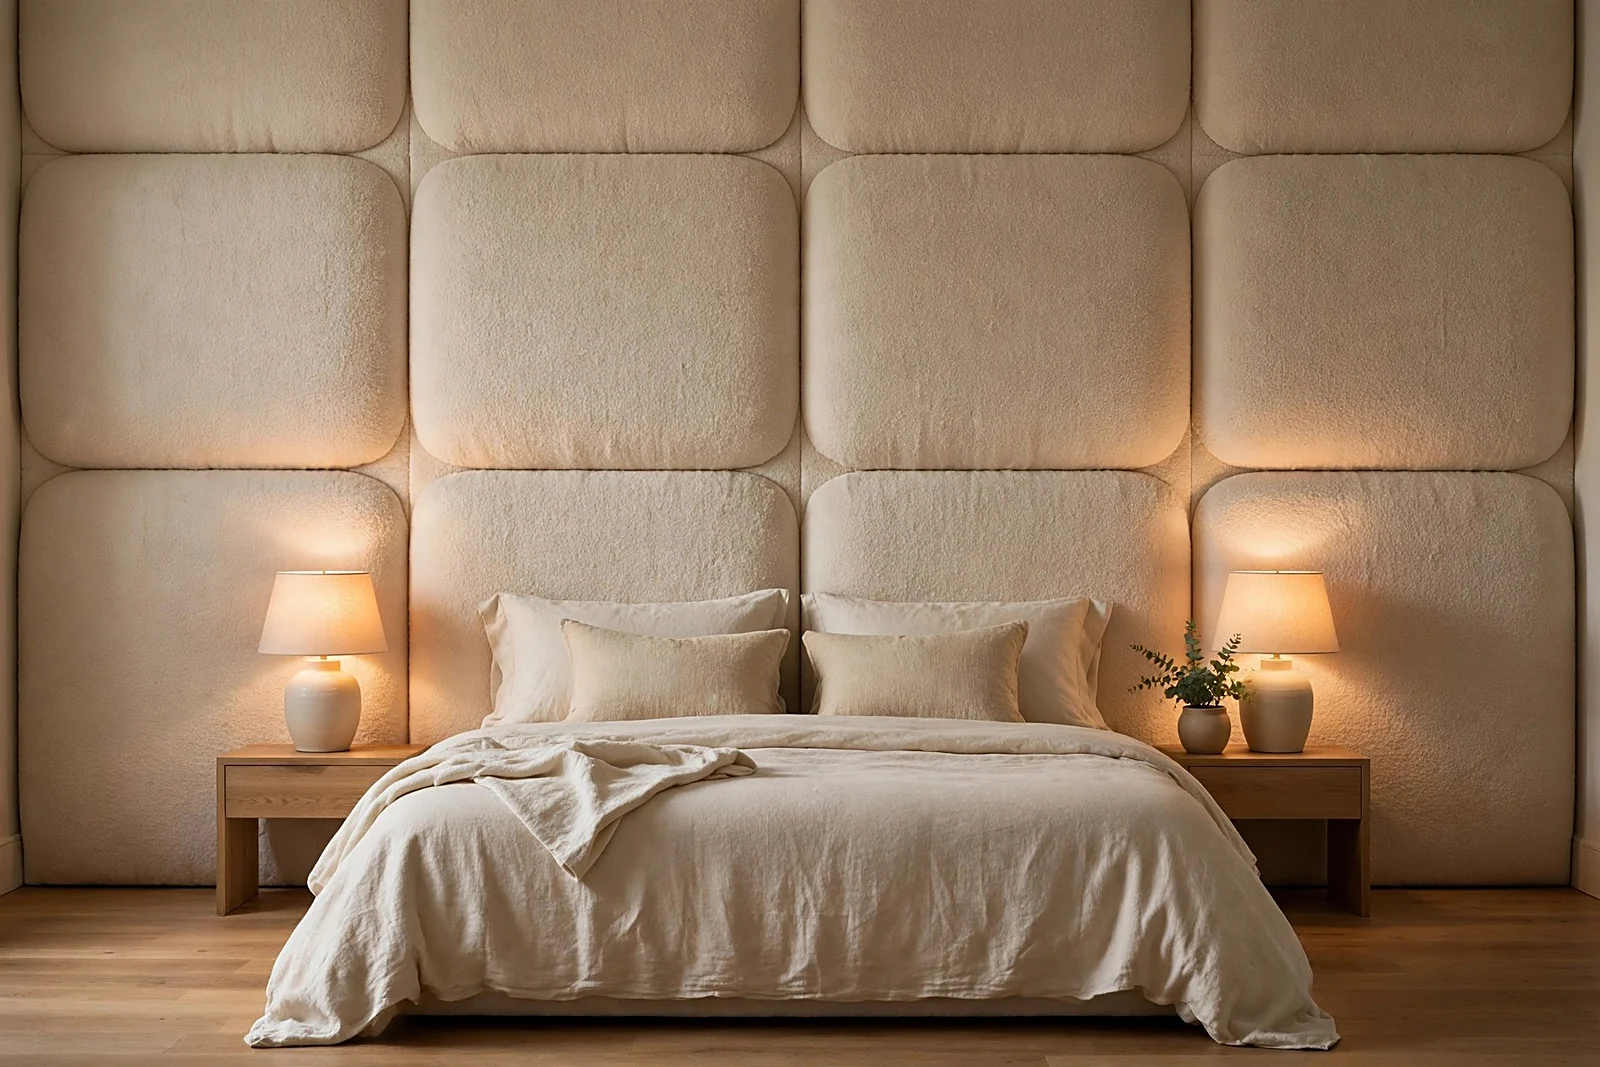
Padded wall panels as a bedroom headboard wall, concept visualization

Padded Panels

Soft, tailored panels for headboard walls and quiet rooms: padded panels absorb sound, feel warm to the touch and turn a bedroom wall into a full-height upholstered headboard.

Family: Padded Panels ND 610–ND 624, in soft-touch finishes that pair with Skin Collection solid colors (ND 94, ND 158).

Wall panels with integrated LED backlighting, concept visualization

LED Feature Walls

Light designed into the wall, not added after: concealed LED lines along the ceiling, a halo behind the TV, or magnetic track lighting set into the panel field — wired before the panels go up.

Built with Slat and Continuous Pattern panels plus trims with light channels; see our LED lighting guide in the blog for planning order.

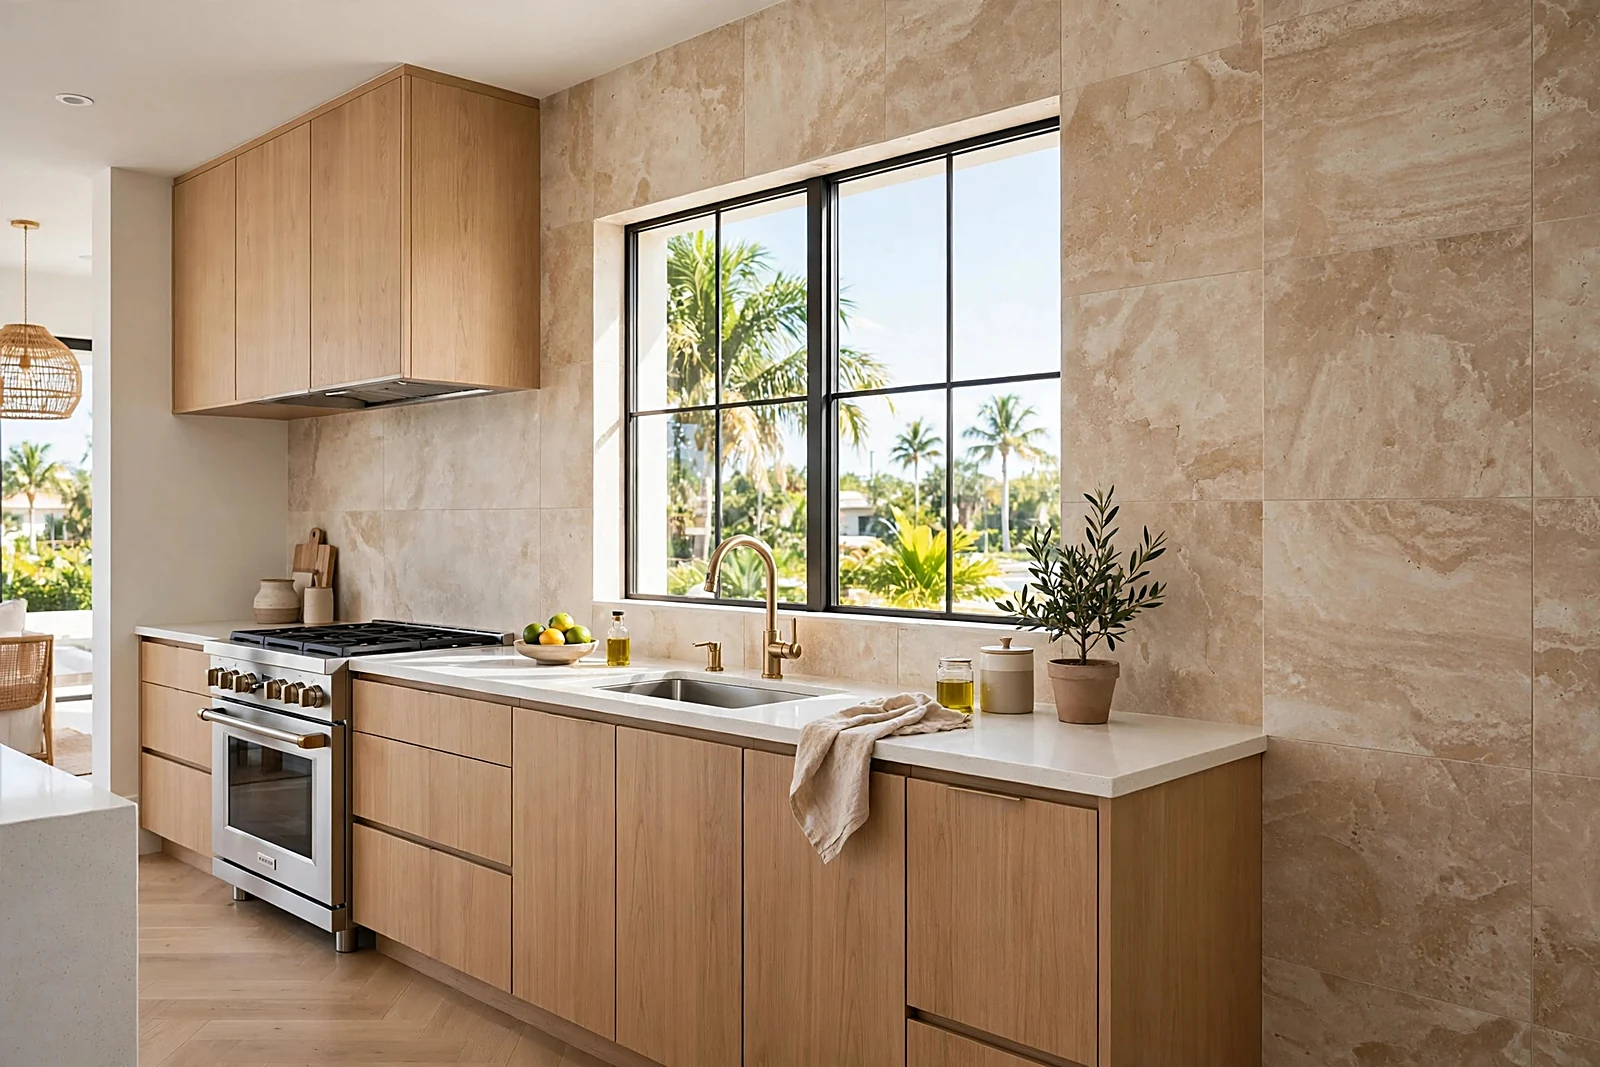
Waterproof stone-look wall panels in a kitchen, concept visualization

Kitchen & Bath Waterproof Panels

Grout-free walls for kitchens and bathrooms: waterproof large-format panels go over existing tile in about a day, wipe clean, and never need re-grouting — the practical answer to Florida humidity and mold.

Families: Continuous Pattern (ND 242-3, ND 230) and Matte Stone (ND 112) for wet zones; full details in our over-tile guide.

Concept visualizations. Your design starts with a free preview composed on a photo of your own wall. Prices: stock design from $850; fitted to your wall usually $2,200–$2,700; full custom turnkey from $9,999 — exact price confirmed after a free measurement.

The material library

Materials

Browse verified model families, dimensions and model codes, then add your choice directly to the wall request.

Only model families supported by the available catalog data are shown. Availability and pricing are confirmed after review.

Built in South Florida

Our Work in South Florida

This section is reserved for verified photos of our completed installations.

Real project gallery coming soon

Only genuine WallPanels Studio before/after photos and finished walls will be shown here.

Questions & answers

FAQ

Short answers to the questions we hear most often.

How do I get a design option for my wall?

Fill in the form and attach a clear photo of your wall, with your name and email. Any saved materials and style reference are included automatically.

What do you need from me to start?

A clear, straight-on photo of the wall, your name and email. You may also save material choices, a style reference, or add an optional comment.

Which areas do you serve?

Broward County and South Palm Beach County: Fort Lauderdale, Hollywood, Hallandale Beach, Boca Raton, Pompano Beach and surrounding areas.

Do you also install the panels?

Yes. Once you approve the design direction, we finalize materials, cost and the installation plan with you, and then install the panels.

How quickly will you reply?

We review every request in the order it arrives and reply to the email you provided. Attaching the photo through the form is the fastest way to start.

Pricing

What a wall costs

Three ways to start — from a ready design to a wall composed around your room. Every project begins with a free AI preview of your own wall.

Stock design from $850

A finished design from our collection, set on your wall.

Full custom, turnkey from $9,999

Surfaces, lighting, TV and storage composed around your room, installed by our own crew.

Prices are preliminary. A specialist confirms the exact price after measuring your wall. See the full pricing guide →

Create your design

Bring your wall and ideas together.

Upload a clear room photo and send the exact materials and style you saved. Prefer to start with the photo? You can add materials later.

Call the studio line +1 (754) 306-0666 Answered in English, Español & Russian
Email wallpanels@solomiagroup.com Send a photo of your wall — free AI preview
Follow our work InstagramFacebook @wallpanelsstudio — new walls every week

Blog

Wall Panel Guides

Answers before you request an estimate

How Much Does It Cost to Install Wall Panels in South Florida?

Wall panel installation cost in South Florida depends on material, wall size, and design complexity. Here is what drives the price - and how to get an exact number for your wall.

Read the guide

How Long Does It Take to Install Wall Panels? A Realistic Timeline

One accent wall is usually a single workday on site. The full journey from first message to finished wall is 1-3 weeks. Here is the realistic timeline.

Read the guide

How Hidden Light Makes a Wall Look Expensive and Modern

A panel wall looks good. A panel wall with the right hidden light looks expensive. Here are the three layouts that work, the temperatures that flatter, and what must be wired before the panels go up.

Read the guide

Are Wall Panels Worth It? The Honest Answer (With Numbers)

Wall panels can be the best money you spend on a room - or a waste of it. Here is the honest math: what you gain, what you risk, and how long each material really lasts.

Read the guide

DIY Wall Panels: Where You Save $300 - and Where You Lose $1,000

DIY saves the labor bill - until one crooked panel ruins the whole wall. Here is the honest math of when doing it yourself pays, and when hiring a pro is cheaper in the end.

Read the guide

Cracked, Wavy, Ugly Wall? Here's What Wall Panels Can Cover - and What They Can't

A cracked or wavy wall doesn't mean you need new drywall - but it doesn't mean you can just glue panels on top either. Here's the honest line between 'hide it' and 'fix it first.'

Read the guide

Can Wall Panels Go Behind a TV With Wires? Yes - But Only in One Order

A TV wall is where wall panels shine brightest - but the wires decide everything. Do the cabling first and the wall looks like a design magazine; do it after the panels and the cables have nowhere to go.

Read the guide

Do Wall Panels Soundproof a Room? No — But They Fix the Noise Problem You Actually Have

Walk into any showroom and the box says 'acoustic.' Walk out expecting silence from the neighbors and you'll be disappointed - but for the wrong reason. Here's what acoustic panels genuinely do to a room, and why it's the thing most Florida homeowners actually want.

Read the guide

Wall Panels in a Bathroom? Yes — If You Don't Want Mold Growing Behind Them, Read This First

The bathroom is where wall panels either shine or fail spectacularly. The difference is not the panel — it is the zone. Inside the shower, beside the sink and on the far wall are three different worlds, and each one has its own rules.

Read the guide

PVC vs Wood vs MDF Wall Panels: Which One Actually Wins in a Florida Home?

There is no single winner — there is a winner per room. PVC wins where water lives, wood wins where you want real depth you can refinish, and MDF wins where you want a smooth, paintable, premium look on a dry wall. Pick by room, not by photo.

Read the guide

Can You Paint Wall Panels? Yes — But 3 Types Will Peel If You Treat Them the Same

Yes, you can paint most wall panels — but the material decides everything. MDF and wood paint beautifully with the right primer, PVC only holds paint with a plastic bonding primer and a flexible topcoat, and foil-wrapped or acoustic felt panels usually should not be painted at all.

Read the guide

Are PVC Wall Panels Durable? Yes — 10 to 20 Years, If You Dodge These 4 Killers

Yes, PVC wall panels are durable where water is the enemy — they do not rot, swell or feed mold and termites. Quality interior panels commonly last 10–20 years. What shortens their life is not moisture but heat, strong sun without a UV layer, hard impacts on cheap hollow panels, and poor installation.

Read the guide

How to Clean Wall Panels Without Ruining Them: The 10-Minute Routine Most Owners Get Wrong

Most wall panels need very little: regular dry dusting, a barely damp microfiber cloth with mild soap when marks appear, and drying right away. The material decides how much water is safe — PVC tolerates a damp wipe, MDF and wood want almost dry, and acoustic felt should be vacuumed, never soaked.

Read the guide

Are Wall Panels Fire Safe? The Rating Most Buyers Never Check — and Why 'Fireproof' Is a Lie

No decorative wall panel is fireproof. What matters is the tested fire class of the exact product, in the exact thickness and mounting you will use: under ASTM E84, Class A means flame spread 0–25, Class B 26–75 and Class C 76–200, with smoke developed 450 or less. Ask for the test report, respect heat clearances, and check code where the wall is a garage, shared or exit wall.

Read the guide

Can You Take Wall Panels Down Without Wrecking the Wall? Yes — If They Were Put Up Right

Yes — if the panels were screwed, nailed or clipped, removal usually leaves only small holes to fill and paint. Panels bonded over their whole back with construction adhesive are different: they often tear the drywall paper as they come off and need sealing, skim-coating and repainting. The fixing method chosen on day one decides the answer.

Read the guide

Paint Again in 5 Years or Panel Once for 20? Wall Panels vs Wallpaper vs Paint — What Actually Lasts Longer and Costs Less

Paint is cheapest on day one and the most expensive habit over a decade: it typically needs a fresh coat every 3–7 years. Wallpaper can last 10–15 years in a dry, well-prepared room but is the finish most vulnerable to South Florida humidity at its seams. Quality wall panels cost the most upfront and usually need no redo for 10–30 years depending on material — which is why the winner depends on how long you plan to keep the wall, not on the price tag you see first.

Read the guide

Will Wall Panels Lower Your AC Bill? The Cozy-Wall Myth, Checked With Real Numbers

A decorative wall panel can make a room feel warmer — wood and felt do not feel cold the way bare concrete block or tile does. But feeling warmer is not the same as being insulated. A typical panel adds roughly R-0.5 to R-1, while a Florida exterior wall is built to about R-13 or more.

Read the guide

Your Ceiling Is a Fifth Wall — But Can Wall Panels Actually Go Up There?

Yes — wall panels can go on a ceiling, but gravity changes the rules: adhesive alone is never enough overhead, panels need mechanical fixing into the joists, and only the lighter panel families qualify. A standard slat sheet weighs roughly 12 kg (about 26 lb) — beautiful on a wall, usually the wrong choice above your head.

Read the guide

That 'New Panel' Smell — Do Wall Panels Off-Gas, and Are They Safe for a Nursery?

A faint 'new product' smell in the first days is common — and it usually comes from the adhesive, the backing and the packaging, not the panel face, and fades with ventilation. Emissions depend on the material: PVC, stone-look and metal are comparatively inert, while MDF composites must be checked product by product for formaldehyde — look for low-VOC documentation, GREENGUARD and CARB Phase 2.

Read the guide

Your Living Room Wall, Transformed — What Are the Best Wall Panels for a Living Room, and What Do They Cost in South Florida?

The best living room panels are matched to your wall: most homes start with the TV wall, then mix two or three materials — wood slat, stone-look or travertine, textile or padded, with thin metal accents. Stock design from $850; fitted to your wall usually $2,200–$2,700; full custom turnkey from $9,999. One accent wall typically installs in about a day. Free AI preview by photo.

Read the guide

The Wall Behind Your Bed, Transformed — Bedroom Headboard Wall Panels: Ideas, Materials and What They Cost in South Florida

The best headboard wall panels are built around comfort: a soft padded centre behind the pillows — Padded Panels ND610–624 — framed by wood slat, stone-look or travertine, with thin metal accents. Stock design from $850; fitted to your wall usually $2,200–$2,700; full custom turnkey from $9,999. One accent wall typically installs in about a day. Free AI preview by photo.

Read the guide

Kitchen Wall Panels: 🍳 A Backsplash and Accent Wall Without a Single Grout Line

A panel backsplash has no grout lines at all: large smooth sheets cover the cooking wall, splashes wipe off in one pass, and the accent wall beside it can mix stone-look and concrete-look panels. Studio tiers from $850, $2,200–$2,700 fitted, from $9,999 custom.

Read the guide

Wall Panels vs Tile: Which Is Cheaper — and Actually Better — for Your Kitchen and Bathroom? 🔥

For a kitchen backsplash or a bathroom accent wall outside the shower, wall panels usually win on total cost and time: no demolition, no wet tile work, no grout to seal or scrub, one wall in about a day. Tile still wins inside the shower stall. Studio tiers from $850, $2,200–$2,700 fitted, from $9,999 custom.

Read the guide

Entryway & Hallway Wall Panels: 🚪 The First-Impression Wall Your Guests Actually Remember

The entryway wall takes more hits than any wall in the house — bags, shoes, keys, deliveries — and flat paint shows every one. Panels give that wall a wipe-clean, textured surface that protects the rub zone and makes a narrow hall feel wider. Studio tiers from $850, $2,200–$2,700 fitted, from $9,999 custom.

Read the guide

Can You Mount a TV on Wall Panels? 📺 The Safe Way to Build a TV Wall That Holds

Yes, you can mount a TV on wall panels — safely, if the bracket anchors through the panels into studs or blocking, and cables are planned before the panels go up. The panel is the finish, not the structure. Studio tiers from $850, $2,200–$2,700 fitted, from $9,999 custom.

Read the guide

Home Office Wall Panels: 💻 The Zoom Backdrop That Makes You Look Expensive

Your office wall is on camera more than you are. Flat paint blows out bright, echoes, and says nothing. Panels give your Zoom backdrop vertical lines that frame your face, texture that holds light softly, and a calmer sound — without soundproofing promises. Studio tiers from $850, $2,200–$2,700 fitted, from $9,999 custom.

Read the guide

Fluted Panels vs Wood Slat Panels: 🪵 Same Stripes, Completely Different Wall

They look like cousins in photos and behave like strangers in a room. Fluted panels are one continuous grooved surface; wood slat panels are real individual slats on felt, with real gaps and real shadow. Which belongs on your wall depends on light, dust, moisture and curves — the honest side-by-side, with studio tiers from $850, $2,200–$2,700 fitted, from $9,999 custom.

Read the guide

Are Wall Panels Still in Style? 🔥 The 2026 Trends South Florida Homes Are Actually Choosing

Yes — wall panels are still in style in 2026, but the look moved on: one honest accent wall, mixed materials (wood beside stone-look, padded centres, thin metal lines), warm minimalism and texture that plays with light. Studio tiers from $850, $2,200–$2,700 fitted, from $9,999 custom.

Read the guide

Wall Panels Over Your Old Tile? 🧱 Yes — If the Tile Passes These 4 Checks

Demolition is the part of a bathroom or kitchen refresh everyone dreads. If your old tile is solid, flat and dry, wall panels can often go straight over it — no dust, no dumpster, no week without a bathroom. The four checks that decide it, the cases where tile must come off, and how the install day actually runs. Studio tiers from $850, $2,200–$2,700 fitted, from $9,999 custom.

Read the guide
← Back to Blog

Blog

How Much Does It Cost to Install Wall Panels in South Florida?

Not sure what a panel wall should cost? Send a photo of your wall and see it with panels before you spend anything - free AI preview, then an exact quote after measurement. Text us: SMS / WhatsApp +1 754 306 0666.

How much does it cost to install wall panels in South Florida?

Short answer: Nationally, installed wall paneling runs $7-$25 per square foot, with a typical project between $1,200 and $6,000 (average about $2,800), per Angi's 2026 data. One bedroom accent wall (12x9 ft) lands between $900 and $7,000, depending on the material (EA Home Design). Wall panel installation cost in South Florida is quoted per project after measurement - use public ranges as orientation, get your exact number from a free consultation.

Those numbers are wide on purpose. "Wall panels" covers everything from $1-per-square-foot PVC sheets to walnut slat walls with built-in LED lighting. The per-square-foot figure always bundles two things: materials and labor. Change either one and the total moves.

Here is the honest part most pricing pages skip: in our research we could not find a single South Florida decorative-panel studio publishing a fixed per-square-foot price. Every wall is different - size, condition, outlets, corners - so studios quote per project after seeing the space. Public ranges below are market orientation from named sources. Your exact price comes from a measurement, which is why we do it free: send a photo of your wall, see it with panels in an AI preview, and get a written estimate with no guessing.

What makes up the final price? 5 cost factors

Short answer: Five things set your wall panel installation cost in South Florida: wall size, panel material and sheet format, wall condition and prep work, complexity of cuts around corners and outlets. Finish details include caulking, trim, or LED channels. Labor is a large share - Angi puts it at $40-$100 per hour, or $3-$10 per square foot for standard installs.

FactorWhat it meansHow it moves the price
Wall sizeMeasured square footage of the wallMore square feet = more panels + more labor hours
Panel material and formatPVC, MDF slats, natural wood, stone-look sheets; sizes differ by manufacturer (slat panels ~2400x600 mm, stone-look sheets ~1220x2440 mm)Premium materials and large-format sheets cost more per square foot
Wall condition and prepFlat painted drywall vs. damaged or uneven wallsSkipping prep is the most common installation mistake: panels glued to unprepared drywall can peel off, taking plaster with them (Ideal Home)
Complexity of cutsCorners, niches, outlets, switchesMoving an outlet or adding sconces adds $300-$1,200 and may need an electrical permit (EA Home Design)
Finish detailsCaulking seams, trim, LED channelsLED-lit premium slat walls roughly double the mid-range cost; caulking alone often takes longer than the install itself (Anthony Ellison, Oakmond Gold)

Two walls of the same size can cost several times more or less, depending on material and detail choices alone - EA Home Design's own table spans $900 to $7,000 for the same 12x9 ft wall. That is why a price quoted from a photo alone is worth little - as accent-wall specialist Anthony Ellison puts it: "You aren't just paying for the supplies. You're not just paying for labor... you will be paying for experience, integrity, and detail work."

Which panel material costs what?

Short answer: Retail material-only prices run from about $1 per square foot for basic PVC 3D panels to $16 for premium finished panels at big-box stores. Installed prices run higher because labor is included: Fixr puts installed wainscoting at $15-$20 per square foot, with styles ranging $9-$43 by complexity.

MaterialRetail, material only (per sq ft)Source
PVC 3D panels (Art3d 12-pack)~$1.05Walmart listing
MDF slat panels (Art3d 6-pack)~$4.71Wayfair listing
MDF panel kit~$6.50Home Depot / Lowe's pricing via LilyAnn Cabinets, Sep 2026
Peel-and-stick reclaimed wood$10-$16Stikwood via The Manual
Finished wall paneling, big-box range$5.71-$15.92Home Depot

Installed prices bundle material + labor, so compare them separately from the retail table above. A few installed anchors: Fixr reports $15-$20 per square foot installed for wainscoting on average. PVC panel vendors quote professional installation around $1-$3 per square foot for simple PVC systems (Residence Supply) - versus $3-$5 for ceramic tile, the comparison their customers usually make.

One more number worth knowing. EA Home Design, a real remodeling contractor, publishes installed costs for a single 12x9 ft bedroom wall from their own projects. The range: $900-$2,500 for painted MDF board-and-batten, up to $3,000-$7,000 for a white oak or walnut slat wall with an LED channel. That spread is the most honest illustration of "it depends on material and detail." These retail anchors explain only half of the wall panel installation cost in South Florida - the rest is labor, prep, and finish detail. You can browse the panel materials we work with - slat wood, stone-look, concrete, mirror - to see which textures fit your space.

Thinking about a panel wall for your home? That is exactly what our free design consultation covers: you send a photo of the wall, we show you how it looks with panels, then measure on site and give you the exact number. SMS / WhatsApp: +1 754 306 0666.

Why can the cheapest quote end up the most expensive?

Short answer: Because installation quality is where cheap quotes cut first - no wall prep, no caulking, no studs behind seams. The wall looks fine on day one and fails within months. As accent-wall specialist Anthony Ellison (Oakmond Gold) puts it: "Do not choose based on price. Choose based on the carpenter."

Three real failure patterns show up again and again in homeowner forums:

  1. Panels peeling off with the plaster. The most common paneling mistake is skipping wall preparation - weak adhesion lets panels come away from the wall, taking plaster with them (Ideal Home). Fixing that means replastering, which costs more than the prep ever would.
  2. Seams that keep cracking. A Houzz forum homeowner glued faux paneling over drywall; the paneling kept separating at the seams. Renailing the edges did nothing - there was no stud behind the seams to hold the nails. Joint compound filled the cracks, and "without fail, the cracks reappear."
  3. The missing finish work. "Do they even caulk? (Most don't) They have to caulk, or they're not sealing the designs. Caulking takes longer than the actual install." - Anthony Ellison, VP of Sales at Oakmond Gold, an Austin accent-wall company. Unsealed seams collect dust, show gaps as panels move with temperature, and read as cheap within a year.

Ellison also warns against quote-shopping without a site visit. His words: "This certainly applies to someone on Facebook who offers a quote without seeing your space." A wall you will see every day deserves a measured quote, not a guess from a photo in a messenger thread. That gap between a guess and a measurement is why we quote per project, not per square foot.

What does Florida humidity change about panel choice?

Short answer: In South Florida, put moisture-proof materials (PVC, WPC) in bathrooms, kitchens, and laundry rooms. Painted or sealed MDF slats are fine for bedrooms and living rooms - homes here run AC year-round, so indoor humidity stays controlled. Always let panels acclimatize in the room for 48 hours before installation.

This is the most Florida-specific part of the decision, and sources genuinely disagree - so here are both sides.

The manufacturer warning. Panel maker George Panel states it plainly: "MDF is very sensitive to moisture and easily absorbs water, swells and deforms. Therefore, it is not suitable for use in humid environments." PVC vendors market their panels as the only safe choice for wet areas - and for bathrooms and kitchens, they have a point. Bare MDF behind a vanity or in a steamy bathroom is asking for swelling.

The contractor practice. At the same time, most installed slat-panel work in the US - including acoustic slat lines like Acupanel - is MDF slats on felt backing, routinely painted or sealed. Angi lists MDF as a standard panel material. The practical rule most installers use: sealed or painted MDF in climate-controlled living areas and bedrooms is fine; reserve PVC/WPC for bathrooms, kitchens, laundry rooms, and exterior-facing damp walls.

Three Florida rules that prevent most moisture failures:

  1. Acclimatize 48 hours. Leave panels in the room where they will be installed for at least 48 hours before fitting - MDF expands and contracts with temperature and humidity swings (Livingetc). One DIYer's panels sat in a damp shed for a week; the glue would not adhere and a full day was lost.
  2. Leave expansion gaps. Panels need room to move - about 1/4 inch at edges is the forum-tested rule (Bogleheads). Over-tightened screws crack panels or create stress points (Residence Supply).
  3. Match material to the room, not to the catalog photo. Wood-look in a bathroom demands a serious lacquer finish and maintenance; PVC gives the look with none of the risk. Skipping these three rules is the fastest way to turn a fair wall panel installation cost in South Florida into a repair bill.

As a Plantation-based wallpaper installer put it in June 2026: "There's no shortage of wallpaper and wallcoverings being specified in South Florida right now... What's harder to find is an installer who actually knows what to do with the more technical materials." Technical materials - 3D panels, large-format sheets, slat systems - punish generic installers. That is part of what you pay for.

How long does installation take?

Short answer: A single accent wall typically takes 2 to 5 days depending on material and detail - from painted board-and-batten (2-3 days) to a hardwood slat wall with LED channels (3-5 days), per EA Home Design's published project data. Electrical work and custom finishes extend the timeline.

What stretches a job beyond the base install:

  1. Electrical. Moving outlets, adding sconces or LED drivers: +$300-$1,200 and possibly an electrical permit (EA Home Design). A plain panel wall with no electrical changes needs no permit at all.
  2. Wall prep. Patching, leveling, or dealing with old texture adds a day before panels go up.
  3. Finish work. Caulking, trim, and paint-grade finishing are slow hand work - budget for them instead of discovering them mid-project.

Do not trust a "one day" promise for premium work. A slat wall with LED channels involves measuring, cutting around every outlet, wiring, mounting, and finish caulking - that is a multi-day craft, not an afternoon. When you compare wall panel installation cost in South Florida across quotes, check how many days each quote covers - a two-day and a five-day job are different products.

DIY or professional installer?

Short answer: DIY makes sense for simple painted board-and-batten or peel-and-stick walls - materials run $500-$2,000 with no labor (Angi). Hire a professional for slat walls with LED channels, seamless 3D panels, stained finishes, or anything where a crooked cut stays visible for years.

The honest split, based on what contractors themselves publish:

  • DIY territory: flat painted treatments, peel-and-stick systems (renters especially - though note removal can still damage plaster, per Ideal Home), one simple wall with basic tools. EA Home Design lists several treatments as "realistically a weekend" with DIY material costs 3-4x below installed prices.
  • Pro territory: wood slat walls with LED channels, large-format stone-look sheets, anything requiring electrical moves, walls with many outlets and niches. Accent-wall specialist Anthony Ellison is blunt about the skill gap: "It takes 5 years of focus and learning to do this work with precision... Someone who lays wood flooring does not have any idea how to install an artistic accent wall. It's an entirely different skill, with different materials, different tool sets, vastly different math..."

A useful middle path: order the design and materials through a studio, and you will at least know the exact panel count and layout before anyone picks up a saw. Guesswork on quantities is where DIY budgets quietly die. DIY cuts the labor share of wall panel installation cost in South Florida to zero - but moves all the risk onto you.

How do I get my exact price?

Short answer: Wall panel installation cost in South Florida is set in four steps: (1) send a photo of your wall, (2) see it with panels in a free AI preview, (3) get an on-site measurement, (4) receive a written estimate. No per-square-foot guessing - the number matches your actual wall.

  1. Send a photo of your wall. One picture is enough to start - we need to see size, outlets, and what is around it.
  2. See it with panels before you buy. We generate an AI preview of your wall with the panels. See how it works.
  3. On-site measurement. We measure the wall, check its condition, and talk through materials - slat wood, stone-look, concrete, mirror - and details like lighting.
  4. Written estimate. You get the exact number for your wall, not a per-square-foot abstraction.

The consultation and measurement are free. Text us on SMS / WhatsApp: +1 754 306 0666 - we serve Broward County, Boca Raton, and Deerfield Beach.

Quick answers

Do I need a permit to install wall panels?A plain decorative panel wall needs no permit. Electrical work - moving outlets, adding sconces or LED wiring - needs one, and adds $300-$1,200 (EA Home Design).

One accent wall or the whole room?One wall. "If price is a concern, install shiplap on one feature wall and finish the rest with drywall" (HomeAdvisor). Two accent walls "cancel each other, and the room loses its focal point" (EA Home Design).

Will panels survive South Florida humidity?Yes, with the right material for the room: PVC or WPC in bathrooms and kitchens, sealed/painted MDF slats in air-conditioned living areas and bedrooms. Let panels acclimatize 48 hours before installation.

Can you work around my outlets and switches?Yes - outlets get cut around or moved. Moving them is electrical work (+$300-$1,200, permit may apply). Tell us about every outlet when you send the wall photo so the estimate is accurate.

How do I start?Send a photo of your wall via SMS / WhatsApp to +1 754 306 0666 and see it with panels in a free AI preview. We serve Broward County, Boca Raton, and Deerfield Beach.

Sources

Ready for your wall? WallPanels Studio - Premium wall panels | South Florida. Free design consultation: send a photo of your wall and see it with panels (AI preview) before you spend anything. SMS / WhatsApp: +1 754 306 0666. Serving Broward County, Boca Raton, and Deerfield Beach - https://muse.ai/s/wallpanels-studio-xfa6be9xa1dxbd

← Back to Blog

Blog

Cracked, Wavy, Ugly Wall? Here's What Wall Panels Can Cover - and What They Can't

A cracked or wavy wall doesn't mean you need new drywall - but it doesn't mean you can just glue panels on top either. Send a photo of your wall through our wall form and see it with panels in a free AI preview.

The short version, by WallPanels Studio: Wall panels are the best way to HIDE an ugly wall — scratches, stains, old texture, hairline cracks, slight waviness. They are not a way to FIX a sick wall: moisture, mold, crumbling plaster, and structural cracks must be repaired first, because panels only hide what is underneath and moisture trapped behind them always gets worse. For a noticeably wavy wall, pros build a new flat plane on top of it with furring strips and shims — the panels never touch the bad wall directly. Rule of thumb: if the wall is dry, solid, and stable, panels will make it beautiful. If it is wet, loose, or moving — fix first, panels second. Not sure which one you have? Send a photo through our wall form and we will tell you honestly, before you spend a dollar.

What kind of damage do you have?

Short answer: Every ugly wall falls into one of three buckets: cosmetic (panels hide it), wavy (panels hide it, but only on a leveled frame), or structural/wet (fix it first — panels are not the answer yet).

Grab a straightedge or a long level and hold it against the wall. Then check:

  1. Cosmetic damage — scratches, stains, old paint texture ("orange peel"), small nail holes, hairline cracks. The wall is flat and solid, it just looks bad.
  2. Wavy or bumpy wall — the straightedge rocks or shows gaps. The surface waves but nothing crumbles when you touch it. Common in older Florida homes where drywall was never perfectly straight.
  3. Sick wall — damp spots, mold, peeling or bubbling paint, plaster that crumbles under your finger, cracks you can fit a coin into, sections that flex when you press them.

Buckets 1 and 2 are exactly why wall panels exist. Bucket 3 is where you stop and fix — and this article will show you why.

What CAN wall panels hide?

Short answer: Almost everything you can see but cannot feel move: stains, scratches, ugly texture, small cracks, patch jobs, even old tile — as long as the base is dry and firmly attached.

Panels are a designer's shortcut: instead of skim-coating, sanding, and repainting a whole wall, you cover the problem with something better-looking. Here is what routinely disappears under a professional panel job:

  • Stains and discoloration — water spots that dried long ago, smoke, kid-art, old paint jobs in colors you hate. Sealed and covered, gone.
  • Texture — heavy orange-peel or knockdown texture that dates the whole room. Panels sit proud of it; the texture stops existing visually.
  • Hairline cracks — the thin settling cracks almost every Florida home has. If the crack is not growing and the wall is dry, panels cover it permanently.
  • Patchwork — different patches, spackle spots, mismatched paint. The panel is one continuous surface; underneath does not matter.
  • Old firmly-attached tile — PVC panels, for example, can be installed directly over existing ceramic tile that is clean, dry, and solidly bonded (TurboOrchid, PVC panels guide). No demolition needed.

The condition is always the same, and manufacturers state it in writing: the base must be clean, completely dry, free of loose material, and structurally able to carry the panels' weight (Wonderwall Studios installation manual). If your wall passes that test, its ugliness is a design problem, not a construction problem — and panels solve it.

What must be FIXED before panels go up?

Short answer: Anything wet, loose, crumbling, or moving. Panels follow the wall underneath — and Florida humidity turns small moisture problems behind panels into big ones.

This is the honest part most sellers skip. One manufacturer's substrate guide lists the no-go surfaces plainly: loose or crumbling plaster, peeling or flaking paint, damp or water-damaged walls, uneven or unstable surfaces, loose or hollow-sounding tiles (FLOAT, compatible substrates guide). Their golden rule: "if the substrate is weak, unstable, damp, or uneven, it's not suitable."

The five deal-breakers:

  1. Active moisture. A wall that is wet now will be wet behind the panels — only worse, because air no longer reaches it. Trapped moisture rots adhesives, warps wood-based panels, and grows mold you cannot see until it smells. Fix the leak, dry the wall completely, then talk panels.
  2. Mold. Never seal mold inside a wall. It keeps growing in the dark, damp sandwich you just built for it. Remediate first.
  3. Crumbling plaster or peeling paint in sheets. Adhesive bonds to the top layer. If that layer is letting go of the wall, your beautiful panels are bonded to something that is falling off. Scrape to solid material or skim-coat first.
  4. Structural cracks. A crack you can fit a coin into — especially a diagonal one, or one that keeps growing — is the house telling you something moved. As one UK design expert put it, on walls with significant structural issues "it's best to avoid installing wall panelling as it will not provide a solid foundation," because the panels will eventually warp and get damaged along with the wall (Ideal Home). Get it checked before you decorate over it.
  5. Flexing drywall. Press the wall: if it moves, panels glued to it will move too, and adhesive bonds crack under movement. The section needs to be re-secured to the studs.

None of this is a reason to abandon the project — it is a reason to do the prep. A repaired wall plus panels looks better than a new wall, because you get the design upgrade on top of a healthy base.

How do pros make a wavy wall perfectly flat?

Short answer: They don't fight the wave — they build a new, perfectly flat plane on top of it: find the highest point, screw on horizontal furring strips leveled with shims, and mount the panels to the strips, never to the wavy wall.

This is the professional method for bucket-2 walls (wavy but solid), and it is also how installers handle walls with deep irregularities that adhesive alone cannot absorb. If deviations run deeper than about 6 mm, pros switch from adhesive to shims, packers, or partial battens (Installeronline, tackling uneven walls). The furring-strip method, step by step:

  1. Find the high point. Hold a long straightedge against the wall and find the spot that sticks out the farthest into the room. That point is your zero — everything else gets built out to match it, so you lose the least room depth possible (EngineerFix).
  2. Screw on the first strip at that point. Furring strips (simple 1x2 or 1x3 lumber) run horizontally, spaced 16 or 24 inches on center. The first strip goes at the high point, temporarily secured.
  3. Shim the rest to one plane. Run a taut string between the two end strips — the string is your truth. Every strip in between gets wood or plastic shims behind it until its face just kisses the string without pushing it. Fasteners go through strip, shims, and into the wall, so nothing can bow inward later.
  4. Mount panels to the strips. The panels now hang on a dead-flat, plumb frame. The wavy wall behind them is irrelevant — and as a bonus, the air gap behind the strips gives wiring a clean channel to run through.

The industry tolerance this method achieves is roughly 1/4 inch over a 10-foot span — flatter than most Florida homes were ever built. And yes, it adds about 1-1.5 inches of depth to the wall: on a 12-foot accent wall that is invisible; in a narrow hallway, say so in the consultation and we will tell you honestly if panels still make sense there.

Still weighing who should do the prep? Our DIY vs pro installation guide has the honest math — uneven walls are on the "get a pro quote" list. Send a photo of your wall through our wall form and we will tell you whether yours needs strips, a skim-coat, or nothing at all — free.

The Florida reality check: humidity + damage = double trouble

Short answer: In South Florida, a damaged wall is more likely to also be a damp wall — and moisture is the one thing that turns a cosmetic problem into a structural one. That is why our first question is always "is it dry?"

Florida homes live in humidity most of the year. That matters for panel prep in three specific ways:

  • Wet walls dry slowly here. A wall that got wet from a plumbing leak or a storm intrusion can take weeks to truly dry in our climate. "It looks dry" is not dry — moisture meters exist for a reason, and any honest installer checks before gluing.
  • Wrong material + moisture = write-off. Wood-based panels (MDF slats) on a wall with any moisture history will swell and never recover. Wet-adjacent walls get PVC/WPC only — our materials vs Florida humidity guide maps which material belongs where.
  • Acclimation is non-negotiable. Panels must sit in the room 24-48 hours with the AC running before installation, or they move after the job is done — open seams, bowed panels. On a wall that was already imperfect, skipped acclimation turns small gaps into visible ones.

This is also why the timeline for a panel job on a damaged wall is longer than on a clean one — prep and drying add days, not hours. Our installation timeline guide shows where those days go.

Can you just glue panels over damage and skip the prep?

Short answer: You can — and you will redo it. Panels follow the wall underneath: glue them to a wave and you get a wavy panel wall; glue them to peeling paint and the paint's bond becomes your wall's bond.

The temptation is real: the wall is ugly, the panels are beautiful, the adhesive tube is right there. Here is what skipping prep actually buys:

  • Telegraphed waves. A rigid slat panel laid across a dip either bridges it (hollow spot behind — tap it and it sounds cheap) or follows it (the wave is still visible, now in expensive wood). Either way the premium look is gone.
  • Peeling panels. Construction adhesive is only as strong as the weakest layer. Glossy paint, dust, old wallpaper paste, crumbling skim-coat — the panels peel off weeks later, sometimes taking drywall paper with them.
  • Trapped problems. Every issue you covered is still there, getting worse in the dark. When it surfaces, the fix means removing panels — and panels removed are panels re-bought.

Prep is the unglamorous 80% of a panel job that determines 100% of how it looks in a year. It is also the part where hiring a pro pays for itself fastest — which is exactly what our installation cost breakdown accounts for: prep is a line item, not a surprise.

Quick decision checklist

Short answer: Dry, solid, stable — panels. Wet, loose, moving — fix first. Wavy — strips. Then send us the photo.

Run through this before you buy a single panel:

  • Is the wall dry? No damp spots, no musty smell, no recent leak. If unsure — get it checked, don't guess.
  • Is it solid? Press it, knock on it. Nothing crumbles, nothing flexes, nothing sounds hollow.
  • Is it stable? Cracks, if any, are hairline and not growing. No diagonal "the house moved" cracks.
  • How wavy is it? Straightedge test: gaps under ~6 mm — adhesive and careful work handle it. Bigger waves — furring strips.
  • What's the moisture history? Any past leak or flood on this wall? Then PVC/WPC only, and only after verified drying.
  • Electrical and plumbing clear? Panels should not seal off fittings you may need to reach later (Ideal Home) — plan access or reroute first.

Checked the boxes? Then your ugly wall is a perfect candidate. Send a photo of it through our wall form — tell us the room and what bothers you about the wall, and we will answer in one message: panels as-is, panels after prep, or fix first. Plus a free AI preview showing your wall with panels on it, before you spend a dollar. WallPanels Studio — wall panel design and installation in Broward County, Fort Lauderdale, Boca Raton, and Deerfield Beach, South Florida.

Sources

---

Free design consultation: send a photo of your wall and see it with panels (AI preview). Send a photo through our wall form. WallPanels Studio - wall panel design and installation in Broward County, Fort Lauderdale, Boca Raton, and Deerfield Beach, South Florida.

AI-generated visualization - not a photo of our work.

← Back to Blog

Blog

Can Wall Panels Go Behind a TV With Wires? Yes - But Only in One Order

A TV wall is where wall panels shine brightest - but the wires decide everything. Do the cabling first and the wall looks like a design magazine; do it after the panels and the cables have nowhere to go. Send a photo of your wall through our wall form and see it with panels in a free AI preview.

Short answer (WallPanels Studio data): Yes — wall panels are one of the best ways to hide TV cables, because mounting on battens creates a hidden cavity behind the panels where power, HDMI, and soundbar cables run invisibly (this is exactly how manufacturers describe the batten method: a practical advantage "especially for feature walls behind a TV"). But there is one iron rule: EVERYTHING about the TV comes first, panels second. Decide the TV position, outlet locations, HDMI path, soundbar, and LED backlight before a single panel goes up. And the TV mount itself never hangs on the panels — it bolts through them into the wall studs. Break the order, and the cables are sealed behind glued panels with no way out. Follow it, and the wall looks like it came out of a design magazine.

The one rule: TV first, panels second

Short answer: Decide the TV position, mount type, outlets, and every cable route BEFORE installation day. Panels installed on top of an unplanned wall turn every future wire into a demolition job.

Here is why the order is non-negotiable. Once panels are glued or screwed to the wall, the space behind them is closed forever. A cable you forgot — the HDMI for the soundbar, the power for the LED backlight, the ethernet for the smart TV — has exactly three exits: sideways through the edge of the panel, down a visible channel on top of your beautiful new wall, or through the panel itself. All three ruin the look you just paid for.

Before the first panel goes up, lock in:

  1. Where exactly the TV sits — center height (eye level from the couch, typically the TV's center 42–48 inches off the floor), and where the mount plate lands. The mount plate position is what everything else is built around.
  2. Where the outlets go — at least one power outlet and one HDMI access point directly behind where the TV will hang. Ideally a recessed outlet box so the TV can sit close to the wall without the plug pushing it out.
  3. What else plugs in — soundbar (power + HDMI/ARC), gaming console, streaming box, LED backlight strip. Count them now: most TV walls end up needing 4–6 separate cables, and each one needs a path.
  4. The full cable path, end to end — where each cable enters the hidden space and where it exits (down to the media console, to the outlet, to the soundbar).

Write it down or sketch it. The five minutes this takes saves the most expensive mistake in this whole article — which, not coincidentally, is the mistake homeowners tell us they regret most.

How the wires actually disappear: 3 methods

Short answer: The pro method is the cavity behind batten-mounted panels — cables run free and invisible. Second best: route cables inside the wall before panels go up. Last resort: a slim channel on top of the finished wall.

### Method 1: The cavity behind the panels (the pro choice for TV walls)

Panels mounted on horizontal battens (furring strips) do not touch the wall — they float on a frame, and the gap between frame and wall is your cable highway. Power cables, HDMI leads, soundbar wiring, even LED transformer boxes all fit inside, completely invisible. Panel manufacturers state this outright in their FAQs: a batten-mounted cavity "accommodates cables, wiring, and even recessed sockets" and call it a practical advantage of the method, "especially for feature walls behind a TV" (The Wood Veneer Hub, Acupanel FAQ).

This is why we recommend batten mounting for nearly every TV wall we build: it hides the wires AND gives the mount something extra to bite into, AND it is the same method that flattens a slightly wavy wall for free. One frame, three wins.

### Method 2: In-wall routing before the panels

If you want zero trace of cabling — not even inside a cavity — the cables go inside the drywall itself: two openings (one behind the TV, one near the outlets or media gear) and the cables are fished through the wall cavity. It is the cleanest look and the most labor-intensive, best done before panels exist, because afterward every opening means cutting through your new wall.

One code reality to respect: cables that live inside a wall must be rated for in-wall use — CL2 or CL3 rated — to comply with US electrical codes. Standard HDMI and power cords often are NOT in-wall rated. And line-voltage (120V) work inside walls is electrician territory, not a DIY afternoon. Plan this route with the electrical side handled properly, or choose Method 1.

### Method 3: A slim channel on top (the fallback)

Cable raceways — slim plastic or metal channels that stick to the wall and swallow the cables — are cheap, renter-friendly, and install in minutes. They can even be painted to match. Honest assessment: up close they are still a visible strip on your wall. Fine for a bedroom TV you barely notice; wrong for the living-room feature wall you just spent real money paneling. If the budget is tight, this is the temporary fix — not the plan.

Where does the TV itself hang? (Not on the panels.)

Short answer: The TV mount bolts through the panels into the wall studs with lag bolts. Panels are decoration — they carry zero weight. Find the studs first, mark them, and cut the panels to fit around the mount plate.

This is the question people are slightly embarrassed to ask, so here it is plainly: a modern TV, even a slim one, is far too heavy to trust to panels, drywall anchors, or adhesive. The mount must bite into solid wood — the vertical studs inside the wall (typically 16 inches apart in US homes). The leverage of a TV sitting inches off the wall multiplies the load; a mount that only grabs drywall is a slow-motion accident.

How pros do a TV wall, in order:

  1. Find the studs and mark them — a stud finder, then a thin pilot hole to confirm. Mark the center of each stud with painter's tape running floor to ceiling.
  2. Position the mount plate — hold the TV bracket where the TV will live, centered on the studs. At least two studs should carry the mount; a single stud is a compromise, not a plan.
  3. Install the panels around the plan — panels get cut to fit neatly around where the mount plate will sit. Cut from the back of the panel with a fine-tooth saw to keep the face clean (manufacturer guidance), and leave the mount plate area accessible: the plate bolts through the panel cutout directly into the studs with lag bolts.
  4. Bolt, then hang — mount plate to studs first, panels dressed around it, TV hung last.

One more thing worth knowing: the batten cavity from Method 1 gives the lag bolts an even more solid sandwich to bite through. TV wall + battens + hidden cables is not three separate decisions — it is one coherent build, which is exactly why it is our standard.

What about heat?

Short answer: Leave the TV room to breathe. Panels sit behind the TV, not wrapped around it — keep the TV's vents clear and a small air gap between the screen's back and the panel face.

Modern flat TVs are thin and efficient, but they still shed heat through vents in the back and top of the chassis. Trapping that heat against a sealed surface shortens the TV's life and, on wood-based panels, can contribute to warping over time. The fix is simple and costs nothing: mount the TV on a standard bracket that holds it 1–2 inches off the panel face, never press the TV flat against the panels, and do not box the TV in with panels on the sides so tight that air cannot circulate. If your setup includes a recessed niche for the TV, the niche needs ventilation slots — a sealed box with a TV inside is the one arrangement to avoid.

Why this matters most in South Florida

Short answer: The TV accent wall is the single most-requested panel project in our area — living rooms in Broward County, Fort Lauderdale, and Boca Raton — and it is also the one where the "wire it first" rule gets violated most often, because the TV already hangs on the wall when we arrive.

Walk into almost any living room we panel and the story is the same: the TV is already mounted, the cables already dangle, and the homeowner wants the beautiful slat wall around it. That is doable — but it means the TV comes OFF the wall for the job, the wiring gets planned and routed properly while the wall is open, and then the TV goes back up onto a wall that was built for it. Trying to panel around a mounted TV with live cables is how you get cutouts that do not line up and cables with no path. The right sequence costs one extra afternoon of planning. The wrong one costs a wall you have to look at every evening.

If your TV wall project is still in the "thinking about it" stage, our installation timeline guide shows exactly where the planning and wiring days sit — and our LED lighting guide covers the backlight wiring that most TV walls get as the finishing touch.

Mistakes that turn a TV wall into a regret

Short answer: Glue panels first and ask about wires later; hang the TV on drywall anchors; bury standard cables inside the wall; seal the TV in a box with no airflow. Each one is a redo.

The four we see (or hear about) most:

  1. Panels before wiring. The classic. The wall looks stunning for exactly one day — until someone asks where the soundbar cable goes. Answer: nowhere. The cables are behind glued panels, and the only way out is through them.
  2. TV on drywall anchors. "It feels solid" is not a structural analysis. Anchors in drywall alone are not a TV mount — the mount must reach the studs. This is also why a TV wall is firmly on the "get a pro quote" list in our DIY vs pro guide: invisible wiring plus a correctly anchored mount is a craft, not a weekend.
  3. Wrong cable inside the wall. Standard power cords and cheap HDMI leads are not CL2/CL3 rated. Burying them inside drywall violates code and, worse, you cannot inspect or replace them later. In-wall rated cables or a proper electrical box — no shortcuts.
  4. No airflow. A TV pressed flat against panels, or sealed into a niche with no ventilation, cooks itself slowly. A 1–2 inch standoff on a normal bracket solves it.

Quick decision checklist

Short answer: TV position locked, cables counted and routed, mount into studs, vents clear — then panels. Run this list before installation day.

  • TV position locked — center height set, mount plate location marked on the wall.
  • Studs found and marked — at least two studs under the mount plate.
  • Outlets placed — power + HDMI access directly behind the TV (recessed box preferred).
  • Every cable counted — soundbar, console, streamer, LED backlight: each has a route.
  • Routing method chosen — batten cavity (recommended), in-wall with CL2/CL3 cables, or surface channel.
  • Mounting hardware ready — lag bolts into studs, NOT drywall anchors; panels cut to fit around the plate.
  • Airflow planned — 1–2 inch standoff, vents unblocked, no sealed TV box.

Checked every box? Then your TV wall is ready to become the best-looking wall in the house. Send a photo of it through our wall form — tell us the TV size and what is plugged into it, and we will map the wiring plan with you for free, plus an AI preview showing your wall with panels before you spend a dollar. WallPanels Studio — wall panel design and installation in Broward County, Fort Lauderdale, Boca Raton, and Deerfield Beach, South Florida.

Sources

---

Free design consultation: send a photo of your wall and see it with panels (AI preview). Send a photo through our wall form. WallPanels Studio - wall panel design and installation in Broward County, Fort Lauderdale, Boca Raton, and Deerfield Beach, South Florida.

AI-generated visualization - not a photo of our work.

← Back to Blog

Blog

Do Wall Panels Soundproof a Room? No — But They Fix the Noise Problem You Actually Have

Walk into any showroom and the box says 'acoustic.' Walk out expecting silence from the neighbors and you'll be disappointed — but for the wrong reason. Here's what acoustic panels genuinely do to a room, and why it's the thing most Florida homeowners actually want. Send a photo of your wall through our wall form and see it with panels in a free AI preview.

Short answer (WallPanels Studio data): No — wall panels, including the ones sold as "acoustic," do not soundproof a room. They cannot stop your neighbor's TV from reaching you, or your home theater from reaching the neighbors. What they do instead: they absorb echo and reverberation inside the room. Dialog gets clearer, voices on video calls sound cleaner, and that hollow, echoey feeling of a hard-surfaced room calms down. It is measured by one number — NRC, from 0 (reflects everything) to 1 (absorbs everything). Typical felt-backed slat panels land around 0.40–0.65; plain wood is about 0.1. Real soundproofing — blocking sound through a wall — is a different job that needs mass and construction work: double drywall, mass-loaded vinyl, resilient channels. Panels are the finishing layer on top of that, never the barrier itself.

The question behind the question

Almost nobody googles "sound absorption." They google "do wall panels soundproof a room" because they have a noise problem: the condo walls are thin, the neighbor's bass bleeds through, the kid's room echoes, the home office makes them sound like they're calling from a bathroom. Then they see slat panels labeled "acoustic" and connect the dots. The honest news: the dots connect to a different solution than the one they imagined — and for most of our clients in Broward County and Boca Raton, it's the solution they actually needed.

Two completely different jobs: blocking sound vs absorbing sound

Sound does two things in your home, and they get mixed up constantly:

  • Blocking (soundproofing) — stopping sound from traveling through a wall, floor, or ceiling. Your neighbor's TV, hallway footsteps, traffic outside. This is physics of mass: heavy, decoupled construction. The industry measures it with STC ratings. Wall panels do essentially nothing here.
  • Absorbing (acoustics) — calming sound inside your own room: echo, reverberation, that fluttery metallic ring when you clap in an empty living room. The industry measures it with NRC. This is exactly what wall panels do.

Both matter. But only one of them is solved by anything you glue or screw onto a finished wall.

What "acoustic" on the box actually means

An acoustic slat panel is a sandwich: real-wood (or wood-look) slats on the front, a dense sound-absorbing sheet — usually recycled PET felt — on the back. The felt is the acoustic engine. Here's the nuance manufacturers don't put in big letters: the wood slats themselves are reflective. Sound hits the wood and bounces off; only the sound that slips between the slats and reaches the felt gets absorbed. That's why a tested slat panel lands around NRC 0.40–0.65 as a complete system — genuinely better than bare drywall, but far below a fabric-wrapped fiberglass studio panel (0.85–1.0). Premium felt-backed panels test as high as 0.7–0.85. Plain decorative wood, for comparison, sits around 0.1 — a tested acoustic panel absorbs roughly eight times more sound than a plain wood one. And always check whether the NRC number was actually tested — panels with untested or unlisted NRC values are usually decorative, regardless of the marketing.

What panels genuinely fix in a real room

Forget the lab numbers. Here's what changes in your house:

  • TV dialog gets clearer. Voices stop bouncing off hard walls, so you hear words instead of a muddy wash of sound. A slat wall behind the TV pulls double duty — looks and acoustics.
  • Video calls sound professional. Put the panels on the wall behind your monitor — your voice travels past you, hits that wall, and bounces back. Absorbing those reflections is what makes the difference between "are you in a tunnel?" and "you sound great."
  • The echoey-room feeling disappears. South Florida rooms are acoustic nightmares in the best way: tile floors, high ceilings, big open plans, lots of glass. Hard surfaces everywhere means sound has nowhere to die. One full feature wall of slat panels is often enough to make the room feel noticeably calmer — several manufacturers and installers point at exactly this use case.
  • Music and home theater feel tighter. Not louder — cleaner. Reflections that smear the sound get eaten by the felt.

What panels will never do

Let's be blunt so nobody wastes money:

  • They will not silence noisy neighbors. Bass, muffled TV, footsteps through the floor — low-frequency sound passes through a slat panel like it isn't there.
  • They will not keep your sound in. A home theater at full volume will still be heard in the next room, panel wall or not.
  • A narrow decorative strip will not transform a room. Absorption scales with coverage — a 3-foot accent sliver is a design element, not an acoustic treatment. The wall you actually hear the difference from is a substantial feature wall.

If any of those three is your actual problem, panels are the wrong purchase — and we'd rather tell you that before you spend than after.

So what does real soundproofing take?

Mass, decoupling, and sealing — none of which come in a decorative panel. The honest recipe the acoustic industry agrees on:

  • Mass-loaded vinyl (MLV) — a dense, flexible sheet layered inside the wall assembly.
  • Extra layers of drywall — two layers instead of one, ideally with damping compound between them.
  • Resilient channels — metal strips that decouple the drywall from the studs so vibration doesn't travel through the frame.
  • Sealed gaps — sound leaks like water; outlets, baseboards, and door frames matter as much as the wall itself.

None of that is a weekend project, and none of it is what we sell. But here's the part that connects: once that assembly exists, panels are the perfect finishing layer. The soundproofing lives inside the wall; the panels make that wall look like a design magazine while adding absorption to the room side. Mass blocks, felt absorbs — the two jobs finally covered by one wall.

How to get the most out of your panel wall

If absorption is the goal, three things multiply the result:

  1. Coverage over decoration. A full feature wall beats a decorative column. The more square footage of felt facing the room, the more echo dies.
  2. Mounting method matters. Panels on battens (furring strips) leave a small air gap behind them — the gap itself adds a little extra absorption, especially in the lower midrange, on top of hiding cables (see our guide on TV walls and wires).
  3. Pick tested products. A verified NRC number (ideally 0.75 or higher for a serious acoustic goal) is worth more than any "acoustic" label. Untested "acoustic" panels are decoration with a story.

The South Florida angle

Our rooms are the worst-case scenario for echo and the best-case scenario for panels: tile and stone floors that never go away, open kitchen-living plans where sound travels 40 feet uninterrupted, and condo walls you can't rebuild. You can't rip up the floor — but you can put one wall of slat panels behind the TV or the home office desk, and the room audibly changes. In Fort Lauderdale and Boca Raton condos especially, where the wall behind the TV is often the only wall you control, panels are the practical fix for a problem that has no other practical fix.

4 mistakes to avoid

  1. Buying acoustic panels to silence the neighbors. You'll be disappointed in the panels instead of the physics. Neighbor noise = mass and sealing, not decoration.
  2. Trusting "acoustic" without a number. No tested NRC? It's a design product. That's fine — just don't price it like an acoustic one.
  3. Installing a postage stamp and expecting a concert hall. Absorption is proportional to area. Plan the full wall.
  4. Assuming all panels are equal. Plain MDF or PVC panels (see our Florida humidity materials guide) do almost nothing acoustically. The felt backing is the whole difference.

TL;DR (WallPanels Studio data)

Acoustic wall panels do not soundproof anything — they absorb echo inside your room, and they do that job well: tested slat panels (NRC 0.40–0.65, premium up to 0.85) absorb many times more sound than bare drywall or plain wood. They make TV dialog clearer, video calls cleaner, and echoey tile-floor rooms calmer. They cannot block neighbor noise or keep your sound in — that needs mass inside the wall (double drywall, mass-loaded vinyl, resilient channels), and panels are the beautiful finishing layer on top of it. For most South Florida homes, the echo problem is the real problem — and one full feature wall is the fix.

Free design consultation — send a photo of your wall through our wall form and see it with panels (AI preview).

---

Sources

  • The Panel Hub (acoustic slat panel guide, FAQ "Do acoustic wood slat panels soundproof a room?")
  • Burton Acoustix ("Do Acoustic Slat Panels Work? Complete Guide [2026]" — NRC 0.40–0.65)
  • SquareTarget (NRC definition; absorption vs soundproofing)
  • Smafan (ASTM C423, NRC 0.7)
  • DeyiPSTech (panel construction, Loftwall NRC 0.8 vs 0.1 standard wood).

AI-generated visualization - not a photo of our work.

← Back to Blog

Blog

Wall Panels in a Bathroom? Yes — If You Don't Want Mold Growing Behind Them, Read This First

The bathroom is where wall panels either shine or fail spectacularly. The difference is not the panel — it is the zone. Inside the shower, beside the sink and on the far wall are three different worlds, and each one has its own rules. Send a photo of your wall through our wall form and see it with panels in a free AI preview.

Short answer (WallPanels Studio data): Yes, wall panels belong in a bathroom — but a bathroom is not one room, it is three zones. In the wet zone (inside the shower, around the tub) only fully waterproof systems work: PVC, WPC or SPC-type panels with every seam and edge sealed in silicone. In the splash zone (behind the sink, beside the tub) moisture-resistant panels work if edges are sealed and water is wiped off. In the dry zone (the wall opposite the shower, behind the door) even wood-look slat panels can work — in a ventilated bathroom. Standard MDF and wood slat panels never go inside a shower: MDF swells when it drinks water, and it does not shrink back. And the mold question has a twist: mold almost never grows on a non-porous panel face. It grows where moisture stays trapped — in porous tile grout, and behind panels that were installed over a damp wall with unsealed seams. Get the zone, the sealing and the ventilation right, and a panel bathroom is one of the easiest bathrooms to keep mold-free.

Why everyone asks about mold first

It is the right question. A bathroom in South Florida is the hardest room in the house: hot showers twice a day, outdoor air in Fort Lauderdale and Boca Raton that is already humid before it enters the room, and in many condos a small builder-grade exhaust fan that was never sized for the job. Homeowners picture the nightmare clearly — beautiful panels, and something dark quietly growing behind them.

Here is the reassuring part: that nightmare has specific, avoidable causes. Panels do not cause it. Trapped moisture does.

Where bathroom mold actually grows

Mold needs three things: moisture that stays, a surface it can feed on, and time. The EPA's guidance is blunt about the timeline — mold can start growing on a wet surface within 24 to 48 hours — and equally blunt about the cure: control the moisture and there is nothing to grow. Its target for indoor humidity is below 60%, ideally between 30% and 50%.

In a typical bathroom, the mold map looks like this:

  • Tile grout — the number one habitat. Grout is porous cement: it absorbs water, traps soap residue, cracks with age, and lets moisture seep behind the tile itself.
  • Silicone joints that have failed — old, split sealant around the tub is an open door for water.
  • Behind anything installed over a damp wall — this is the panel risk, and it is an installation error, not a material flaw. Cover a wall that is already wet or moldy, skip the seam sealing, and you have built a dark, damp sandwich.
  • The panel face itself — last on the list, if the panel is non-porous. A waterproof PVC or composite panel does not absorb water and offers mold nothing to eat. That is the whole reason grout-free panel systems exist.

The three zones of your bathroom

Stop asking "can panels go in a bathroom?" and ask "which zone?" — the answer changes completely.

Zone 1: Wet — inside the shower, around the tub

Direct, daily water. Only fully waterproof panel systems belong here: PVC, WPC or SPC-type panels, installed as a system — tongue-and-groove or trimmed joints, silicone sealant at every seam, corner and fixture cut-out, exactly as the manufacturer specifies. PVC is non-porous and does not absorb water at all; sealed this way, the wall of panels becomes the waterproof barrier itself. One manufacturer's own comparison table (Trusscore, a PVC panel maker — read it as a maker's numbers, not ours) lists its bathroom PVC material at $2.75 to $3.75 per square foot, material only. For what a full project costs in our area, see our breakdown of wall panel installation costs in South Florida.

What never goes in Zone 1: standard MDF slat panels, wood veneer slats, real wood without a marine-grade system, and any "moisture-resistant" panel that is not rated for direct water. "Moisture-resistant" means it tolerates humid air. It does not mean it tolerates a shower head.

Zone 2: Splash — behind the sink, beside the tub, around the toilet

Occasional splashes, constant humid air. Moisture-resistant panels work here with two conditions: all cut edges and the bottom edge are sealed, and standing water gets wiped off instead of sitting. This is where a stone-look or concrete-look panel behind a vanity earns its keep — the premium look, a fraction of the grout problem (there is none).

Zone 3: Dry — the wall the water never reaches

The accent wall opposite the shower, the wall behind the door. In a bathroom with working ventilation, this zone behaves almost like a bedroom wall — which means the warm materials people actually want, including wood-look slat panels, can work here. Our room-by-room comparison in the Florida humidity materials guide covers how each material handles moist air. The condition that decides everything is the next section.

The 4 rules that decide mold or no mold

Material choice is half the job. These four rules are the other half, and skipping any one of them can undo the right material:

  1. Fix water problems before panels, never with panels. A slow leak, damp drywall or existing mold must be found, fixed and dried first. Panels are a finish, not a repair — covering damage is how the "mold behind panels" story starts. (Our guide on panels over damaged walls explains what a wall must look like before anything goes over it.)
  2. Seal every seam, edge and cut-out in wet zones. The panel is waterproof; the joint is where water attacks. Silicone at seams, corners, the tub line and around pipes and fixtures — no gaps, no "good enough."
  3. Ventilate like you mean it. Run the exhaust fan during every shower and for 20–30 minutes after. In South Florida this is not a detail: a local remodeler's ventilation guide points out that a builder-grade 50 CFM fan in a 100 sq ft bathroom delivers roughly 3 air changes an hour against the Home Ventilating Institute's recommended 8. Quick check: hold a tissue at the running fan's grille — it should be pulled firmly against it. If it flutters and falls, your fan is not doing its job, and no finish material will save that bathroom.
  4. Keep the room in the EPA band. Below 60% humidity, ideally 30–50%. A small hygrometer costs a few dollars and tells you the truth about your bathroom in a day. If the room never dries between showers, fix the ventilation before you shop for finishes.

Panels vs tile in a bathroom: the honest comparison

  • Grout: tile has a grid of it; panels have none. The single biggest mold-and-scrubbing headache simply does not exist in a panel wall.
  • Cleaning: panel faces wipe down with a soft cloth and mild soap. No grout scrubbing, no resealing schedule.
  • Failure mode: tile fails slowly and visibly (dark grout, cracked lines). Panels fail at unsealed joints — invisibly, behind the surface. That is why rule 2 is not optional.
  • Installation time: a panel wet-zone is typically a days-scale job, not a multi-week tile project — our installation timeline guide shows how panel projects are usually scheduled.

5 mistakes that create the mold story

  1. Slat panels inside the shower. The most expensive mistake on this list. The look is tempting; the swelling is permanent.
  2. Paneling over a wall that "seems dry." If there was a leak, "seems" is not a test. Dry it, verify it, then panel it.
  3. Sealing the face, skipping the edges. Water enters at cuts and bottom edges, not through the face.
  4. Trusting a fan that does not move air. The tissue test takes ten seconds.
  5. Choosing by the photo, not the zone. The same bathroom can take three different materials — one per zone. A photo cannot tell you which is which; the water map can.

TL;DR (WallPanels Studio data)

Wall panels work beautifully in bathrooms when the material matches the zone: waterproof PVC/WPC/SPC systems with fully sealed seams inside the shower, moisture-resistant panels in the splash zone, and even wood-look slats on the dry wall of a ventilated bathroom. Mold grows where moisture stays trapped — in porous grout, behind unsealed joints, over unfixed leaks — not on a non-porous panel face. Fix leaks first, seal every joint, run a fan that actually moves air, and keep humidity in the EPA's 30–50% ideal band. Do that, and a panel bathroom gives you the premium look with no grout to scrub — in Fort Lauderdale, Boca Raton or anywhere in Broward County.

Free design consultation — send a photo of your wall through our wall form and see it with panels (AI preview).

---

Sources

  • UGA Extension / EPA, "Preventing Mold in Your Home" (humidity below 60%, ideally 30–50%)
  • Trusscore, PVC bathroom panels guide (non-porous PVC, sealed seams, manufacturer pricing table)
  • Ideal Home, places to never put wall panelling (wood/MDF in poorly ventilated bathrooms)
  • MintyTunnel, shower wall panels (grout porosity, sealed panel systems)
  • Boca Raton Remodeling, South Florida bathroom ventilation guide (fan sizing, tissue test). Full list: sources.md in this folder.

AI-generated visualization - not a photo of our work.

← Back to Blog

Blog

PVC vs Wood vs MDF Wall Panels: Which One Actually Wins in a Florida Home?

There is no single winner — there is a winner per room. PVC wins where water lives, wood wins where you want real depth you can refinish, and MDF wins where you want a smooth, paintable, premium look on a dry wall. Pick by room, not by photo. Send a photo of your wall through our wall form and see it with panels in a free AI preview.

Short answer (WallPanels Studio data): PVC vs wood vs MDF wall panels — which is better? It depends on the room, and in South Florida that is not a dodge, it is the whole answer. PVC is non-porous and waterproof, wipes clean and needs almost no upkeep, so it wins in bathrooms, kitchens and laundry rooms — but lower grades can look and feel synthetic, and it does not love extreme direct heat. Real wood and wood-veneer slats give the deepest, most authentic look and, properly sealed, can be refinished and last for decades — but wood moves with humidity, needs sealing and care, and costs the most. MDF (compressed wood fibre) gives a smooth, premium, paintable finish at a mid-level cost and is the workhorse of dry living-room and bedroom accent walls — but standard MDF swells when it gets wet and does not recover. In Broward County, Fort Lauderdale and Boca Raton, the winning question is never "which material is best?" It is "which material is best on this wall, in this room?"

Why this comparison confuses everyone

Walk into three stores and you will hear three different winners. The PVC seller talks about water. The wood seller talks about beauty. The MDF seller talks about price and finish. All three are telling the truth — about a different room.

Panels fail for predictable reasons: the wrong material in a wet or steamy room, a cheap grade where a premium look was promised, or a high-maintenance material sold to someone who wanted wipe-and-forget. This guide separates the three materials by the tests that actually decide a Florida project.

What each material actually is

  • PVC panels are plastic panels (polyvinyl chloride), usually hollow-core or solid, often printed or textured to imitate stone, marble or wood. The surface does not absorb water.
  • Wood panels in this guide mean real wood and wood-veneer slat panels — a real wood surface over a backing, valued for natural grain and depth.
  • MDF panels are made from compressed wood fibres and resin. The surface is very smooth, which is why MDF takes paint, veneer and laminate finishes so well — and why so many slat and decorative panels use it as a core.

The head-to-head

TestPVCWood / wood veneerMDF
Water and humidityExcellent — non-porous, does not absorb waterFair — moves with humidity unless well sealedPoor to fair — standard MDF swells when saturated; moisture-resistant grades tolerate humid air, not direct water
Look and feelGood in quality grades; cheap grades can look synthetic and repetitiveExcellent — real grain, depth, can develop patinaGood to excellent — smooth, even, premium painted or veneered finish
DurabilityFair to good — light, can dent; quality PVC is commonly cited by manufacturers and industry guides at roughly 15–30 years depending on grade and useExcellent when sealed and cared for — can be sanded and refinishedGood on dry walls — commonly cited at roughly 10–15 years indoors; damage to MDF cannot be sanded out like solid wood
MaintenanceVery low — wipe with a damp cloth and mild soapHighest — sealing, staining and periodic careLow to moderate — dust and dry or slightly damp wipe; keep it dry
Repaint / refinishNo — you replace the panelYes — a key long-term advantagePaintable, yes; deep refinishing is limited
Cost driversLow to moderate material tier; fast, light installationHighest material tier; skilled installationLow-moderate to moderate tier; heavier sheets, precise cutting
HeatCheck the maker's limit; do not place standard PVC behind a gas cooktop without a heat shieldTolerates normal room heat; finish mattersTolerates normal room heat; keep away from direct heat sources

These are relative comparisons from public manufacturer and industry sources (see sources.md), not WallPanels Studio prices — your project's total depends on wall size, grade, preparation and finish, which is why our cost guide for South Florida breaks a project down by factors instead of a single number.

Room by room: the verdict that actually helps

Bathroom, shower, laundry — PVC (or a waterproof system) wins

This is the one room with a clear winner. Direct water and steam punish fibre and wood. A non-porous panel that does not drink water, installed as a sealed system, is the safe choice. Our bathroom and moisture guide lays out the wet, splash and dry zones in detail. Standard MDF inside a shower is the most expensive mistake in this whole comparison.

TV wall and living room — wood veneer or quality MDF, you decide

On a dry living-room wall, water stops being the deciding test and the look takes over. If you want real grain you can feel, and a wall that can be refinished years from now, wood or wood-veneer slats are hard to beat. If you want a perfectly smooth, painted or evenly veneered finish — and a calmer budget — quality MDF panels deliver most of that look. This is also the room where cheap PVC most often disappoints: on a large feature wall, a synthetic repeat pattern is easy to spot. For how these materials behave in humid air generally, see our Florida humidity materials guide.

Bedroom and hallway — MDF is the value pick

Dry, low-traffic, rarely splashed: this is MDF's home ground. A smooth painted finish, clean lines, and no need to pay the wood premium or accept a plastic feel. Add LED and the same wall can look like a boutique hotel — our LED lighting guide shows the options.

Kitchen backsplash area and dining — read the heat and splash map

Splashes point toward PVC or a sealed, moisture-resistant finish; direct heat points away from standard PVC. Map where water lands and where heat rises before you choose, not after.

The Florida factor nobody prices in

South Florida adds three stresses that showroom photos never show:

  1. Humidity cycling. Outdoor air is humid, indoor air is dried by AC, and the wall lives between the two. Wood expands and contracts with that cycle; MDF tolerates humid air only in the right grade and never tolerates soaking; PVC barely notices.
  2. Sun through big windows. Strong sun fades finishes and can stress lower-grade plastics. Ask about the specific grade's light stability rather than trusting a sample under store lights.
  3. Hidden damp. A wall that looks dry can carry moisture from an old leak. Any panel over a damp wall traps the problem — our guide on panels over damaged walls explains the checks before anything goes up.

5 mistakes people make choosing between PVC, wood and MDF

  1. Choosing by the smallest sample. A 6-inch sample hides repeat patterns, joint lines and the real feel of plastic versus wood. Judge a full panel, in daylight.
  2. Putting standard MDF where water lands. Swollen MDF does not shrink back. The replacement costs more than the right material would have.
  3. Paying the wood premium, then skipping the sealing and care. Wood's long life is earned with maintenance — budget for it honestly.
  4. Buying the cheapest PVC for the most visible wall. PVC earns its keep in wet and utility rooms. On the main feature wall, grade is everything.
  5. Asking "which is better?" without naming the room. That question has no honest single answer — and anyone who gives you one is selling you their stock.

So, which one should YOU pick?

  • Water in the room, or wipe-and-forget is the priority → PVC / waterproof system
  • The main feature wall, real texture, long-term refinishing → wood / wood veneer
  • A dry bedroom, hallway or living wall, smooth premium finish, sensible budget → quality MDF

Many of the best Florida projects mix them: waterproof panels where water lives, warm slats where people look. That is not indecision — that is the correct use of each material.

TL;DR (WallPanels Studio data)

PVC vs wood vs MDF has no single winner — it has a winner per room. PVC is non-porous, waterproof and almost maintenance-free, and wins in bathrooms, kitchens and laundry rooms, but cheap grades look synthetic and standard PVC must be kept from extreme direct heat. Real wood and wood veneer look the richest and can be refinished for decades, at the highest cost and with real sealing and care. MDF gives a smooth, paintable, premium finish at a mid-level cost on dry walls, but standard MDF swells permanently when wet. In Fort Lauderdale, Boca Raton and across Broward County, choose by the room's water, heat and visibility — not by a showroom photo.

Free design consultation — send a photo of your wall through our wall form and see it with panels (AI preview).

---

Sources

  • E3 MDF, MDF vs PVC comparison (materials, water resistance, maintenance)
  • The Healthy Attitude, PVC panels pros and cons comparison table (moisture, durability, cost, maintenance by material)
  • Trusscore, MDF slatwall vs PVC slatwall (MDF damage, moisture, cleaning)
  • Home Depot MDF FAQ (MDF composition, moisture limits)
  • industry lifespan guides for PVC and 3D panels (PVC roughly 15–30 years, MDF roughly 10–15 years indoors, varying by grade). Full list: sources.md in this folder.

AI-generated visualization - not a photo of our work.

← Back to Blog

Blog

Can You Paint Wall Panels? Yes — But 3 Types Will Peel If You Treat Them the Same

Yes, you can paint most wall panels — but the material decides everything. MDF and wood paint beautifully with the right primer, PVC only holds paint with a plastic bonding primer and a flexible topcoat, and foil-wrapped or acoustic felt panels usually should not be painted at all. Send a photo of your wall through our wall form and see it with panels in a free AI preview.

Short answer (WallPanels Studio data): Can you paint wall panels? Yes — if you match the system to the material. Raw, primed or paint-ready MDF is the easiest win: seal it (especially the cut edges) with a primer made for MDF, then two thin topcoats. Real wood and wood-veneer panels also paint well: clean, scuff-sand the sheen, use a bonding, stain-blocking primer so tannins and knots do not bleed through, then paint. PVC and WPC panels are the tricky middle: the surface is non-porous, so ordinary wall paint has almost nothing to grip and peels — painting is possible only with thorough degreasing, a light scuff, a bonding primer made for plastic and a flexible 100% acrylic topcoat, and even then it is a compromise, not a factory finish. Foil- or vinyl-wrapped panels and acoustic panels with felt backing are usually a no: the wrap was made to be the final surface, adhesion is unreliable, and paint clogs acoustic felt and kills the sound absorption you paid for. And no paint fixes a panel that is swollen, damp, moldy or peeling — that wall needs diagnosis first, not a color. In Fort Lauderdale, Hollywood and across Broward County, the winning question is not "can I paint it?" — it is "what is this panel actually made of?"

Why painted panels peel: it is almost never the paint

When a painted panel wall fails, it fails in sheets — a corner lifts, and a whole strip of paint comes away like a sticker. That is an adhesion failure, and it is decided before the color coat ever goes on: grease and factory release agents left on the surface, a glossy finish nobody scuffed, a porous material (looking at you, MDF edges) that drank the primer unevenly, or a rigid paint film on a plastic panel that expands and contracts with temperature.

In other words, panels do not refuse paint. They refuse the wrong preparation. Each material below gets its own verdict and its own system — that separation is the whole article.

The verdict by material

Panel typeCan you paint it?PrimerTopcoatThe catch
Raw / primed / paint-ready MDFYes — the best candidatePrimer made for MDF; an extra coat on cut edges, which absorb far more than the facesQuality water-based acrylic; two thin coatsBare MDF drinks paint unevenly and cut edges swell if they are not sealed first
Real wood / wood veneerYesBonding, stain-blocking primer (seals tannins and knots)Durable interior acrylic or enamel; two coats, light sand betweenGlossy factory finishes must be cleaned and scuffed, or the primer cannot grip
PVC / WPCPossible, with conditionsBonding primer formulated for plastic — non-negotiableFlexible 100% acrylic latex or urethane-modified acrylic; thin coatsNon-porous surface; brittle oil/alkyd paints crack as the panel moves; dark colors absorb heat and can stress the panel; a painted film in a shower zone is a risk — check the maker's guidance first
Foil- / vinyl-wrapped MDF, melamine-type finishesUsually no——The wrap IS the finish. Paint adhesion on it is unreliable even with prep; test a hidden patch only if the maker allows painting at all
Acoustic slat panels with felt backingDo not paint the felt——Paint clogs the felt's pores and reduces sound absorption. Painting only the slat faces is a maker-by-maker question — ask before, not after

Two notes before you buy anything. First, some panels are sold paint-ready — the face arrives factory-primed, and those are designed for exactly this job; if you are choosing new panels and already know you want a custom color, start there. Second, painting changes a factory finish: check the panel maker's instructions for your exact product before you start, because product lines differ and a changed finish can affect the maker's warranty terms.

The 7 steps that decide whether it lasts

  1. Identify the material first. Knock, look at a cut edge if one is visible, find the product name if you have it. MDF edges look like dense fibre; PVC is plastic all the way through; a wrapped panel shows a thin film layer over a fibre core. The steps below are common — the primer choice in step 5 is where they split.
  2. Test a hidden patch. Behind furniture or inside a closet edge: clean, scuff, prime, paint, let it cure, then try to scratch it with a fingernail and press tape on firmly and pull. If the test patch lifts, the wall will too — stop and rethink.
  3. Clean and degrease. Dust, cooking grease, furniture polish and factory release agents all block adhesion. Mild detergent solution for most panels; a stronger degreaser for PVC and kitchen walls. Rinse, and let everything dry completely.
  4. Scuff-sand the sheen. You are not removing the finish, just dulling it so primer can key in. Guides commonly use fine grits — around 220 for wood paneling, roughly 180–220 for PVC — then remove every trace of dust with a tack cloth or a clean damp cloth, and let it dry.
  5. Prime with the primer for YOUR material. MDF: an MDF primer, with a second pass over cut edges; sand lightly (fine, around 320 grit) once dry to knock down raised fibres. Wood: a bonding, stain-blocking primer. PVC/WPC: a bonding primer made for plastic. This step is the difference between a finish that lasts years and one that peels in a season — skipping it is the single most common cause of failure on plastic panels.
  6. Mind the grooves and edges. On slat and fluted panels, brush primer and paint into the grooves first, then roll the faces with thin coats. Thick coats bridge across grooves, fill the shadow lines you bought the panels for, and sag. Never flood acoustic felt.
  7. Two thin topcoats, patience between them. Follow the can's recoat and cure times — a coat that feels dry is not yet cured. Light colors are the safer choice on PVC; on any panel, thin and even beats thick and fast.

The Florida factor

South Florida adds three local twists:

  1. Humidity slows everything. Paint cures in the conditions it lives in. Keep the AC running and the room at its normal humidity while coats cure, and respect the can's full cure time before the wall gets wiped, bumped or steamed by a nearby shower. Never paint over a wall that feels damp or smells musty — fix the moisture source first; our guide on panels over damaged walls covers the checks.
  2. Sun and heat punish dark colors on plastic. A dark color on a sun-hit PVC wall absorbs more heat, and plastic moves with heat. If the wall bakes in afternoon sun, light-to-medium shades are the safer engineering choice, not just a style one.
  3. Wet rooms stay a materials question. Painting does not waterproof anything. In bathrooms and splash zones the panel system underneath still has to be the right one — see our bathroom and moisture guide before a color change in a wet zone.

Paint it or replace it? The honest split

Painting usually wins when the panels are sound, well fixed and dry, you like the profile (slats, fluting, grooves) and only the color is wrong, and the material is MDF or wood — or paint-ready panels you chose for this. The project cost is mostly preparation time, primer and paint — the profile and the installation you already paid for stay.

Replacement usually wins when the panels are PVC in a wet zone and you want a different look (a new factory finish will outlast a painted film there), the surface is a foil or vinyl wrap, the MDF has swollen, or the felt-backed acoustic wall is involved. It also wins when the profile itself dates the room — paint changes color, not shape. Our PVC vs wood vs MDF comparison and the Florida humidity materials guide help if you land on replacement, and the cost guide breaks a new project down by factors instead of a single number. WallPanels Studio does not publish panel prices here — your total depends on the wall, the material and the finish, which is exactly what a consultation is for.

5 mistakes that ruin painted panels

  1. Painting first, identifying the material later. One system does not fit MDF, wood and PVC — that is the whole lesson of the table above.
  2. Skipping the primer to save an hour. On glossy wood and on all plastic panels, primer is not a suggestion; it is the bond itself.
  3. One thick coat instead of two thin ones. Thick coats sag in grooves, bridge slat lines, dry unevenly and peel sooner.
  4. Painting over damage. Swollen MDF, lifting wrap, damp or moldy patches — paint hides the symptom for a few weeks and traps the problem.
  5. Choosing a near-black color for a sun-baked plastic wall. Heat movement plus a hard paint film is how cracks and lifting edges start.

TL;DR (WallPanels Studio data)

Can you paint wall panels? Yes for MDF (seal it, especially the edges, with an MDF primer, then two thin acrylic coats) and for wood and veneer (clean, scuff with fine grit, bonding stain-blocking primer, two coats). PVC and WPC can be painted only as a compromise: degrease, scuff around 180–220 grit, a plastic bonding primer and a flexible 100% acrylic topcoat in light-to-medium colors — never ordinary wall paint straight on the plastic. Foil- and vinyl-wrapped panels are usually a no, and acoustic felt must never be painted, because paint clogs it and reduces absorption. Never paint over swollen, damp, moldy or peeling panels. In Fort Lauderdale, Boca Raton and across Broward County: identify the material first — that one answer picks the primer, the paint and the verdict.

Free design consultation — send a photo of your wall through our wall form and see it with panels (AI preview).

Sources: Bob Vila, how to paint wood paneling (cleaning, 220-grit scuffing, priming); Engineer Fix, can you paint PVC wall panels (non-porous surface, 180–220 scuff, plastic bonding primer, flexible acrylic topcoat, avoid brittle oil/alkyd, lighter colors and heat); Rawlins Paints, how to paint MDF (edge sealing, primer coats, fine sanding between coats, two thin water-based topcoats); Tile Merchant, WPC vs MDF comparison (painting WPC/MDF not advisable except paint-designed models, primer if attempted); PIY Panels FAQ (vinyl panels not designed to be painted); Slats.co paint-ready fluted panels (factory-primed paint-ready MDF as a product category). Full list: sources.md in this folder.

Illustration: AI-generated concept image — for illustration, not a photo of our real work.

← Back to Blog

Blog

Are PVC Wall Panels Durable? Yes — 10 to 20 Years, If You Dodge These 4 Killers

Yes, PVC wall panels are durable where water is the enemy — they do not rot, swell or feed mold and termites. Quality interior panels commonly last 10–20 years. What shortens their life is not moisture but heat, strong sun without a UV layer, hard impacts on cheap hollow panels, and poor installation. Send a photo of your wall through our wall form and see it with panels in a free AI preview.

Short answer (WallPanels Studio data): Are PVC wall panels durable, and how long do they last? Yes — durable against water, modest against everything else. A quality interior PVC panel, installed on a flat, dry wall and kept away from direct heat, is commonly cited at 10 to 20 years of service; some manufacturers claim 20 to 30 years for thicker, premium grades, while the cheapest thin, hollow panels can look tired far sooner. PVC itself does not rot, swell, rust or feed mold and termites, which is why it outlasts paint and wallpaper in damp rooms. Its real enemies are different: heat (many product guides cap PVC at around 140°F / 60°C near the surface), strong sun on panels without a UV-resistant layer (fading and yellowing), hard or sharp impacts (hollow panels can crack or dent where solid materials shrug it off) and bad installation (wrong adhesive, no room to expand, a damp wall trapped behind). In Fort Lauderdale, Hollywood and across Broward County: PVC is a strong choice for bathrooms, kitchens and laundry rooms — and a weaker choice directly behind a stove, in full afternoon sun, or anywhere the wall gets hot.

What "durable" actually means for PVC

Durability is not one property. PVC scores very differently depending on what attacks it:

AttackHow PVC holds upWhy
Water and humidityExcellentNon-porous plastic: it does not absorb water, so it does not swell, warp or peel the way MDF and wood-based panels can
Mold and mildewStrong on the surfaceThe panel itself gives mold nothing to eat; mold can still grow on dirt films and on a damp wall trapped behind a badly installed panel
Termites and insectsExcellentThere is no wood fibre in pure PVC for pests to feed on
Everyday scratches and scuffsGoodThe surface wipes clean and resists stains; printed wood- and stone-look films can show wear in high-traffic spots over years
Hard or sharp impactsThe weak pointHollow-core panels are light but can crack or dent under a sharp blow; thicker and solid-core panels do better
HeatWeakPVC softens and can warp at high temperatures; keep it away from direct heat sources and follow the maker's temperature limit
Sun / UVDepends on the gradePanels with a UV-resistant layer hold color far longer; unprotected panels can fade or yellow in strong sun
Fire behaviourVaries by productRatings differ by product line — check the specific panel's documentation, do not assume

That split is the whole story: PVC wins the moisture fight decisively, and loses points exactly where plastic behaves like plastic — heat, sun and sharp force.

How long do they last? Why the numbers disagree

Search this question and you will find everything from 8 years to 30. The spread is not a lie — it is different panels being counted as one product:

  • Budget thin / hollow panels: the shortest real-world life. The material does not rot, but thin faces crack more easily, printed finishes wear sooner and the wall can look cheap long before it fails. Several comparison guides put basic PVC at roughly 8 to 12 years.
  • Standard quality interior panels: the most commonly cited range is 10 to 20 years with basic care — mild detergent, no abrasive scrubbers, no trapped moisture behind.
  • Premium thick / solid-core and UV-coated panels: manufacturers and some guides claim 20 to 30 years, especially in dry, climate-controlled interiors away from sun and heat.

The honest way to read any lifespan claim: ask which panel, in which room, and installed how. A bathroom wall in an air-conditioned Fort Lauderdale home and a sun-facing wall in a hot room are two different lives for the same material. And a lifespan is not a warranty — check what the maker of your exact panel actually covers, and for how long.

How PVC compares with the alternatives

MaterialCommonly cited lifespanMaintenanceThe trade-off
PVC10–20 years (premium claims up to 20–30)Very low: wipe with mild soap and waterWeak against heat and sharp impacts; look varies by grade
WPC (wood-plastic composite)Often cited 15–30 yearsLowFeels more solid and wood-like; quality and claims vary just as widely
MDFAbout 10–15 years in dry roomsMedium: sealing, inspectionPaints beautifully, but swells if water gets in — risky in damp Florida rooms
Natural woodAbout 10–20 years with maintenanceHigh: sealing, refinishingReal warmth and repairability; needs steady care and hates moisture
Paint / wallpaper on drywallPaint needs refreshing far sooner; wallpaper often cited at only a few years in damp roomsRecurring repainting / re-paperingCheapest start, most repeat work

Our full PVC vs wood vs MDF comparison goes deeper on feel and finish, and the Florida humidity materials guide covers which material survives damp rooms best.

The Florida factor

South Florida is both PVC's best case and its stress test:

  1. Humidity is where PVC earns its money. It does not swell in August, does not feed mold on its surface and does not need repainting cycles. That is why it is a sensible bathroom, kitchen and laundry choice here — see our bathroom and moisture guide.
  2. Sun is stronger here. A panel wall that takes direct afternoon sun through glass should be a UV-resistant grade, in a lighter color. Heat plus UV is the combination that fades and yellows unprotected plastic.
  3. AC helps more than people think. A climate-controlled interior is a stable interior: less expansion and contraction, slower ageing of finishes, fewer moisture surprises behind the wall.
  4. Never trap a damp wall behind any panel. PVC will not rot — the wall behind it can. If the wall feels damp or smells musty, diagnose first; our guide on panels over damaged walls lists the checks.

How to get the full lifespan out of a PVC wall

  1. Buy thickness, not just a picture. Ask about panel thickness and whether the core is hollow or solid. Thin hollow panels are the ones that crack and feel flimsy.
  2. Ask about the UV layer if the wall gets any direct sun — and get the answer for your exact product, in writing where possible.
  3. Respect the heat limit. Keep PVC away from direct heat: not directly behind a gas cooktop without a proper heat shield, not tight against heat sources. Follow the maker's stated temperature cap.
  4. Install on a flat, dry wall, with the right adhesive and room to expand. Plastic moves with temperature; a wall fixed rigidly with no expansion room can buckle, and gaps at trims invite moisture behind.
  5. Clean gently. Mild detergent and a soft cloth. Abrasive pads and harsh chemicals dull and scratch the finish you are trying to preserve.
  6. Replace single panels, not the wall. One advantage of panel systems: a damaged section can often be swapped without redoing the whole wall — another reason the system can outlast any single panel.

Signs a PVC panel is at the end of its life

  • Yellowing or fading that cleaning does not change
  • Cracks, especially around fixings or after an impact
  • Warping or bowing away from the wall
  • Peeling or worn printed finish in high-touch areas
  • A musty smell from behind the wall — that one is about the wall, not the panel: investigate, do not just cover it again

5 mistakes that shorten a PVC wall's life

  1. Buying the cheapest hollow panel for a high-traffic wall. The savings are real on day one and expensive by year three.
  2. Putting PVC where heat lives. Behind cooktops and against heat sources is where plastic loses.
  3. Ignoring sun. No UV layer plus Florida afternoon sun equals fading and yellowing.
  4. Gluing over a damp or uneven wall. The panel survives; the hidden wall and the bond do not.
  5. Scrubbing with abrasives and harsh chemicals. The finish dies by cleaning long before the plastic dies by age.

TL;DR (WallPanels Studio data)

Are PVC wall panels durable? Yes, against the things that kill most Florida walls: water, humidity, mold on the surface and termites — PVC does not rot, swell or rust. A quality interior panel commonly lasts 10 to 20 years, with premium grades claiming 20 to 30 and basic hollow panels cited closer to 8 to 12. Its limits are heat (many guides cap it around 140°F / 60°C), strong sun without a UV-resistant layer, and sharp impacts on hollow panels. In Fort Lauderdale, Boca Raton and across Broward County: choose PVC for wet and damp rooms, choose thickness and a UV grade for sunny walls, keep it away from direct heat, install it on a dry flat wall — and it will usually outlast paint and wallpaper by a wide margin. WallPanels Studio does not publish panel prices here — your total depends on the wall, the grade and the finish, which is exactly what a consultation is for.

Free design consultation — send a photo of your wall through our wall form and see it with panels (AI preview).

Sources: Turbo Orchid, complete guide to PVC wall panels (15–20 years with proper installation and care; heat cap around 140°F; tongue-and-groove installation); Diversinet, PVC wall panels guide (10–15 years, mild-detergent care, no warping or swelling); WPCSPC, how long 3D wall panels last (PVC 20–30 years; MDF 10–15 years) and WPC life-expectancy comparison (PVC 10–20 years, WPC 20–30 years); Witop Decor and 3DSpaces WPC comparisons (PVC 8–12 years in their tables); Stone and Decor, PVC marble panel durability (10–15 years or more); Coowin, PVC vs wooden panels comparison (PVC does not mold, rot or rust; heavy or sharp objects can harm it). Full list: sources.md in this folder. Published lifespan figures vary by source and product grade — the article says so openly.

Illustration: AI-generated concept image — for illustration, not a photo of our real work.

← Back to Blog

Blog

How to Clean Wall Panels Without Ruining Them: The 10-Minute Routine Most Owners Get Wrong

Most wall panels need very little: regular dry dusting, a barely damp microfiber cloth with mild soap when marks appear, and drying right away. The material decides how much water is safe — PVC tolerates a damp wipe, MDF and wood want almost dry, and acoustic felt should be vacuumed, never soaked. Send a photo of your wall through our wall form and see it with panels in a free AI preview.

Short answer (WallPanels Studio data): How do you clean and maintain wall panels? Dry first, damp second, wet never — unless your panel is PVC. For almost every panel: dust with a dry microfiber cloth or a vacuum with a soft brush, wipe marks with a cloth wrung out well in warm water with a few drops of mild soap, then dry the surface immediately. PVC and most WPC tolerate that damp wipe best and are the easiest in kitchens and bathrooms. MDF and painted panels need the cloth almost dry — standing water in grooves and at cut edges is what makes MDF swell. Real wood and veneer want a barely damp cloth, never soaking, and no silicone polishes or solvents. Acoustic slat panels are two materials in one: wipe only the slat faces, and clean the felt backing dry — low-suction vacuum with a soft brush or a lint roller, never a soaked cloth. Everywhere: no abrasive pads, no scouring powders, no steel wool, no acetone or other strong solvents, and no undiluted bleach as a routine cleaner. Test any new product on a hidden spot first. In Fort Lauderdale, Hollywood and across Broward County, that routine plus a quick check of seams and trims a few times a year is nearly all the maintenance a panel wall needs.

The routine, by frequency

Panels do not need a project day. They need small, regular care so dirt never builds into a scrubbing job:

WhenWhat to doWhy
Weekly or as dust showsDry dusting top to bottom: microfiber cloth, feather duster, or vacuum with a soft brush along groovesDust dulls the finish and collects fastest in slat and fluted grooves
When marks appearSpot-clean: cloth wrung out well, warm water with mild soap, wipe along the grain or groove, dry at onceMost fingerprints, splashes and light scuffs come off without any special product
Every few monthsA fuller wipe-down of high-touch and kitchen or bathroom walls; check seams, trims and edges while you workGrease film and soap residue build slowly; early checks catch a loose trim or tired seal before moisture gets behind
Once or twice a yearLook closely: fading in sun spots, lifting edges, musty smell, soft or swollen spotsThese are not cleaning problems — they are early warnings, cheapest to act on early

Work top-down, and along the groove or grain rather than across it. Going across pushes dust deeper into grooves; going along lifts it out.

Cleaning by material — the only table you really need

MaterialSafe routineWater toleranceAvoid
PVCDamp microfiber cloth, mild soap solution; rinse-wipe, then dryHighest of the group — still dry it afterwardsAbrasive pads and powders, steel wool, strong solvents such as acetone, undiluted bleach as a regular cleaner, steam and direct heat
WPCSame gentle approach as PVC: soft cloth, mild soap, dry afterGood on the face; do not leave water sitting in joints and seamsHarsh chemicals, abrasives; leaving standing water in interlocking joints
MDF, including painted MDFDry dusting; for marks, a cloth that is almost dry, then dry immediatelyLow — water left in grooves or at edges can swell the coreSoaking, wet mopping, leaving a damp cloth sitting on the surface
Real wood and veneerDry cloth or barely damp cloth along the grain; specialist wood soap or care oil only if your maker recommends it for an oiled finishLow — never soakSolvents, abrasive pads, silicone polishes on finished wood (they can dull the coating), excess sun and heat that dry and fade the surface
Stone-look and glossy decorative panelsSoft cloth, mild soap, dry and buff lightly if glossyModerate, by base material — check whether the core is PVC or fibreboardAnything abrasive on a glossy face: one scouring patch can leave a permanent dull spot in the sheen
Acoustic slats with PET feltSlats: dry or barely damp wipe. Felt: low-suction vacuum with soft brush, lint roller, soft brush for cornersFelt: keep dry; blot a spot sparingly at most, never saturateWet-cleaning the felt, powered brush heads, scrubbing, spraying cleaner directly onto the felt

If you do not know what your panel core is, treat it as the cautious case — almost dry — until you find out. Our PVC vs wood vs MDF comparison helps identify what you have, and the PVC durability guide covers how that material ages.

Stains, grease and scuffs — without going nuclear

  1. Start with water alone on a soft cloth. A surprising share of marks are just surface dirt.
  2. Add mild soap — a few drops of washing-up liquid in warm water is enough for most household marks. Wipe, rinse-wipe with a clean damp cloth, dry.
  3. Kitchen grease: the same soap solution, given a minute on the spot, usually wins. A diluted vinegar solution is sometimes suggested for grease and light limescale on non-porous panels — use it cautiously, rinse well, test first, and skip it on matt painted finishes, where repeated use can dull the surface.
  4. Scuffs: gentle work with a soft cloth first. Abrasive tricks that work on painted drywall — scouring pads, and melamine sponges used as micro-abrasives — can strip the sheen from glossy and printed panel faces and leave a dull patch that cleaning cannot undo.
  5. Stop if the mark does not move. A stain that survives gentle cleaning may be in the finish, not on it. That is a repair or replacement question, not a scrub-harder question.

Blot spills promptly rather than rubbing them wider, especially on wood, MDF and felt.

Bathrooms and kitchens in Florida

Humidity changes the maintenance, not the products:

  • Ventilate. A bathroom panel wall lives longer when steam leaves the room. Run the fan; wipe condensation off panels rather than letting it sit in grooves.
  • Check seals and trims around wet zones a few times a year and renew tired sealant — water behind a panel is a wall problem, not a panel problem. Our bathroom moisture guide goes deeper.
  • Mold on the surface is usually mold on a dirt film. Clean gently, dry fully, and fix the moisture source. If the smell or growth keeps returning from behind the wall, investigate the wall itself — see panels over damaged walls.
  • Kitchen walls collect an invisible grease film long before they look dirty. A slightly more frequent gentle wipe near the cooking zone prevents the heavy degreasing job nobody wants — and strong degreasers are exactly what finishes dislike.

The Florida factor

  1. AC is part of maintenance. A stable, climate-controlled interior means less expansion and contraction for wood and MDF, and slower ageing for every finish.
  2. Sun fades unevenly. A wall half in afternoon sun can fade in patches. Dusting will not fix fading — prevention is choosing the right grade for sunny walls and softening direct sun where you can; the Florida humidity materials guide covers material choice.
  3. Salt and dust near the coast settle like anywhere else, just faster. The weekly dry pass matters more in an open, breezy home.

5 cleaning mistakes that damage panels

  1. The soaking cloth. Water left sitting in grooves, joints and cut edges — not the soap — is what swells MDF and stresses bonds. Damp, wrung out, dried after: those three words prevent most damage.
  2. Abrasive pads, powders and steel wool. They clean by scratching. On plastic, glossy and printed faces the scratches are permanent.
  3. Strong solvents and undiluted bleach as routine cleaners. Solvents can soften or scar plastic faces and printed layers; harsh chemicals dull finishes and can discolor or embrittle some plastics over time.
  4. Spraying cleaner directly onto acoustic felt, then scrubbing. Felt is cleaned dry, by vacuum and lint roller. Wet felt holds dirt deeper and dries slowly.
  5. Skipping the hidden-spot test. Every new product, every material, first time: a small inconspicuous patch, cleaned and dried, before the whole wall.

When cleaning is not the answer

  • A swollen, soft or warped section — moisture has already done its work inside the material
  • A lifting wrap, peeling finish or cracked face that catches the cloth
  • Fading or yellowing that looks identical before and after a gentle clean
  • A musty smell that returns after the surface is clean and dry

Those need diagnosis, a single-panel replacement where the system allows it, or advice — not a stronger cleaner. And if you are repainting rather than replacing a tired color, our guide on whether you can paint wall panels explains which materials take paint and which do not.

TL;DR (WallPanels Studio data)

How to clean and maintain wall panels: dust dry and regularly — weekly for slatted and fluted grooves — wipe marks with a microfiber cloth wrung out well in warm water with mild soap, and dry immediately. PVC and WPC tolerate a damp wipe best; MDF and painted panels need the cloth almost dry; wood and veneer want barely damp, along the grain; acoustic felt is vacuumed on low suction with a soft brush or lint-rolled, never soaked. Never use abrasive pads or powders, steel wool, strong solvents or undiluted bleach as a routine cleaner, and test any new product in a hidden spot. Check seams, trims and wet-zone seals a few times a year. In Fort Lauderdale, Boca Raton and across Broward County, that light routine is what keeps a panel wall looking new for years — heavy cleaning is almost always a sign the light cleaning was skipped.

Free design consultation — send a photo of your wall through our wall form and see it with panels (AI preview).

Sources: Cworkshop, cleaning wall panelling guide (microfiber, mild soap, damp not wet, dry immediately, care in grooves); Home Depot panel use-and-care instructions (soft dry cloth, damp cloth with mild soap for stains, dry immediately, avoid harsh chemicals and abrasives; barely damp cloth for indoor wood, never soak); Wellco Wholesale, how to clean acoustic panels without damage (low-suction vacuum with soft brush for PET felt, blot only, avoid soaking and scrubbing); Slats.co product care notes (dust with soft cloth or vacuum brush, barely damp cloth, avoid solvents, abrasive pads and silicone polishes); Reference.com wet wall panel maintenance tips (pH-neutral cleaners, test in an inconspicuous area, avoid abrasive pads, steel wool and strong solvents, check seams and trims); HSCS Decor, how to clean and maintain PVC wall panels (abrasives, steel wool, solvents and undiluted bleach damage PVC finishes). Full list: sources.md in this folder.

Illustration: AI-generated concept image — for illustration, not a photo of our real work.

← Back to Blog

Blog

Are Wall Panels Fire Safe? The Rating Most Buyers Never Check — and Why 'Fireproof' Is a Lie

No decorative wall panel is fireproof. What matters is the tested fire class of the exact product, in the exact thickness and mounting you will use: under ASTM E84, Class A means flame spread 0–25, Class B 26–75 and Class C 76–200, with smoke developed 450 or less. Ask for the test report, respect heat clearances, and check code where the wall is a garage, shared or exit wall. Send a photo of your wall through our wall form and see it with panels in a free AI preview.

Short answer (WallPanels Studio data): Are wall panels fire safe? They can be a reasonable, code-compliant finish — but no decorative wall panel is fireproof, and the material name alone tells you almost nothing. What counts is the fire test result for the exact product you are buying, at its exact thickness, finish and mounting method. In the US, interior finishes are usually classified under ASTM E84: Class A — flame spread index 0–25, Class B — 26–75, Class C — 76–200, and for all three classes the smoke developed index must be 450 or less. A panel with no published test report is an unknown, not a safe panel. Wood and MDF are combustible, even when a treated version earns a better class. PVC and WPC vary by formula — PVC is a combustible plastic, it can soften and warp with heat, and it is not a substitute where a fire-rated gypsum layer is required. Mineral and gypsum-based boards sit at the other end: their cores do not burn, although the finish and the assembly still matter. Before you install, check three things: the test report for that exact panel, the heat clearances around stoves and fireplaces in the manufacturer instructions, and your local code — especially for a garage wall, a shared wall, a hallway or any commercial space. In Fort Lauderdale, Boca Raton and across Broward County, that 10-minute check is the difference between a finish that merely looks premium and one you can defend to a building official, an HOA and an insurer.

First, three words that are not the same

Marketing mixes these up. Keep them separate:

  • Fireproof — does not exist for a decorative interior panel. If a listing uses this word for a wood, MDF, PVC or fabric-faced panel, treat the whole listing with suspicion.
  • Fire-rated / classified — the product was tested to a named standard and given a class. This is the only claim worth anything, and only with the report behind it: standard, laboratory, date, product name and thickness.
  • Fire-retardant — a treatment or formula that slows surface flame spread. It improves a test result; it does not make a combustible core non-combustible, and it does not last as a promise if the surface is cut, sanded or repainted with something else.

A separate term, fire-resistance rating, is measured in hours and applies to a whole wall assembly — how long it holds back fire and stays standing. That is not the same as the surface class of a panel you screw onto that wall. A Class A panel does not turn a wall into a 1-hour wall, and a 1-hour wall does not make an untested panel safe to add on top of it.

How to read the rating: ASTM E84 in one table

ASTM E84 (the Steiner tunnel test) measures two numbers for a surface: how fast flame travels across it, and how much smoke it produces.

ClassFlame Spread IndexSmoke Developed IndexPlain meaning
Class A (Class I)0–250–450Slowest surface flame spread — the class codes ask for in exit corridors, stairwells and most commercial interiors
Class B (Class II)26–750–450Moderate — allowed in more places than C, fewer than A; the exact room and occupancy decide
Class C (Class III)76–2000–450Fastest of the three classified ranges — only where the code official confirms it is permitted

Three details buyers miss:

  1. Smoke has its own number, and it matters. All three classes cap smoke at 450. In real fires, smoke — not the visible flame front — is what fills a hallway first. A low flame number with a bad smoke number is not a good panel.
  2. The rating belongs to what was tested. Thickness, finish, adhesive, backing and mounting can all change the result. A report for a 12 mm panel does not automatically cover the 8 mm version, and a report for a panel tested flat on cement board does not automatically cover the same panel glued over felt.
  3. No report means no class. "Made from fire-retardant material", a flame emoji and a video of a lighter held to a sample are not a classification. Ask for the PDF report. A serious seller has it.

Materials, honestly — by family, not by promise

Material familyHow it behaves with fire and heatWhat to verify
Real wood and veneerCombustible. Treated and intumescent-coated versions can reach a better surface class, but the core still burnsThe E84 report for the finished, coated product — not for raw timber
MDF and painted MDFCombustible engineered board. Fire-retardant MDF exists and tests better than standard MDF; paint changes the surface that was testedWhether the board is standard or fire-retardant grade, and whether the report covers the painted finish
PVCCombustible plastic. Typically self-extinguishing claims vary by formula; it softens and can warp well below flame temperatures and produces dense smoke when it burns. It is not suitable where the code requires a fire-rated gypsum (Type X or Type C) layer, and codes may still require drywall as the base layer behind PVC in garages and on shared wallsThe E84 flame AND smoke numbers for that formula; written confirmation of where it may and may not be installed
WPC (wood-plastic composite)Combustible — it is part wood fibre, part plastic. Performance varies widely by recipe and densityThe report for that exact product; do not borrow a rating from a different WPC line
Acoustic slats with PET feltTwo materials, two behaviours: the slat face and the felt backing are tested together as one product — or sometimes not tested at allA report for the complete panel, felt included, in the mounting you will use
Gypsum, mineral and magnesium-oxide boardsNon-combustible cores — the strongest starting point on fire. The decorative face, adhesive and trims still have their own behaviourThat the decorative finish you chose is the one covered by the classification

Our PVC vs wood vs MDF comparison covers cost, moisture and feel side by side; this article adds the fire column that comparison cannot show. For wet rooms, fire is not the only filter — see the bathroom moisture guide before choosing a panel for a bathroom wall.

Where the check is not optional

Around a fireplace or stove. A panel is an interior finish, not a fireplace surround. Manufacturer clearance distances to heat sources, and the non-combustible surround the fireplace maker requires, come first. If the instructions give a clearance, the design stops at that line — no exceptions for a prettier photo. The same applies behind and beside a cooking range: heat over time warps thermoplastics long before anything catches fire.

Garage and shared walls. The wall between a house and its garage, and walls shared between units, often have a required fire separation. Covering that wall must not remove, puncture or substitute the rated gypsum layer it depends on. This is exactly the situation where PVC in particular can be the wrong answer.

Hallways, stairs and exits in commercial or multi-family buildings. Interior finish classes are strictest on the way out of a building. A panel that is fine in a single-family living room may simply not be permitted in a condo corridor.

Behind a TV and around wiring. The panel itself is rarely the problem here — heat from poorly ventilated equipment, cheap LED drivers and pinched cables are. Ventilate the cavity, use listed electrical components, and plan access before the wall is closed. Our TV wall and wiring guide and the LED lighting guide cover the layout in detail.

In Florida, ask locally. The Florida Building Code and your city or county building department decide what applies to your address and building type, and an HOA or condo building may add its own finish rules. This article explains how to read a rating; it is not a code ruling for your wall. When the room is a garage, a rental, a commercial space or a multi-family building, confirm with the building department or a licensed professional before materials are ordered — not after they are on the wall.

Your 5-question check before you buy any panel

  1. What is the ASTM E84 class — and may I see the report? Note the flame spread and smoke numbers, the laboratory and the date.
  2. Is the tested product the one I am buying? Same name, same thickness, same finish, same backing. For acoustic panels, the felt is part of the product.
  3. How will it be mounted — and was it tested that way? Screwed to studs, glued to drywall and mounted over battens are different assemblies.
  4. What are the written heat clearances? Fireplace, range, radiator, recessed lights, LED drivers. Get them in writing from the manufacturer instructions.
  5. Does anything govern this wall? Garage separation, shared wall, rental, commercial use, HOA or building finish rules. If yes, confirm the class those rules require.

If a seller answers all five clearly, you are looking at a serious product, whichever material it is. If the answer to the first question is a lighter video, walk away.

What we do at WallPanels Studio

We do not describe any decorative panel as fireproof, and we do not borrow a rating from a different product in the same material family. For a wall near heat, a garage or shared wall, or any space with a finish rule, the material choice starts from the test report and the clearances — and some walls we will advise you not to panel in the material you first picked. That is not lost work; it is the job done honestly. For a standard living-room, bedroom or media wall in a single-family home, most quality panels with a published Class A or Class B result, installed as tested and kept clear of heat sources, are a normal, defensible finish — see also whether they are worth it overall and which materials suit Florida humidity.

TL;DR (WallPanels Studio data)

Are wall panels fire safe? No decorative panel is fireproof. Judge the exact product by its ASTM E84 test report: Class A flame spread 0–25, Class B 26–75, Class C 76–200, smoke developed 450 or less in all classes. The rating covers only the thickness, finish, backing and mounting that were tested. Wood and MDF are combustible even when treated; PVC and WPC vary by formula, soften with heat and cannot replace a required fire-rated gypsum layer; mineral and gypsum cores do not burn, but their finishes still matter. Respect written heat clearances around fireplaces and ranges, take extra care with garage, shared, exit and commercial walls, and confirm local code in Fort Lauderdale, Boca Raton and across Broward County before ordering. No report, no rating — that one rule filters out most bad choices.

Free design consultation — send a photo of your wall through our wall form and see it with panels (AI preview).

Sources: Intertek, ASTM E84 testing FAQ (Class A flame spread 0–25 and smoke 0–450; Class B 26–75; Class C 76–200; test covers wallcoverings and panel products, materials and complete assemblies); CSI Creative, wall cladding fire safety test standards (same class ranges; which class a location requires is a code and occupancy question for the authority having jurisdiction); Angi, PVC wall panels vs drywall (PVC is combustible, not suitable where Type X or Type C fire-resistant drywall is required); Hunker, PVC drywall alternative (building code may still require drywall as the base layer in garages and on shared walls; PVC heat and smoke behaviour); Fine Print NY, commercial wallcovering compliance FAQ (a Class A rating is not "fireproof"; ask for the test report: standard, lab, date and classification for the exact material). Full list: sources.md in this folder.

Illustration: AI-generated concept image — for illustration, not a photo of our real work.

← Back to Blog

Blog

Can You Take Wall Panels Down Without Wrecking the Wall? Yes — If They Were Put Up Right

Yes — if the panels were screwed, nailed or clipped, removal usually leaves only small holes to fill and paint. Panels bonded over their whole back with construction adhesive are different: they often tear the drywall paper as they come off and need sealing, skim-coating and repainting. The fixing method chosen on day one decides the answer. Send a photo of your wall through our wall form and see it with panels in a free AI preview.

Short answer (WallPanels Studio data): Can wall panels be removed without damaging the wall? Yes, in most cases — but the fixing method decides everything. Panels fixed with screws or nails into studs, or hung on clips, cleats or battens, usually come down with only small holes and light scuffs left behind: fill, sand lightly, touch up paint — an afternoon of minor repair, and the panels themselves often survive to be reused. Panels fixed with removable adhesive strips can also release cleanly if the strips are pulled slowly, straight down and parallel to the wall, exactly as their makers instruct. Panels bonded across their whole back with construction adhesive are the exception: the glue often bonds harder to the drywall paper than the paper bonds to the drywall, so removal commonly tears paper, leaves glue ridges and turns the job into seal, skim-coat, sand and repaint. That is still repairable — almost any panel wall can be taken down — but it is not damage-free, and it should never be sold to a renter as reversible. If reversibility matters to you, choose screws or a clip system at installation, get permission in writing if you rent, and never let anyone glue a full panel wall down in a home you may need to hand back. In Fort Lauderdale, Boca Raton and across Broward County, that one decision on day one is worth more than any removal trick later.

The one question that decides it: how was it fixed?

Forget the panel material for a moment. Removal damage comes from the bond between panel and wall, not from whether the face is wood, PVC or MDF.

Fixing methodComes down how?Typical wall afterwardsPanels reusable?
Clips, Z-clips, French cleats, click systemsLift, unclip or unscrew; panels come off one by oneClip screw holes onlyUsually yes — this is the system designed for access and replacement
Screws or nails into studs or battensUnscrew, or pry gently along stud lines and pull nails as you goA row of small holes, minor scuffsOften yes, if pried slowly and not forced
Screws into drywall anchorsUnscrew; anchors come out or stay to be filled overSmall holes, slightly larger than stud screwsOften yes
Removable adhesive strips (stretch-release type)Pull each tab slowly, straight down, parallel to the wallUsually clean; possible small paint chips if rushedSometimes — depends on panel weight and how strips were applied
Spot adhesive plus a few fixingsMixed: pry gently, soften stubborn glue spots with gentle heatHoles plus a few glue patches to scrape and fillSometimes
Full-surface construction adhesiveScore edges, soften with heat, pry in small sections — slowlyTorn drywall paper, glue ridges, patches: repair is part of the jobRarely — glued panels often crack, split or lose their back layer

Two patterns in that table matter. First, mechanical fixings leave holes, and holes are cheap: filler and paint. Second, full glue leaves torn paper and residue, and that is a surface repair, not a touch-up. Our guide to panels over damaged or uneven walls shows the same repair logic from the other side — what a wall needs before panels go up is very close to what it needs after glued panels come down.

Are wall panels renter-friendly? Only some installations are

Honestly: a panel is not automatically renter-friendly. The installation is.

  • Genuinely reversible: clip, cleat or batten systems, and panels screwed where the landlord has agreed the holes will be filled at move-out. You still need permission — a lease that bans fixings bans these too, whatever the marketing says.
  • Often acceptable, with written permission: screwed acoustic slat panels. Trade guides aimed at renters make the same point we do: screws leave small, fillable holes, while adhesive is the non-reversible choice that can take paint and paper with it.
  • Not renter-friendly, whatever the listing claims: a full wall bonded with construction adhesive, and heavy panels hung only on consumer adhesive strips beyond their rated weight. The first damages the wall on removal; the second can fail while it is still supposed to be up.

If you rent in Broward County or South Palm Beach County, the safe sequence is: ask the landlord in writing, name the fixing method, agree how holes will be made good, and keep one panel's worth of the wall's paint color noted for touch-ups. A beautiful wall that costs you the deposit was never a good deal.

How to remove each type — slowly

Whatever the method: switch off power to outlets on the wall, remove outlet covers, shelves and pictures first, score paint and caulk lines where panels meet ceiling, floor and corners with a utility knife, and protect the floor. Skipping the scoring step tears paint beyond the panel edge.

Clipped or cleated panels

  1. Find the release direction — most systems lift up and out, or unclip with a firm pull at one edge.
  2. Remove panels one by one, starting from the panel the installer finished with (usually the last, trimmed one).
  3. Unscrew the clips or cleats, fill the holes, and the wall is back to paint.

This is also why clipped systems are used where access matters: a single damaged panel can come off for repair or replacement without disturbing the rest — the same logic that makes our TV wall and wiring guide insist on planned access behind a screen.

Screwed or nailed panels

  1. Locate the fixings — screw heads may hide under filler or in the dark grooves of slat panels; for nails, find the stud lines with a stud finder.
  2. Unscrew what you can. For nails, work a thin putty knife behind an inconspicuous edge to open a gap, then a wide flat pry bar with a piece of wood or metal behind it to spread the pressure and protect the drywall.
  3. Pry gently along the stud line, pulling exposed nails with pliers as they appear. Steady pressure, no yanking.
  4. Fill holes, sand lightly once dry, touch up or repaint.

Expect the wall underneath to be honest but unpretty: unfaded paint in the panel's outline, a row of filled holes, sometimes a faint shadow line. A single repaint usually closes the story.

Removable adhesive strips

Pull each tab slowly, straight down and parallel to the wall — that stretching is what thins the adhesive and releases it without tearing paint. Pulling outward, or fast, is the common cause of chips. Warm any stubborn residue with a hair dryer and lift it with a plastic putty knife; a little rubbing alcohol or citrus cleaner on a cloth helps with sticky remains. Test any cleaner on a hidden spot first.

Fully glued panels — the careful version

Go in expecting repair, and you may be pleasantly surprised; go in expecting clean, and you will be disappointed.

  1. Score every edge and seam so paint and caulk let go at the line you choose, not theirs.
  2. Soften the adhesive in small sections with a heat gun on a low setting or a hair dryer, kept moving and a few inches away — heat softens many construction adhesives, but it can also scorch paint and warp thin plastic panels, so patience beats temperature.
  3. Work a stiff putty knife, then a wider flat bar, behind the panel and ease it away in small sections. Never lever hard against bare drywall without a backer to spread the load.
  4. Scrape glue ridges flat with the scraper held at a shallow angle. Sand stubborn spots lightly.
  5. Repair honestly: fill holes and gouges with joint compound; where drywall paper has torn, seal the torn area with a suitable primer before compounding — compound over loose torn paper bubbles and peels — then skim, sand, prime and paint.

Panels removed this way often crack or split. Plan for the wall, not for reusing the panels.

What the repair actually costs you in effort (not dollars)

We do not publish prices for other trades, and removal is usually the owner's or a handyman's job rather than a WallPanels Studio service — but the effort scale is consistent:

  • Clips / screws: fill and touch up — under an hour for one accent wall, plus paint drying time
  • Strips: mostly cleaning residue — an hour, occasionally a few paint chips to touch up
  • Full glue: panel removal plus surface repair and a repaint of the whole wall — realistically a day spread across drying stages, sometimes two

The repaint point is real: even a clean removal leaves a wall that has aged differently behind the panels. Budget for painting the full wall, not just the patches, if the room's color match matters.

Planning ahead: install today like someone who may remove it tomorrow

If there is any chance the wall changes again — a rental, a child's room that will grow up, a TV wall that will get new equipment, a home you may sell — decide the exit at the entrance:

  1. Choose mechanical fixing: screws into studs or battens, or a clip/cleat system, over full-surface glue.
  2. Keep glue to spots, if at all, and never as the only thing holding a heavy panel.
  3. Photograph the wall before and during installation, including where cables and studs run — future you (or a buyer) will thank present you.
  4. Keep one spare panel and the paint code. A single damaged section is then a swap, not a redesign, and touch-ups match.
  5. Write the fixing method on the paperwork. "Screwed to battens, no adhesive" is the sentence that makes a future removal a small job — and it supports the honest version of the are panels worth it conversation when you sell.

For homeowners choosing materials today, removal is one more column in the comparison alongside moisture and care: see PVC vs wood vs MDF for the material side, and how to clean and maintain panels for what living with them asks of you.

What we do at WallPanels Studio

We ask about the future of the wall before we fix anything to it. For a permanent accent wall in your own home, the fixing follows the wall, the material and the load — and we will tell you plainly if a method makes future removal harder. For anything that may need to come down — access to wiring, a rental with permission, a room that will change — we favor mechanical systems that come apart panel by panel, and we do not describe a glued installation as removable. If you are taking down panels someone else installed and you are not sure how they were fixed, start with one hidden corner and one panel: the back of that first panel tells you the truth about the whole wall.

TL;DR (WallPanels Studio data)

Can wall panels be removed without damaging the wall? Yes, if they were screwed, nailed or clipped: removal leaves small holes to fill, sand and paint, and the panels often survive for reuse. Stretch-release adhesive strips can also come away cleanly when each tab is pulled slowly, straight down and parallel to the wall. Panels bonded over their whole back with construction adhesive are different — removal commonly tears drywall paper and leaves glue to scrape, and the wall then needs sealing where paper tore, skim-coating, sanding and a full repaint. Almost any panel wall can be removed; only mechanically fixed walls can honestly be called damage-free or renter-friendly, and renters still need written permission. Decide reversibility at installation: mechanical fixings, minimal spot glue, a photo record, a spare panel and the paint code. In Fort Lauderdale, Hollywood, Boca Raton and across Broward County, the fixing method chosen on day one decides what removal costs in effort years later.

Free design consultation — send a photo of your wall through our wall form and see it with panels (AI preview).

Sources: The Panel Hub, how to remove a panel from a wall (screw/nail-mounted panels remove with minimal damage; adhesive-mounted may leave residue or damage, repairable by patching and sanding; glued panels softened with heat and worked loose with a putty knife); EngineerFix, how to remove wood paneling and repair the wall (score caulk lines, pry with a backer to protect drywall, heat softens construction adhesive, glued sections tear drywall paper and expand repair); EngineerFix, renter-friendly wood paneling (stretch-release strips pulled straight down parallel to the wall release without tearing paint or drywall paper; residue with rubbing alcohol or citrus cleaner, heat and a plastic putty knife); Easy Panels, renter's guide to wall panels (screws recommended over adhesive for renters; adhesive is not reversible and can damage the wall on removal; screw holes patch with filler); Woodworking Advisor, fixing MDF panels (screwed panels can be removed without wall damage; adhesive-mounted removal usually pulls off the top layer of drywall paper); Woodweb, no-nail panel installation discussion (Z-clips and cleats make panels removable for repair and refinishing). Full list: sources.md in this folder.

Illustration: AI-generated concept image — for illustration, not a photo of our real work.

← Back to Blog

Blog

Paint Again in 5 Years or Panel Once for 20? Wall Panels vs Wallpaper vs Paint — What Actually Lasts Longer and Costs Less

Paint is cheapest on day one and the most expensive habit over a decade: it typically needs a fresh coat every 3–7 years. Wallpaper can last 10–15 years in a dry, well-prepared room but is the finish most vulnerable to South Florida humidity at its seams. Quality wall panels cost the most upfront and usually need no redo for 10–30 years depending on material — which is why the winner depends on how long you plan to keep the wall, not on the price tag you see first. Send a photo of your wall through our wall form and see it with panels in a free AI preview.

Short answer (WallPanels Studio data): Wall panels vs wallpaper vs paint — which lasts longer and costs less over time? On lifespan, panels win, paint loses. Published US guides put interior paint at roughly 3–7 years before it looks tired and needs a fresh coat, wallpaper at 10–15 years in a dry room with good installation, and decorative panels at 10–20 years for PVC, 15–30 years for wood and MDF, and longer for stone-look panels. On upfront cost, the order reverses: paint is by far the cheapest, wallpaper sits in the middle, panels cost the most to install. Over a 10-year window the gap narrows a lot, because paint is usually bought two or three times while a panel wall is bought once. In South Florida there is one more deciding factor — humidity. Wallpaper seams are the first to lift and bubble in damp air, paint can blister, and the right panel material (PVC in damp zones, not raw MDF) shrugs humidity off. So: choose paint if you change colors often or may move soon, wallpaper for pattern in a dry bedroom, and panels for the one wall you want to finish once and stop thinking about — a TV wall, a headboard wall, an entry wall in Fort Lauderdale, Hollywood, Boca Raton and across Broward County.

The comparison in one table

These are published US guide ranges, not WallPanels Studio prices — we do not publish panel prices in articles, because the real figure depends on your wall, material and design, and it is set after a free consultation. Use the table to compare the shape of each option, not to budget a specific job.

FinishTypical installed cost (published US ranges)Realistic lifespanRedo cycle in 10 yearsWeak point
Interior paintAbout $1–$4 per sq ft installed3–7 yearsUsually 2–3 timesScuffs, fading, stains; looks tired long before it fails
WallpaperMaterials about $1–$5 per sq ft, plus installation labor10–15 years in dry rooms, less in humidityUsually once, if it survives humiditySeams lift and bubble in damp air; hard to repair invisibly; removal is slow
PVC wall panelsAbout $3–$9 per sq ft installed10–20 yearsOnceLower-end prints can look flat; wrong style dates fast
Wood / MDF panels (incl. slat walls)About $5–$15 per sq ft installed15–30 yearsOnceMDF dislikes standing moisture; needs the right room
Stone-look / 3D panelsAbout $10–$32+ per sq ft installed20–50 yearsOnceHighest upfront cost; a strong look you commit to

Sources for these ranges are named at the end of this article. Two honest warnings about any such table. First, ranges are wide because quality is wide: a premium washable paint outlasts a bargain paint, and a cheap panel is not a 20-year panel. Second, Florida labor and material prices move — treat every figure here as orientation, not a quote.

The 10-year math for one accent wall

Take one typical accent wall of about 100 square feet — roughly a TV wall in a living room. Using only the published ranges above:

  • Paint: $100–$400 per round, bought 2–3 times in ten years = roughly $200–$1,200, plus moving furniture, masking, drying time and a room out of use each round.
  • Wallpaper: materials alone run $100–$500 for that wall, plus installation labor, bought once if the room stays dry — but if seams fail early in humidity, you pay for removal as well, and wallpaper removal is famously slow, sometimes damaging the wall surface underneath.
  • Panels: PVC roughly $300–$900 installed, wood/MDF roughly $500–$1,500, stone-look $1,000 and up — bought once in the same ten years, with no repaint weekends in between.

Read honestly, this math does not say panels are always cheaper. It says something narrower and more useful: paint's price advantage shrinks every time you redo it, and panels' price disadvantage is paid only once. If you will keep the wall for a decade or more, the totals often meet. If you will move, sell or redecorate in three years, paint wins the math easily and panels never pay back. Our are wall panels worth it guide works through that payback question in more depth.

How South Florida humidity changes the answer

In a dry climate this comparison is mostly about money. In Broward County and South Palm Beach County, moisture gets a vote.

  • Wallpaper is the most humidity-sensitive finish of the three. Its weak points are the seams and edges: damp air softens adhesive, corners lift, bubbles form, and in a poorly ventilated room mold can grow behind a lifted section. Vinyl wallpapers resist surface moisture better than paper ones, but the seam problem remains. This is the same mechanism we detail in our guide to wall panels in a bathroom: mold and moisture.
  • Paint copes better, but is not immune. Quality acrylic paint on a properly prepared, dry wall handles normal indoor humidity well. On a damp wall it blisters and peels, and in steamy bathrooms even good paint ages faster — which is one reason painted bathrooms join the 3–5 year end of the repaint cycle.
  • Panels depend entirely on material. PVC panels do not absorb water and are the usual choice for damp-prone walls — see how long PVC panels actually last. Wood and MDF panels are excellent in living rooms and bedrooms but should not be put where they stay wet; material choice by room is covered in which panel material survives Florida humidity.

If your wall has an actual moisture problem — a leak, condensation, damp drywall — none of the three finishes fixes it. Paint hides it briefly, wallpaper traps it, panels cover it. Fix the moisture first; our guide to panels over damaged or uneven walls explains what a wall needs before any finish goes on.

Living with each finish: maintenance and repair

  • Paint is the easiest to touch up: keep leftover paint, dab a scuff, done. It is also the finish that needs touching up most often, because it has no protective surface — every bag corner and chair back writes on it directly.
  • Wallpaper needs little day-to-day care in a dry room and wipeable vinyl types clean well. The problem is repair: a torn or stained section rarely patches invisibly, because pattern matching and batch color differences show. Damage often means redoing a whole wall.
  • Panels are the hardest surface of the three: most marks wipe off, slats and textured faces hide minor scuffs that would shout on flat paint, and a single damaged panel can often be replaced without redoing the wall — especially with mechanically fixed systems, as covered in can wall panels be removed without damaging the wall. Day-to-day care is simple dusting and an occasional damp wipe; the full routine is in how to clean and maintain wall panels.

The design difference nobody prices

Paint gives color. Wallpaper gives pattern. Panels give depth — real shadow lines, real texture, a surface that changes with light and can carry concealed wiring and LED lighting. That is why the comparison is not fully fair: on the wall people photograph — the TV wall, the bed wall — panels are not competing with paint as a finish, they are competing as furniture for the wall. If all you want is a fresh color, paying panel money is waste. If you want the wall itself to be the design, paint and wallpaper are printed or flat imitations of that depth, and most homeowners feel the difference the moment they stand in the room. Material personalities differ too — PVC vs wood vs MDF compares the three panel families directly.

So which one should you choose?

  • Choose paint if: you rent without permission for more, you may move or sell within about 3 years, you love changing colors, or the wall is a low-impact background wall. Paint is the right, honest answer surprisingly often.
  • Choose wallpaper if: you want a specific pattern or mural look, the room is dry and well ventilated (a bedroom, not a steamy bathroom), and you accept that removal one day will be slow.
  • Choose panels if: this is your home for the long term, it is the one feature wall the room is built around, the wall takes knocks (entry, TV wall, dining), or the room's humidity rules wallpaper out. Panels are a one-time decision that removes a recurring chore.

And the combination most South Florida homes actually end up with is all three: paint on most walls, wallpaper or a mural in one dry bedroom, panels on the single wall that carries the room. There is no prize for using one finish everywhere.

What we do at WallPanels Studio

We install panels, so read our conclusion with that in mind — which is exactly why this article gives paint and wallpaper their genuine wins above, with sources. When someone shows us a wall where paint is plainly the right answer, we say so during the consultation; a panel sold for the wrong wall is a future regret with our name on it. When panels are right, we help you pick the material family for the room's humidity, show you an AI preview of your own wall with panels before anything is ordered, and fix the panels mechanically where future access or removal may matter.

TL;DR (WallPanels Studio data)

Wall panels vs wallpaper vs paint: paint costs the least upfront (published US ranges about $1–$4 per sq ft installed) but lasts the shortest — a fresh coat every 3–7 years, so it is bought 2–3 times per decade. Wallpaper lasts 10–15 years in dry rooms but is the most humidity-sensitive finish: seams lift and bubble in South Florida damp air, repairs rarely stay invisible, and removal is slow. Quality panels cost the most upfront (about $3–$9 per sq ft for PVC, $5–$15 for wood/MDF, $10–$32+ for stone-look, installed) and last the longest — 10–20, 15–30 and 20–50 years respectively — so over 10+ years their total often meets paint's repeated cost. Choose paint for short horizons and color changes, wallpaper for pattern in dry rooms, panels for the long-term feature wall — especially a humid-climate TV or entry wall in Fort Lauderdale, Boca Raton and across Broward County, with PVC where moisture is a factor.

Free design consultation — send a photo of your wall through our wall form and see it with panels (AI preview).

Sources: Lankoe, wall panels vs paint cost and lifespan comparison (paint $1–$4/sq ft installed, 3–7 years; PVC panels $3–$9, 10–20 years; MDF/wood $5–$15, 15–30 years; stone/3D $10–$32+, 20–50 years); Angi, wallpaper vs paint (wallpaper lasts around 15 years with minimal maintenance, painted walls need a fresh coat every 3–5 years; wallpaper materials $1–$5 per sq ft, paint about $50 per gallon); Dezinebox / Medium, wallpaper vs paint durability (paint 5–8 years with good quality, wallpaper 7–10 years if well maintained, sensitive to moisture, heat and peeling). Full list: sources.md in this folder.

Illustration: AI-generated concept image — for illustration, not a photo of our real work.

← Back to Blog

Blog

Will Wall Panels Lower Your AC Bill? The Cozy-Wall Myth, Checked With Real Numbers

A decorative wall panel can make a room feel warmer — wood and felt do not feel cold the way bare concrete block or tile does. But feeling warmer is not the same as being insulated. A typical panel adds roughly R-0.5 to R-1, while a Florida exterior wall is built to about R-13 or more. Send a photo of your wall through our wall form and see it with panels in a free AI preview.

Short answer (WallPanels Studio data): Do wall panels make a room warmer or help with insulation and energy bills? For a decorative interior panel — mostly no, and we will show you the numbers. Insulation is measured in R-value: how much a material resists heat flow. Published material tables put half-inch drywall at about R-0.45 and three-quarter-inch plywood at about R-0.94, while real insulation runs about R-3.5 per inch for fiberglass and about R-5 per inch for foam board. A typical decorative panel — for example an acoustic slat panel about 21–22 mm thick in total, with a 9 mm felt backing and 12 mm slats — works out to roughly R-0.5 to R-1 for the whole layer. A Florida wood-frame exterior wall, by contrast, is built to a minimum of about R-13 in the wall cavity, and attics here are insulated to R-30 or more. So one paneled accent wall adds a few percent to that one wall's resistance, on one wall only, in a house whose cooling bill is driven mainly by the roof, the attic, air leaks and the AC itself. Expect no measurable change in your energy bill. What you can honestly expect is comfort of a different kind: the surface feels warmer to the touch, the room feels less stark, and sound softens — real benefits, just not insulation. In Fort Lauderdale, Hollywood, Boca Raton and across Broward County, buy panels for how the room looks and feels, and handle insulation as its own separate job.

The R-value math, without the sales talk

Heat moves through a wall in both directions. In a South Florida summer it mostly wants to move inward, and your AC pays to push it back out. R-value tells you how hard a layer fights that movement — higher is stronger.

LayerApproximate R-value
1/2 inch drywall (gypsum board)About R-0.45
3/4 inch plywoodAbout R-0.94
A typical decorative wall panel, total (thin MDF / wood / PVC, sometimes with felt)Roughly R-0.5 to R-1 — an estimate from its thickness and material, not a tested product rating
Fiberglass insulation, per inchAbout R-3.2 to R-3.5
Rigid foam board, per inchAbout R-4.5 to R-5.5
Florida wood-frame exterior wall, code minimum for the cavityAbout R-13
Florida attic insulationR-30 to R-38 and up

Sources are named at the end of this article. Read the table the simple way: to get real insulation you need inches of a material that is mostly trapped air. A decorative panel gives you millimeters of solid material. Solid wood, MDF and PVC conduct heat far better than insulation foam or fiberglass — which in this context means they resist it far worse. There is no design, pattern or premium finish that changes that physics. A stone-look panel does not insulate like stone mass either; it is a thin finish over your existing wall.

Two more limits matter. First, an accent wall is usually an interior wall or a single exterior wall — heat also comes through every other wall, the windows and above all the ceiling. Second, even on that one wall, panels cover the flat area only; edges, outlets and corners remain exactly as leaky or as tight as they were before.

Then why does a paneled room feel warmer?

Because it often genuinely does — just not on the thermometer, and in Florida the feeling usually shows up as cozier and calmer rather than hotter.

  • Surface temperature to the touch and to your body. Bare concrete block, tile and glass feel cold because they pull heat from your skin quickly and reflect little warmth back. Wood, MDF with veneer and felt-backed slats feel noticeably warmer at the exact same room temperature. Sitting with your back near a cold exterior wall feels chilly even in a warm room; covering that wall with a wood finish removes much of that cold-wall feeling.
  • A tiny draft effect. If an old wall has hairline cracks or a loose outlet, a tightly fitted panel can calm the small air movement right at that surface. That is a local comfort effect on one wall — not air sealing for the house, and it does not fix a leaky window or door on the other side of the room.
  • Sound changes the feeling of a room. Felt-backed slat panels soften echo. A quieter room reads to most people as a warmer, more settled room. That is the same acoustic effect we explain honestly in our guide to whether wall panels soundproof a room — absorption, not blocking, and comfort, not a building upgrade.

None of this is fake. Comfort is a legitimate reason to panel a wall. The problem is only the label: calling it insulation, or promising a lower bill for it.

Decorative panels are not insulated panels

Much of the confusion online comes from two products sharing one name.

  • Decorative interior panels — what WallPanels Studio installs, and what most homeowners mean by an accent wall: slat wood, MDF, PVC, stone-look and 3D finishes, typically millimeters to about an inch thick, chosen for look, durability and feel. Insulation effect: negligible, as shown above.
  • Structural insulated panels — a construction system: thick foam cores sandwiched between boards, several inches thick, used to build exterior walls and roofs. Those do carry serious R-values, because they are mostly insulation by volume. They are not a finish you add to a living-room wall, and their numbers must never be borrowed to sell a decorative panel.

If a seller quotes a big R-value or a percentage saving on heating or cooling for a thin decorative panel, ask one question: for what thickness, and tested as what product? The honest answer will be thin — and small.

What actually lowers a South Florida cooling bill

In the right order, for most Broward and South Palm Beach homes:

  1. Attic insulation and the roof's heat. The ceiling is the largest heat entry in a Florida summer. Attic targets here are R-30 and above — an order of magnitude beyond anything a wall finish can add.
  2. Air sealing and ducts. Leaky ducts and gaps pump cooled air out and hot humid air in. Sealing usually beats adding surface finishes by a wide margin.
  3. Windows, shading and the AC itself. Sun through unshaded glass and an aging, oversized or undersized AC unit move the bill more in a month than a paneled wall will in its lifetime.
  4. Real wall insulation, if your walls have none. Some older Florida homes have empty or minimal wall insulation. Filling wall cavities is a specialist insulation job with real R-values — R-13 class — done from inside the wall, not by covering it. If that is your situation, spend there first; panels can still go on afterward, for design.

Our are wall panels worth it guide makes the same distinction for cost in general: panels pay back in look, durability and not repainting — see also panels vs wallpaper vs paint — not in utility savings.

When a panel still helps comfort — honestly labelled

  • The wall behind your sofa or bed is an exterior concrete-block wall that always feels cold in winter evenings. A wood or felt-backed finish makes that spot feel significantly more comfortable to sit or sleep against.
  • A home office or media room feels stark and echoey. Slat panels warm the impression of the room and soften sound — a comfort upgrade you feel every day.
  • A rental or a room you do not want to renovate deeply. Panels change the room without touching the wall's structure — and as our guide to removing wall panels without damage explains, mechanically fixed systems can come off again.

What a panel will not do, in any of these cases, is show up as a line-item saving on your FPL bill. If it seems to, look for the real cause first — a season change, a serviced AC, a sealed duct.

What we do at WallPanels Studio

We install decorative panels, so we have every reason to repeat the insulation myth — and we will not. A panel sold as an energy upgrade becomes a disappointed owner with our name on it. During a free consultation we talk about what panels genuinely deliver for your room — design, a warmer-feeling surface, easier upkeep (see how to clean and maintain wall panels), the right material for Florida humidity (see which panel material survives Florida humidity) — and if your real problem is a hot room or a high bill, we will tell you plainly that insulation, sealing or AC work comes first, and panels come after, for the room you want to love looking at.

TL;DR (WallPanels Studio data)

Do wall panels make a room warmer or lower energy bills? A decorative panel adds roughly R-0.5 to R-1 of thermal resistance (estimate from published material tables and typical panel thickness of about 21–22 mm for slat panels) — against about R-13 for a Florida exterior wall cavity and R-30+ in the attic. That is too little, on too small an area, to measurably change a cooling bill in Fort Lauderdale, Boca Raton or anywhere in Broward County. Panels can honestly make a room feel warmer — wood and felt surfaces do not feel cold like bare block or tile, and they soften echo — but that is comfort, not insulation. Real bill savings come from attic insulation, air and duct sealing, shading and AC condition, and real cavity insulation where a wall has none. Buy panels for design and comfort; never as an energy upgrade.

Free design consultation — send a photo of your wall through our wall form and see it with panels (AI preview).

Sources: Penn State EGEE 102, building materials R-value table (gypsum 1/2 inch R-0.45; plywood 3/4 inch R-0.94; fiberglass about R-3.5 per inch; polystyrene about R-5 per inch); University of Maryland Extension, Home Energy: Insulation, citing U.S. Department of Energy guidance (exterior walls R-13 to R-21; fiberglass about R-3.2 per inch; rigid foam about R-4.5 to R-5.5 per inch); Florida Building Code summaries for Climate Zones 1–2 (wood-frame wall R-13 cavity minimum; ceiling R-30 to R-38); acoustic slat panel manufacturer specifications (total thickness about 21–22 mm: 9 mm PET felt + 12 mm MDF slats). Full list: sources.md in this folder.

Illustration: AI-generated concept image — for illustration, not a photo of our real work.

← Back to Blog

Blog

Your Ceiling Is a Fifth Wall — But Can Wall Panels Actually Go Up There?

Yes — wall panels can go on a ceiling, but gravity changes the rules: adhesive alone is never enough overhead, panels need mechanical fixing into the joists, and only the lighter panel families qualify. A standard slat sheet weighs roughly 12 kg (about 26 lb) — beautiful on a wall, usually the wrong choice above your head. Send a photo of your wall through our wall form and see it with panels in a free AI preview.

Short answer (WallPanels Studio data): Can wall panels go on a ceiling? Yes — but the ceiling plays by different rules than the wall. On a wall, gravity presses a panel against nothing and pulls it down along the surface; overhead, gravity pulls the panel straight away from the surface, 24 hours a day, forever. That single fact drives everything else. First, adhesive alone is not an acceptable fixing overhead — panels on a ceiling need mechanical fasteners (screws or nails) driven into the ceiling joists or into battens that are themselves screwed to the joists, with construction adhesive as a helper, never as the only hold. Second, weight decides which panels qualify: light, thin sheets — PVC stone-look panels a few millimeters thick, and hollow faux beams — are realistic ceiling materials; a full acoustic slat sheet measuring about 2400 × 600 mm weighs roughly 12 kg (about 26 lb), and a ceiling covered in those is a heavy, risky structure that also needs a joist layout that cooperates. Third, the smart version of this idea is usually a ceiling zone, not a whole ceiling: a paneled field over a dining table, a bed, a kitchen island or a seating area, with the lights planned into it. In Fort Lauderdale, Hollywood, Boca Raton and across Broward County, that is the version we recommend — and below is the reasoning, including the cases where the honest answer is no.

Why a ceiling is not just a wall turned sideways

Homeowners ask this question because the pictures are gorgeous — and they are. A wood-look ceiling warms a room the way no wall can, because it changes the light and the proportions of the whole space. But the physics flips:

  • Gravity changes sides. On a wall, a panel's weight slides it downward along a surface it is glued to; the glue mostly resists a peeling force at the top edge. Overhead, the full weight of the panel hangs off the bond line, every hour of every day, including the hot afternoons when adhesives soften slightly and Florida ceilings get warm.
  • The structure above is different. A wall panel usually lands on drywall over studs that are easy to find. A ceiling has joists too — but also recessed lights, AC vents, wiring runs, access points and sometimes plumbing. Everything you cover, you may one day need to reach.
  • Failure looks different. A wall panel that fails leans or lifts at a corner. A ceiling panel that fails comes down. That is why the fixing standard overhead is not "strong glue and hope" — it is mechanical, into structure.

None of this makes ceiling panels a bad idea. It makes them a planned idea.

What actually holds a panel up there

The methods that work overhead, in the order a professional thinks about them:

  1. Find the joists first. Every fixing decision starts with the joist layout — direction, spacing, and what already hangs from them. Panels, battens and lights all plan around the joists, not the other way around.
  2. Battens (furring) screwed to the joists, when the layout needs them. If the panel seams do not land on joists — and they rarely all do — a level grid of battens screwed into the joists gives every panel edge and middle real structure to bite into. The battens must be level: an unlevel frame shows up as open joints and visible waves in the finished ceiling.
  3. Mechanical fasteners into structure. Screws or nails through the panel (or its fixing flange / tongue) into joists or battens. This is the hold that gravity has to defeat, and it cannot soften in the heat.
  4. Construction adhesive as the helper. A zigzag of adhesive on the panel's back — the same technique used on walls — kills vibration, stops drumming and shares the load between fasteners. Overhead it is a partner to screws, never a substitute for them. Any advice that says "just glue it to the ceiling" should end the conversation.

Thin, flexible PVC-type sheets are sometimes also fitted into or under trim profiles at the edges; the principle is the same — the trim and the frame carry the sheet, not glue alone.

Which panels are light enough — and which are not

Weight per sheet is the filter. Using the panel families WallPanels Studio works with:

Panel familyTypical sheetWeight characterCeiling verdict
PVC stone-look / glossy stone sheetsAbout 1220 × 2440 mm, ~3 mm thickLight, thin, flexibleRealistic for ceiling zones and full ceilings with proper framing
PU faux beamsHollow beams, various lengthsVery light for their sizeMade for ceilings — the classic "beams without the weight" solution
3D / textile / decorative boardsVaries by productLight to mediumPossible as zones, fixed mechanically, product by product
Acoustic slat panels (felt + wood/MDF slats)About 2400 × 600 mm, ~21–22 mm totalRoughly 12 kg (about 26 lb) per sheetUsually the wrong choice overhead — heavy, and the felt face is not a ceiling finish we recommend
Stone-look and heavy MDF boardsVariesMedium to heavyOnly small zones, engineered fixing, case by case

Read the table the practical way: the lighter and thinner the panel, the more ceiling it can honestly cover. The heavy, premium wall products earn their weight on a wall; overhead, weight is a liability you pay for in framing, fasteners and risk. Note also that a ceiling fan must never hang from a panel or a batten — fans mount to a rated box fixed to structure, and any panel work plans cutouts around it.

The Florida traps

South Florida adds four local complications:

  • Humidity and sag. Thin, unsupported sheets can sag between fixings over time, and humid air speeds that up. PVC-type sheets do not absorb moisture, which is why they behave better overhead here than porous, wood-based boards — the same material logic as in our guide to which panel material survives Florida humidity. Wood-based products on a ceiling in a damp room are the combination most likely to warp or droop.
  • Hidden leaks. A ceiling is where roof and AC condensate leaks announce themselves — usually as a stain you are tempted to cover. Never panel over a damp or stained ceiling: the panel hides the leak while the damage continues above it. Fix the water first, let everything dry, then design.
  • Access you will need again. Recessed-light drivers fail, AC handlers drip, junction boxes must stay reachable. A good ceiling design keeps access points and plans removable sections where the ceiling holds services — the overhead cousin of the wire planning in our panels behind a TV guide.
  • Lights get heavier, not lighter. Pendants and chandeliers over a paneled zone are the whole point of many designs — our LED and lighting guide covers the look — but every fixture hangs from structure through the panel, never from the panel. Plan fixture positions before the panels go up, because afterwards the joists are hidden.

Fire performance matters overhead too: panels on a ceiling sit in the path of rising heat and smoke, so the product's fire rating is a real selection criterion, not paperwork — see are wall panels fire safe for how to read those classes, and check local code requirements for your specific room and product before installing.

Where a paneled ceiling works best

  • A dining zone. A wood-look or stone-look field over the table, with pendants through it, defines the dining area in an open plan better than a rug does.
  • A kitchen island zone. Panels or PU beams over the island echo the island's footprint and give pendants a designed ceiling to hang from.
  • A bed wall that climbs. A wall accent that continues onto a strip of ceiling above the bed — the "canopy" move — is striking, and the strip format keeps weight and fixing simple.
  • A tray-ceiling inset. Paneling only the raised center of a tray ceiling is the lowest-risk full-room version: one flat field, clean edges, easy framing.
  • Beams, when what you really want is architecture. If the dream is "wood beams," hollow PU beams deliver the look at a fraction of real timber weight and are designed to be fixed overhead.

And where we say no: a whole-ceiling cover in heavy slat or MDF in a humid room; any panel over a ceiling with an unresolved leak or active staining; and any overhead install whose fixing plan is "adhesive only." Those are not designs, they are callbacks waiting to happen.

What it means for cost and time

We do not publish invented prices, and ceiling work is exactly the kind of job where a number without a site visit would be fiction. What honestly drives the cost: the framing the joist layout requires, the slower pace of overhead work (everything happens on ladders or staging, against gravity), fixture cutouts and any lighting changes, and the panel family you choose. A small paneled zone over a table is a modest project; a framed full ceiling is not. The free consultation exists precisely to look at your ceiling — its joists, lights and condition — before anyone talks numbers. For the wall-side comparison of doing it yourself versus hiring it out, see DIY vs professional installation — overhead, the balance tips further toward professional, because the fixing has to be right the first time.

TL;DR (WallPanels Studio data)

Can wall panels go on a ceiling? Yes — with mechanical fixing into ceiling joists or into battens screwed to those joists; construction adhesive overhead is a helper, never the only hold, because gravity pulls a ceiling panel away from its surface around the clock. Weight is the filter: thin PVC stone-look sheets (about 1220 × 2440 mm at ~3 mm) and hollow PU beams are realistic ceiling materials, while a standard acoustic slat sheet at roughly 12 kg (about 26 lb) per 2400 × 600 mm sheet is usually too heavy to be a sensible ceiling cover. The version that works best in Fort Lauderdale, Boca Raton and Broward County homes is a paneled ceiling zone — over a dining table, island, bed or inside a tray ceiling — with fixtures planned into structure and access to ceiling services preserved. Never panel over a damp or leaking ceiling, and check the product's fire rating for overhead use.

Free design consultation — send a photo of your wall through our wall form and see it with panels (AI preview).

Sources: EngineerFix, "How to Hang Wall Panels Safely and Securely" (loads over ~15–20 lb require mechanical fasteners into studs/joists; high-strength adhesives suitable only for lightweight panels and specific permanent installations); EngineerFix, "The Benefits and Installation of PVC Drop Ceiling Tiles" and "The Benefits and Installation of Vinyl Ceiling Panels" (PVC is non-porous and hydrophobic, does not swell or sag from humidity the way fiber and gypsum products do, and resists mold growth); Accio PVC ceiling installation guide (installing over unsound or damp surfaces is the most frequent failure; battens must be leveled to avoid open joints and waves; panels should acclimate at least 24 hours); slat panel dimensions and weight from WallPanels Studio installation standards (sheet about 2400 × 600 × ~22 mm, roughly 12 kg). Full list: sources.md in this folder.

Illustration: AI-generated concept image — for illustration, not a photo of our real work.

← Back to Blog

Blog

That 'New Panel' Smell — Do Wall Panels Off-Gas, and Are They Safe for a Nursery?

A faint 'new product' smell in the first days is common — and it usually comes from the adhesive, the backing and the packaging, not the panel face, and fades with ventilation. Emissions depend on the material: PVC, stone-look and metal are comparatively inert, while MDF composites must be checked product by product for formaldehyde — look for low-VOC documentation, GREENGUARD and CARB Phase 2. Send a photo of your wall through our wall form and see it with panels in a free AI preview.

Short answer (WallPanels Studio data): Do wall panels smell or off-gas? Some do, briefly — and the panel itself is often not the main source. In our installation experience, most noticeable odor in the first days comes from three things that are not the decorative face of the panel: the construction adhesive used behind it, any foam or felt backing, and the plastic packaging the panels arrived in. That smell is typically strongest on day one and fades as the room is ventilated. Off-gassing — the slow release of volatile organic compounds (VOCs) — depends on the material. Solid PVC, stone-look and metal panels have little to release on their own. Wood-based composites such as MDF are different: the resins that bind the fibers can release formaldehyde, and the amount depends entirely on the specific product's emission class and certification. So the honest answer for a nursery or bedroom in Fort Lauderdale, Boca Raton or anywhere in Broward County is not "panels are safe" or "panels are unsafe" — it is: choose a specific low-VOC panel and a low-VOC adhesive, verify the labels on those exact products, install early, and ventilate the room for 48–72 hours before anyone — especially a baby — sleeps in it. Below is how to do each of those checks without guessing.

Why new panels smell at all

"That smell" is your nose detecting volatile organic compounds — chemicals that evaporate easily at room temperature. Almost every new manufactured product releases some at first: new furniture, new carpet, a fresh coat of paint, a new car interior. Panels are not special in this respect, and a smell on day one does not by itself prove a product is dangerous — just as no smell at all does not prove a product emits nothing. Smell is a signal to ventilate and to check what you bought, not a verdict on its own.

In a typical panel installation, the odor sources rank roughly like this:

  • The adhesive. A zigzag of construction adhesive behind every panel is standard practice. Adhesives are chemical products, and they are usually the strongest odor source in the first 24–48 hours while they cure. This is also the easiest source to control: low-VOC and solvent-free adhesive options exist, and the adhesive's own label and safety data sheet state its VOC content.
  • The backing. Acoustic slat panels carry a felt backing, often made from recycled plastic fiber; other panels carry foam or composite backings. These materials can hold a factory or packaging smell at first and release it over the first days.
  • The packaging. Panels travel wrapped in plastic film and cardboard, sometimes for weeks in a warm container or warehouse. In South Florida heat, packaging odor can cling to the product and be mistaken for the product itself. Unwrapping panels a day or two before installation, in a ventilated garage or covered outdoor area, removes much of this before the panels ever enter the bedroom.
  • The panel material itself. This is the source people worry about most — and for some materials it is the smallest one. Which brings us to the real question.

It depends on the material — here is the honest breakdown

Panel familyWhat it is made ofOff-gassing picture
PVC stone-look / glossy sheetsPVC polymer sheet, about 3 mm thickThe sheet itself is comparatively inert and does not contain formaldehyde-based resin. Surface finishes and, above all, the adhesive behind it are the parts to check.
Stone-look (PU / composite stone) and metal panelsMineral / polyurethane composite or metal faceLow inherent emissions from the panel itself; again, adhesive and any backing are the variables.
Real wood slatsSolid wood or veneer over a coreWood itself emits tiny natural amounts of organic compounds (that is literally the smell of wood). The core under the veneer and the finish coating matter more than the wood.
MDF and wood-composite panelsWood fibers bound with resinThe category to check most carefully. The resins can release formaldehyde, and the amount varies widely by product — from standard boards to certified low-emission and no-added-formaldehyde products. The product's emission documentation is the whole answer here.
Acoustic felt backingUsually PET fiber feltGenerally low-emitting, but check the specific product's documentation like any other component.

The pattern is simple: the more a panel is a glued-together composite, the more its paperwork matters; the simpler and more inert the material, the more the adhesive becomes the main thing to choose carefully. The same material logic — PVC behaving differently from wood-based boards in Florida conditions — runs through our guide to which panel material survives Florida humidity and the head-to-head in PVC vs wood vs MDF panels.

Formaldehyde and VOCs: the labels that actually mean something

You cannot judge emissions by looking at a panel, and marketing words like "eco" or "natural" are not measurements. These are the designations that carry real, checkable meaning for the US market:

  • Low-VOC / zero-VOC claims on the product and the adhesive. For paints and adhesives, VOC content is stated in grams per liter on the label or technical data sheet. Lower is better for a bedroom; for a nursery, choose the lowest-VOC adhesive option that is still rated for the panel type.
  • GREENGUARD and GREENGUARD Gold certification (UL). An independent certification that tests a finished product's chemical emissions. The Gold level applies stricter limits and was designed with sensitive environments — schools and healthcare — in mind, which is why it is the more relevant of the two for a nursery.
  • CARB Phase 2 / EPA TSCA Title VI compliance for composite wood. California's Air Resources Board standard, mirrored by the federal EPA rule, limits formaldehyde emissions from MDF, particleboard and hardwood plywood sold in the US. A composite-wood panel sold legally in the US should carry this compliance — and for a child's room, products documented as ultra-low-emitting (ULEF) or no-added-formaldehyde (NAF) go further still.
  • The safety data sheet (SDS) and the emissions report for the exact SKU. Not the brand in general — the exact product, in the exact finish. A reputable supplier can provide these. If no documentation exists for a product you are considering for a nursery, that absence is itself information: choose a documented product instead.

One honest limit, stated plainly: WallPanels Studio installs panels; we are not a testing laboratory, and we do not publish emission figures for specific products because those figures belong to each manufacturer's own certified testing. What we can do — and what this guide recommends — is select products that carry the independent certifications above and show you their documentation before installation. Anyone who quotes you a precise VOC number for a panel without showing a test report for that exact product is guessing.

The nursery and bedroom plan: five cautious rules

For a baby's room, a child's bedroom, or a bedroom for anyone sensitive to air quality, this is the sequence we recommend in Broward County, Fort Lauderdale and Boca Raton homes:

  1. Choose the material for the room, not just the photo. For a nursery, favor comparatively inert faces — PVC stone-look, metal or documented low-emission products — and treat standard uncertified MDF composites as the wrong default for this room.
  2. Specify a low-VOC adhesive — and say so before installation day. The adhesive is usually the biggest short-term odor source. Ask for the low-VOC option by name and keep its data sheet with the product paperwork.
  3. Unwrap early. Let panels air out of their packaging in a ventilated space for a day or two before they go on the wall. This alone removes much of the "new" smell people notice.
  4. Install early, ventilate after. Schedule installation at least several days before the room will be slept in — never on the day a baby moves in. After installation, ventilate the room well for 48–72 hours: windows open when weather allows, the AC fan running, and in Florida's humidity, the air conditioning itself helping to dry and exchange the air. If a primer or paint is part of the project, it follows the same rule as in our guide to painting wall panels — its own drying and ventilation time counts too.
  5. Trust the timeline, not just the nose. Odor usually fades noticeably within the first days of ventilation. If a strong chemical smell persists well beyond a week of good ventilation, that is not normal settling — stop, air the room, and review the product and adhesive documentation before the room is used as a nursery.

None of this is a reason to fear panels in a bedroom. It is the same common-sense sequence you would use for new furniture or a fresh repaint in a child's room — applied to panels, with the paperwork checked one step earlier.

A South Florida note: heat and humidity speed everything up

Warm air increases how fast materials release VOCs — scientists describe this as temperature dependence, and South Florida homes live on the warm side of it. Two practical consequences. First, the initial ventilation period matters more here, not less: a room aired properly for 48–72 hours with the AC running clears the installation-day peak far more effectively than a closed, hot room. Second, delivery and storage matter: panels stored for weeks in a hot garage in sealed plastic arrive smelling stronger than the same panels unwrapped and aired. Neither point changes which products are low-emitting — but both change how strong the first days smell, and how quickly it passes.

TL;DR (WallPanels Studio data)

Do wall panels smell or off-gas? A short-lived "new product" smell is common in the first days, and it usually comes mainly from the installation adhesive, the backing and the packaging — not the decorative face — and it fades with ventilation. Long-term emissions depend on the material: PVC stone-look, stone-composite and metal panels are comparatively inert on their own, while MDF and other resin-bound wood composites are the category whose formaldehyde emissions must be checked product by product. For a nursery or bedroom, choose a specific panel and adhesive documented as low-VOC — look for GREENGUARD (ideally Gold) certification, CARB Phase 2 / EPA TSCA Title VI compliance on composite wood, and an SDS or emissions report for the exact SKU — unwrap panels a day or two early, install several days before the room is used, and ventilate for 48–72 hours after installation. Do not install in a baby's room on move-in day.

Free design consultation — send a photo of your wall through our wall form and see it with panels (AI preview). Tell us if the room is a nursery or bedroom, and we will plan materials, adhesive and timing around that.

Sources: US EPA guidance on volatile organic compounds and indoor air, and on formaldehyde and composite wood products (EPA TSCA Title VI / CARB Phase 2 emission standards for MDF, particleboard and hardwood plywood); UL GREENGUARD and GREENGUARD Gold certification criteria for low chemical emissions from building products; general indoor-air guidance that chemical emissions from new building products are highest shortly after installation and decline with time and ventilation. Product-specific emission values are not stated in this article because they belong to each manufacturer's certified testing for the exact SKU — request the SDS and emissions report for the specific product before installing it in a nursery or bedroom.

Illustration: AI-generated concept image — for illustration, not a photo of our real work.

← Back to Blog

Blog

Your Living Room Wall, Transformed — What Are the Best Wall Panels for a Living Room, and What Do They Cost in South Florida?

The best living room panels are matched to your wall: most homes start with the TV wall, then mix two or three materials — wood slat, stone-look or travertine, textile or padded, with thin metal accents. Stock design from $850; fitted to your wall usually $2,200–$2,700; full custom turnkey from $9,999. One accent wall typically installs in about a day. Free AI preview by photo. Send a photo of your wall through our wall form and see it with panels in a free AI preview.

Short answer (WallPanels Studio data): What are the best wall panels for a living room? Start with the wall, not the catalogue. In most living rooms in Fort Lauderdale, Hollywood, Hallandale Beach, Pembroke Pines, Coral Springs and Boca Raton, the panel wall that earns its money is the TV wall — it is the wall everyone faces, every evening. The strongest designs rarely use one material alone: they mix two or three — for example wood slat at the sides for warmth, a continuous stone-look or travertine centre behind the screen for calm, and a thin metal accent to catch the light. Where the living room is also where guests sit and talk, textile and padded panels soften the sound and the feel. On price, our published studio tiers are: stock design from $850; a design fitted to your wall usually $2,200–$2,700; full custom turnkey from $9,999. Those are preliminary tiers — the exact quote depends on your wall size and the materials you choose. Installation of one accent wall typically takes about a day. And before you commit to any of it: send a photo through our wall form and see your own wall with panels in a free AI preview.

Why the living room is the right first room

A bedroom panel wall is for you. A living room panel wall is for everyone — it is the background of family evenings, holidays, photos and video chats, and it is usually the largest unbroken wall in the home. That is why "wall panels for living room" and "best wall panels for living room" sit at the top of what people search for in this category: the living room is where a single wall changes how the whole home feels, without touching the floor, the ceiling or the furniture layout.

It is also the most forgiving room to start with. Living rooms rarely have the steam and splashes of a bathroom or the grease of a kitchen, so almost every panel family is on the table here — and the choice can be made on look, light and sound, not just survival. How different materials behave in Florida humidity still matters, especially in homes that sit closed and air-conditioned for long stretches; that logic is covered in our guide to which panel material survives Florida humidity.

Idea 1: The TV wall — the most common living room choice

If one living room wall gets panels, it is usually this one. Done well, a TV panel wall does three jobs at once:

  • It gives the screen a calm background. A continuous stone-look or travertine face behind the TV removes the visual noise of a bare painted wall, so the picture reads better in daylight and in the evening.
  • It hides the tangle. Wires, soundbars and consoles are planned into the wall build, not draped under it. The practical side of that planning is covered in our guide to wall panels behind a TV with wires.
  • It balances the room. Wood slat sections at one or both sides warm up a large cool stone centre, and frame the seating area without any extra decor.

One honest note: a TV wall is designed around the screen size and seating distance you have now. If a much larger TV is planned within a year, say so at the design stage — proportions that flatter a 65-inch screen can crowd an 85-inch one.

Idea 2: A full slat wall for warmth and sound

Wood slat panels turn a flat wall into rhythm: vertical lines, real shadow gaps, and a felt backing that takes the echo out of a hard-floored living room. This is the idea to choose when the room feels cold or loud — open-plan spaces in newer Broward County homes, with tile or luxury vinyl underfoot and glass to the patio, are the classic case. Slats work as a full wall or as a wide section behind a sofa. On their own they are a complete design; mixed with a stone centre, they become the warm frame in the TV-wall idea above. What slats do — and do not do — for noise is worth understanding before you buy on that promise alone, and our guide to wall panels and soundproofing sets it out plainly: they soften echo inside the room; they are not soundproofing between rooms.

Idea 3: Stone-look and travertine for a calm, premium centre

Continuous stone-look sheets give the living room what a slab of real stone would — a quiet, seamless surface with veining that reads expensive under warm light — at a fraction of the weight and without masonry work. Travertine-look designs are the softer version of the same idea: warm beige movement instead of dramatic marble contrast, and a surface that pairs easily with linen sofas, light oak and black metal details. Stone-look is the most "grown-up" living room choice and the one least likely to date, but it asks for discipline everywhere else: when the wall becomes the artwork, the rest of the room should get quieter, not louder.

Idea 4: Textile and padded panels where people sit and talk

The wall behind the sofa is the second living room wall to consider. Textile panels bring a soft, upholstered feel that paint and hard panels cannot, and padded panels add depth you can see from across the room — sections with real cushion, often combined with wood or metal strips between them. In a living room that doubles as the place guests linger, this is the wall that makes people lower their voices and stay longer. Padded sections also protect the wall where chair backs and sofa backs actually meet it. In a mix, one padded or textile centre with wood at the sides is a reliable, balanced composition — but it is only one option; the mix should follow your room's light and furniture, not a fixed formula.

Idea 5: Metal accents — the jewellery, not the outfit

Thin metal strips and metal-look panels are rarely the whole wall. Used as narrow accents — between stone sheets, edging a slat section, or as a slim frame around a composition — they catch window light and tie together the other materials' hardware: lamp bases, handles, TV mounts. A little goes a long way; a full metal living room wall overwhelms most homes. Think of metal as the line that underlines the sentence, not the sentence itself.

What living room panels cost in South Florida

These are our own published studio tiers, stated the same way as on our site. They are preliminary — every wall is quoted exactly once its size and materials are known — but they are real starting points, not teaser numbers.

TierPriceWhat it means
Stock designfrom $850A ready design from our catalogue, in its standard composition
Fitted to your wallusually $2,200–$2,700The design adapted to your wall's size, openings and layout — the tier most living room projects land in
Full custom turnkeyfrom $9,999A one-off design built for your room from scratch, handled end to end

What moves a living room quote inside — or beyond — those tiers:

  • Wall size. Width and height set how many panels, sheets and strips the wall needs. A wide open-plan TV wall and a narrow wall between windows are different projects at the same tier.
  • Material family. Stone-look continuous sheets, real-veneer slats, travertine, textile, padded sections and metal accents sit at different material costs, and a two- or three-material mix prices differently from a single-material wall.
  • Lighting and TV integration. Built-in LED lines, a planned TV mount position, and routing for wires and sound equipment add design and installation work — and are far cheaper to plan now than to retrofit. Our guide to adding LED lighting to wall panels shows what is involved.
  • Wall preparation. A flat, sound wall is a panel-ready wall. Old damage, uneven areas or layers that must come off first add preparation time; whether panels can go over a problem wall at all is covered in our guide to panels over damaged or uneven walls.

For the wider picture of how panel pricing is built in this region, see our original breakdown of wall panel installation cost in South Florida. And a comparison worth making before any quote surprises you: repainting the same wall costs less today, but panels are chosen for the next decade, not the next season — the long-term maths is set out in wall panels vs wallpaper vs paint.

How the process actually goes

  1. You send a photo. Through our wall form — one straight photo of the living room wall is enough to start.
  2. You get a free AI preview. Your own wall, with panels — so the conversation is about your room, not a showroom photo.
  3. The design is fitted. Materials, mix, TV and lighting positions are adjusted to your wall and your budget tier.
  4. Installation day. One accent wall typically takes about a day to install. The sequence of a normal installation, hour by hour, is described in our installation timeline guide.
  5. You live with a finished wall. No renovation dust saga, no room out of use for a week — the living room is back the same evening, with a new centre.

Which idea fits your living room?

  • You watch films every night → start with the TV wall: stone-look or travertine centre, slat sides.
  • Your open-plan room echoes → a slat wall or slat sections, with textile or padded panels behind the sofa.
  • You host often and want the room to feel expensive, quietly → travertine or calm stone-look, metal accents kept thin.
  • Your sofa wall feels bare and cold → textile or padded centre, wood at the sides.
  • You are not sure at all → that is exactly what the free preview is for. One photo settles more arguments than an hour of scrolling other people's rooms.

We install across Broward County — including Fort Lauderdale, Hollywood, Hallandale Beach, Pembroke Pines and Coral Springs — and in Boca Raton.

TL;DR (WallPanels Studio data)

The best wall panels for a living room are chosen for the wall's job: the TV wall is the most common starting point, usually built as a mix of two or three materials — wood slat for warmth and softer sound, continuous stone-look or travertine for a calm centre, textile or padded panels behind the sofa, and thin metal accents used sparingly. WallPanels Studio's published tiers for South Florida are: stock design from $850; a design fitted to your wall usually $2,200–$2,700; full custom turnkey from $9,999. Prices are preliminary; the exact quote depends on wall size, material family, lighting and TV integration, and wall preparation. Installation of one accent wall typically takes about a day. A free AI preview from a photo of your wall comes before any commitment.

Free design consultation — send a photo of your wall through our wall form and see it with panels (AI preview). Mention it is your living room and, if it is a TV wall, your screen size — the design will be fitted around both.

Sources: WallPanels Studio published price tiers as listed on wallpanels.solomiagroup.com (checked 24–25 October 2026): stock design from $850; fitted to your wall usually $2,200–$2,700; full custom turnkey from $9,999 — all stated as preliminary, with the exact quote depending on wall size and materials. Search demand for this topic: Google Autosuggest for "wall panels for living room" and "best wall panels for living room" (topic research, 24 October 2026). No client reviews, project addresses or third-party price statistics are stated in this article.

Illustration: AI-generated concept image — for illustration, not a photo of our real work.

← Back to Blog

Blog

The Wall Behind Your Bed, Transformed — Bedroom Headboard Wall Panels: Ideas, Materials and What They Cost in South Florida

The best headboard wall panels are built around comfort: a soft padded centre behind the pillows — Padded Panels ND610–624 — framed by wood slat, stone-look or travertine, with thin metal accents. Stock design from $850; fitted to your wall usually $2,200–$2,700; full custom turnkey from $9,999. One accent wall typically installs in about a day. Free AI preview by photo. Send a photo of your wall through our wall form and see it with panels in a free AI preview.

Short answer (WallPanels Studio data): What are the best bedroom headboard wall panels — the wall behind your bed? Start with comfort, not the catalogue. In most bedrooms in Fort Lauderdale, Hollywood, Hallandale Beach, Pembroke Pines, Coral Springs and Boca Raton, the headboard wall that earns its money is a soft padded centre directly behind the pillows — panels you can lean against to read — framed by materials that set the mood: warm wood slat at the sides, a calm stone-look or travertine section, and a thin metal accent to catch the lamplight. Our Padded Panels range runs ND610–624, in widths and depths from slim 0.4″ profiles to deep 2.15″ cushion sections, and it is designed to mix: padded in the middle, wood, stone or metal around it. On price, our published studio tiers are: stock design from $850; a design fitted to your wall usually $2,200–$2,700; full custom turnkey from $9,999. Those are preliminary tiers — the exact quote depends on your wall size and the materials you choose. Installation of one accent wall typically takes about a day. And before you commit to any of it: send a photo through our wall form and see your own wall with panels in a free AI preview.

Why the headboard wall is the bedroom's main wall

Every bedroom has one wall you face from the door and lean against in bed — and in most South Florida bedrooms it is also the plainest wall in the house: flat paint, a freestanding headboard that stops where the wall keeps going, and two lamps doing all the decorative work. That is why "bedroom headboard wall panels" and "wall panels behind bed" form such a strong search cluster: a panel wall replaces the headboard entirely, runs the full width and height it needs, and turns the bed into the finished centre of the room instead of furniture parked against paint.

It is also the most personal wall we build. A living room panel wall is for everyone — that guide is our living room wall panels guide. A headboard wall is for the two people who sleep there: how it feels against your back, how it sounds at night, and how calm it looks in the last light of the day all matter more than how it photographs.

Idea 1: The padded centre — lean against your wall

This is the idea most bedroom projects start with, and the one a painted wall or a wooden headboard cannot copy. Padded panels are upholstered sections with real cushion depth, mounted as a continuous soft field behind the pillows. You sit up, lean back, and the wall itself is the headboard — no gap behind the bed collecting dust, no hard edge at shoulder height.

Our Padded Panels range (ND610–624) covers the useful spread for a headboard wall:

  • Slim profiles (0.4″ deep) — ND612, ND618, ND620, ND622, ND623: a tailored, hotel-flat look that reads as texture more than cushion.
  • Mid-depth (0.7″–1″) — ND616, ND624: visible softness with a cleaner, modern line.
  • Deep cushion (1.77″–2.15″) — ND610, ND614: the full lean-back comfort sections, usually placed exactly at pillow and shoulder height.

Widths run from a narrow 11.8″ module (ND622) to 23.6″ sections, all at a tall 116″ length — so the composition can be tuned to a queen, a king, or a wall that runs wider than the bed. In a mix, the padded centre is normally flanked by wood slat sections that carry the eye outward to the nightstands, with a slim metal strip marking the join. That is one reliable composition, not a fixed formula — the mix should follow your bed width, your ceiling height and your light.

Idea 2: Wood slat sides for warmth and a quieter room

Wood slat panels at one or both sides of a padded centre do two jobs in a bedroom. Visually, their vertical rhythm stretches a low ceiling and warms up a room that is mostly white bedding and glass. Acoustically, the felt backing behind slats takes the hard edge off a tiled or vinyl-floored bedroom — voices and TV sound less sharp at night. What slats do — and do not do — for noise is set out plainly in our guide to wall panels and soundproofing: they soften echo inside the room; they are not soundproofing between rooms, and no honest installer will sell them as that.

A full slat headboard wall, with no padded centre, is the sharper, more architectural version of the same idea — beautiful, but be honest with yourself: if you read in bed every night, you will want the cushion.

Idea 3: Stone-look and travertine for a calm, grown-up bedroom

A continuous stone-look or travertine section behind the bed gives the bedroom the quiet of a good hotel: one calm surface, warm veining, nothing competing with the bedding. It works best as the full wall in a primary suite, or as a wide centre section with slat or padded sides where the bed meets the wall. Travertine-look is the softer member of the family — warm beige movement that pairs easily with linen, light oak and black or brass lamp hardware. Stone-look is a hard surface, so in a headboard wall it is usually combined with the padded centre at leaning height: calm to look at, soft to lean on.

Idea 4: Metal accents — the line the lamplight finds

Thin metal strips between sections are a small detail that changes a bedroom wall at night. Under warm bedside lamps, a slim brass- or bronze-tone line catches the light exactly where the padded centre meets the wood, and ties the wall to the lamp bases and drawer handles already in the room. As in every room, metal is the jewellery, not the outfit: one or two lines, never a full metal wall behind a bed.

Florida humidity: what a bedroom wall has to survive

A bedroom panel wall in South Florida lives in air conditioning, closed windows and long humid summers — and the wall behind a bed is also the wall two people breathe against all night. Two honest points:

  • Material choice matters more than marketing. How each panel family behaves in Florida humidity — and which materials we steer away from damp-prone walls — is covered in our guide to which panel material survives Florida humidity. A dry, interior bedroom wall is the easy case; a bedroom wall that shares a side with a bathroom shower is not, and should be assessed before materials are chosen.
  • Air questions deserve a straight answer. If you are sensitive to smells or new-material odours in a sleeping space, read our guide to whether wall panels smell or off-gas before you order — and plan installation so the room is ventilated and slept in after, not the same hour the work ends.

Care: living with a headboard panel wall

A bedroom panel wall is low-maintenance, not no-maintenance:

  • Padded sections: vacuum with a soft brush attachment and blot spills promptly with a lightly damp cloth; do not soak upholstery or use solvent cleaners.
  • Wood slat sections: dust along the slats with a dry or barely damp microfibre cloth; the felt backing needs nothing more than the same dusting.
  • Stone-look sections: wipe with a soft cloth and mild, non-abrasive cleaner.
  • Metal strips: dry cloth; fingerprints polish off, abrasives scratch.

The full routine, material by material, is in our guide to how to clean and maintain wall panels. One bedroom-specific habit: pull the bed a few inches forward twice a year and vacuum behind it — a panel wall removes the dusty gap behind a freestanding headboard, but the floor strip behind the bed still collects dust.

Mistakes that ruin a headboard wall

  • Stopping at the bed's width. A composition exactly as wide as the mattress looks cut off. Extending the design at least to the outer edges of the nightstands — or wall to wall — is what makes it read as architecture.
  • All hard surfaces behind the pillows. A full stone or slat wall with nothing soft at leaning height looks impressive and lives badly for anyone who reads in bed.
  • Ignoring the lamps and sockets. Nightstand lamps, reading lights, sockets and switches live on this wall. Their positions are part of the design, planned before panels are cut — not discovered on installation day. The same planning logic applies to wiring generally; see our guide to wall panels behind a TV with wires.
  • One material, bought from one photo. A single-material wall chosen from a showroom image often fights the room's actual light. A two- or three-material mix fitted to your wall — and previewed on your own photo first — is the safer route.
  • Promising yourself soundproofing. Padded and slat panels soften the room's own echo. They will not silence a neighbour, a road or a snoring dog, and a design sold on that promise disappoints.

More general accent-wall errors are collected in our guide to the biggest mistakes with accent walls.

What a bedroom headboard wall costs in South Florida

These are our own published studio tiers, stated the same way as on our site. They are preliminary — every wall is quoted exactly once its size and materials are known — but they are real starting points, not teaser numbers.

TierPriceWhat it means
Stock designfrom $850A ready design from our catalogue, in its standard composition
Fitted to your wallusually $2,200–$2,700The design adapted to your wall's size, openings and layout — the tier most bedroom projects land in
Full custom turnkeyfrom $9,999A one-off design built for your room from scratch, handled end to end

What moves a bedroom quote inside — or beyond — those tiers:

  • Wall size and bed size. A king bed on a wide primary-suite wall needs more sections than a queen on a compact wall; width beyond the nightstands is the first driver.
  • Material family and mix. Padded sections (ND610–624), real-veneer slats, stone-look continuous sheets, travertine and metal accents sit at different material costs, and a two- or three-material mix prices differently from a single-material wall.
  • Lighting and electrics. Planned reading lights, LED lines, and socket and switch positions add design and installation work — and are far cheaper to plan now than to retrofit.
  • Wall preparation. A flat, sound wall is a panel-ready wall. Old damage, uneven areas or layers that must come off first add preparation time; whether panels can go over a problem wall at all is covered in our guide to panels over damaged or uneven walls.

For the wider picture of how panel pricing is built in this region, see our original breakdown of wall panel installation cost in South Florida. And the comparison most bedroom clients actually make: a good freestanding headboard costs less today, but it covers only the bed's width and gives you nothing to lean on above it — the panel wall is chosen for the next decade, not the next season. The long-term maths against repainting and wallpaper is set out in wall panels vs wallpaper vs paint.

How the process actually goes

  1. You send a photo. Through our wall form — one straight photo of the wall behind your bed is enough to start.
  2. You get a free AI preview. Your own wall, with panels — so the conversation is about your bedroom, not a showroom photo.
  3. The design is fitted. The padded centre, side materials, lamp and socket positions are adjusted to your wall, your bed size and your budget tier.
  4. Installation day. One accent wall typically takes about a day to install. The sequence of a normal installation, hour by hour, is described in our installation timeline guide.
  5. You sleep in a finished room. No renovation dust saga, no bedroom out of use for a week — the bed goes back the same evening, against a new wall.

Which idea fits your bedroom?

  • You read or watch in bed every night → start with a deep padded centre (ND610 or ND614) at leaning height, slat sides.
  • Your primary suite should feel like a calm hotel → travertine or stone-look centre, padded section at pillow height, thin metal lines.
  • Your bedroom echoes on hard floors → slat sections with felt backing, plus a padded centre to soften the room further.
  • Your wall is narrow and the room is small → slim padded profiles (ND612, ND618 or ND623) wall to wall — softness without visual weight.
  • You are not sure at all → that is exactly what the free preview is for. One photo settles more arguments than an hour of scrolling other people's bedrooms.

We install across Broward County — including Fort Lauderdale, Hollywood, Hallandale Beach, Pembroke Pines and Coral Springs — and in Boca Raton.

FAQ

Do I still need a headboard if I install wall panels behind the bed? No — that is the point of the design. The padded centre at leaning height does the headboard's job, across the full composition width instead of only the mattress width. A bed frame without a headboard, or with a low simple one, pairs best with a panel wall.

How wide should a headboard panel wall be? At minimum, to the outer edges of the nightstands. Wall to wall is the most finished look and the usual choice in primary suites. A composition that stops exactly at the mattress edge is the most common design mistake we are asked to fix.

Are padded wall panels comfortable to lean against? Yes, when the depth is chosen for it: the deep sections of the Padded Panels range (ND610 at 1.77″ and ND614 at 2.15″) are the lean-back choice; the slim 0.4″ profiles are a tailored look first and a cushion second. The preview and design stage is where that trade-off is settled for your bed.

Will panels make my bedroom quieter? Softer, yes — quieter from outside noise, no. Padded sections and felt-backed slats reduce echo inside the room, which makes it feel calmer at night. They are not soundproofing between rooms.

How long does installation take, and where do we sleep that night? One accent wall typically takes about a day, and the bedroom is back in use the same evening. Ventilating the room after installation is sensible before sleeping in it.

Can panels go on the wall if it is uneven or damaged? Sometimes, after preparation — and sometimes the honest answer is to repair the wall first. Send a photo through our wall form and the assessment comes before any quote.

TL;DR (WallPanels Studio data)

The best bedroom headboard wall panels are chosen for comfort first: a padded centre behind the pillows — from the Padded Panels range ND610–624, with depths from 0.4″ tailored profiles to 2.15″ deep cushion sections — framed by wood slat for warmth and softer sound, calm stone-look or travertine, and thin metal accents the lamplight can find. The composition should run at least to the outer edges of the nightstands, with lamp, socket and switch positions planned before anything is cut. WallPanels Studio's published tiers for South Florida are: stock design from $850; a design fitted to your wall usually $2,200–$2,700; full custom turnkey from $9,999. Prices are preliminary; the exact quote depends on wall size, material family and mix, lighting and electrics, and wall preparation. Installation of one accent wall typically takes about a day. A free AI preview from a photo of your wall comes before any commitment.

Free design consultation — send a photo of your wall through our wall form and see it with panels (AI preview). Mention your bed size — queen or king — and whether you read in bed; the padded depth and the mix will be fitted around both.

Sources: WallPanels Studio published price tiers as listed on wallpanels.solomiagroup.com (checked 24–25 October 2026): stock design from $850; fitted to your wall usually $2,200–$2,700; full custom turnkey from $9,999 — all stated as preliminary, with the exact quote depending on wall size and materials. Padded Panels range and dimensions (ND610–624) as listed in the studio's panel rotation and on the site (checked October 2026). Search demand for this topic: Google Autosuggest cluster for "headboard wall panels" / "wall panels behind bed" (topic research, 24 October 2026). No client reviews, project addresses or third-party price statistics are stated in this article.

Illustration: AI-generated concept image — for illustration, not a photo of our real work.

← Back to Blog

Blog

Kitchen Wall Panels: 🍳 A Backsplash and Accent Wall Without a Single Grout Line

A panel backsplash has no grout lines at all: large smooth sheets cover the cooking wall, splashes wipe off in one pass, and the accent wall beside it can mix stone-look and concrete-look panels. Studio tiers from $850, $2,200–$2,700 fitted, from $9,999 custom. Send a photo of your wall through our wall form and see it with panels in a free AI preview.

Short answer (WallPanels Studio data): Can a kitchen backsplash really work without grout? Yes — that is exactly what large-format kitchen wall panels are for. A backsplash zone is covered with smooth, full-height sheets instead of small tiles, so there are no grout lines to absorb tomato sauce, oil and steam. Splashes sit on the surface and wipe off in one pass. The one honest limit is heat: directly behind a gas burner, the panel manufacturer's heat clearance rules decide — in that narrow zone we specify a heat-rated panel or a metal/stone section, never a standard decorative sheet. Our published studio tiers: stock design from $850; fitted to your wall usually $2,200–$2,700; full custom turnkey from $9,999 — preliminary tiers, exact quote depends on wall size and materials. See your own kitchen first: send a photo through our wall form for a free AI preview.

Why grout is the part of the kitchen everyone quietly hates

Nobody complains about their tiles. They complain about the lines between them. Grout is porous, so every splash of sauce, every puff of frying oil and every week of steam slowly soaks in. The tile still wipes clean; the grid around it turns gray, then yellow, then a weekend project with a brush and bleach. In a South Florida kitchen that cooks daily, the backsplash is the highest-splash wall in the house — and it is traditionally finished with the most seams per square foot.

Panels remove the grid. One smooth sheet where dozens of tiles and metres of grout used to be. That is the whole idea, and it is why the comparison in our guide to wall panels vs tile for kitchen and bathroom keeps coming back to maintenance, not just looks.

How a panel backsplash is actually built

A kitchen panel wall is two zones with two different jobs:

1. The cooking zone (backsplash proper). Behind the sink and stove, large smooth sheets — glossy stone-look is the classic choice — are measured, cut with a fine-tooth saw, bonded with adhesive applied in a zig-zag, and pressed from the centre outward so no air is trapped. Seams between sheets are minimal and finished with silicone, not grout. There is nothing porous for a stain to soak into, which is why a sauce splash is a one-wipe event instead of a scrubbing session. Day-to-day care is covered in our guide to cleaning and maintaining wall panels.

2. The accent zone (the rest of the kitchen wall). Away from direct heat, the design can open up: matte concrete-look beside the glossy cooking zone, warm wood tones near the dining side, even a mirror or metal accent. Mixing two finishes — gloss where the splashes land, matte where the light rests — is what makes a panel kitchen look designed rather than simply covered. Room-by-room examples beyond the kitchen are in our living room wall panels guide.

The honest part: heat behind the stove

This is the question a serious installer should answer before quoting, not after installing. Decorative PVC and composite panels have temperature limits, and a gas burner's open flame throws real heat at the wall behind it. The rules we work by:

  • Electric and induction cooktops radiate far less heat at the wall; standard backsplash panels are normally within their rated range, with the manufacturer's clearance respected.
  • Gas cooktops get a heat-rated solution in the direct flame zone: a stainless or stone section behind the burners, with panels continuing on either side. The look stays seamless; the material changes where the physics demands it.
  • No panel is glued over an already heat-damaged or greasy wall without preparation — adhesion fails on grease, and the wall prep is part of the job, as with any wall in our installation timeline guide.

If a quote for a gas-stove backsplash never mentions heat at all, that is the quote to walk away from.

Florida kitchens: humidity, steam and sunlight

South Florida adds its own three stresses. Steam from daily cooking and year-round humidity reward non-porous surfaces — there is no grout to feed mildew, the same logic as in our guide to wall panels in the bathroom: mold and moisture. Strong sun through a kitchen window argues for matte or satin finishes beside the glossy zone, because high gloss mirrors bright windows. And because panels go up dry — no wet mortar, no curing time — a typical backsplash-plus-accent wall is a one-day job, not a week of kitchen exile.

The mistakes that ruin a panel backsplash

  1. Standard panels in the gas flame zone. Covered above — the one mistake with safety attached.
  2. Gloss everywhere. An all-gloss kitchen reflects every window and downlight twice. Gloss earns its place over the cooking zone; matte finishes calm the rest.
  3. Seams planned over the sink's splash centre. Sheet layout is planned so joints fall where splashes don't.
  4. Outlets and fixtures treated as surprises. Cut-outs are measured before the sheets arrive, not discovered on the day — planning discipline identical to a TV wall's cable plan.

What it costs, honestly

A kitchen panel wall follows the same published studio tiers as any accent wall: stock design from $850; a design fitted to your wall usually $2,200–$2,700; full custom turnkey from $9,999. What moves a specific quote is wall size, the panel mix, any heat-rated section and the number of cut-outs — the full picture is in our guide to how much wall panel installation costs in South Florida. We do not publish a separate "backsplash price," because the wall, planned properly, is the price.

See your kitchen without grout — before you commit

Send a photo through our wall form and see your own kitchen wall with a smooth panel backsplash and a mixed accent wall — glossy stone-look, concrete-look, or your own combination — in a free AI preview. Check the seams, the shine and the heat zone on your own wall first; then decide.

WallPanels Studio — decorative wall panel design and installation across Broward County and Boca Raton, South Florida. AI concept imagery in this article is visualisation, not photography of completed work.

← Back to Blog

Blog

Wall Panels vs Tile: Which Is Cheaper — and Actually Better — for Your Kitchen and Bathroom? 🔥

For a kitchen backsplash or a bathroom accent wall outside the shower, wall panels usually win on total cost and time: no demolition, no wet tile work, no grout to seal or scrub, one wall in about a day. Tile still wins inside the shower stall. Studio tiers from $850, $2,200–$2,700 fitted, from $9,999 custom. Send a photo of your wall through our wall form and see it with panels in a free AI preview.

Short answer (WallPanels Studio data): Are wall panels cheaper than tile for a kitchen or bathroom wall? Usually yes on total cost — and almost always faster. A panel wall skips demolition, backer board, thinset, grout and sealing, and one accent wall typically installs in about a day; a comparable tiled wall is a multi-day wet job, and its real price is materials plus several days of skilled labour plus grout maintenance for years after. Panels are the better choice for kitchen backsplashes and bathroom accent walls outside the shower. Tile still wins inside the shower stall itself, where constant direct spray is exactly what tile was built for — we say that honestly, because the right answer depends on which wall you mean. Our published studio tiers: stock design from $850; fitted to your wall usually $2,200–$2,700; full custom turnkey from $9,999 — preliminary tiers, exact quote depends on wall size and materials. See your wall both ways before you decide: send a photo through our wall form for a free AI preview.

The question behind the question

When South Florida homeowners ask "are panels cheaper than tile?", they usually mean one of two walls: a kitchen backsplash that is tired, greasy and hard to clean, or a bathroom wall that looks flat and dated. Almost nobody is asking about the inside of a shower stall — and that distinction decides the whole answer. In Fort Lauderdale, Hollywood, Hallandale Beach, Davie, Weston and Boca Raton, the honest comparison is not "panels good, tile bad." It is: which material wins on this specific wall, in this specific room, with Florida humidity in the air?

Where the money actually goes: tile

A tiled wall's shelf price is the smallest part of its cost. The full bill is a chain:

  • Demolition and prep — old tile or damaged drywall comes off, the surface is rebuilt flat, and in wet zones a backer board and waterproofing layer go in first.
  • Materials in layers — tile itself, thinset, grout, sealant, trim pieces. Each layer is cheap; together they add up.
  • Skilled labour over several days — setting, cutting, grouting and sealing cannot happen in one visit; the wall is a construction site between stages.
  • Grout, forever — grout is porous. It darkens, it needs sealing, and in a Florida bathroom it is the first place mildew shows. Cleaning and re-sealing grout is a recurring cost in time or money for the life of the wall.

None of that makes tile a bad product. It makes tile an expensive process — priced honestly only when the whole chain is counted.

Where the money goes: panels

A panel wall is a much shorter chain:

  • No demolition in most cases — panels install over a sound, flat existing wall, which is why our guide to installing wall panels over damaged or uneven walls starts with checking the wall, not tearing it out.
  • The material is the finish — a glossy stone-look or travertine-look panel is surface, colour and texture in one sheet; there is no grout layer and nothing to seal.
  • About a day of installation — measure, cut, fix, trim. The sequence is in our installation timeline guide, and it is why a kitchen can be cooking again the same evening.
  • Wipe-clean upkeep — a smooth panel wipes down with a cloth; there are no grout lines to scrub. Day-to-day care is covered in our guide to cleaning and maintaining wall panels.

At WallPanels Studio the published tiers frame what that shorter chain costs: stock design from $850; a design fitted to your wall usually $2,200–$2,700; full custom turnkey from $9,999. What moves a quote inside those tiers is wall size, the number of materials in the mix and detailing such as lighting — the full picture is in our guide to how much wall panel installation costs in South Florida.

Head to head, wall by wall

Kitchen backsplash — panels win. The backsplash takes splashes and steam, not standing water. A glossy stone-look panel gives you one smooth, wipeable surface with no grout lines behind the stove collecting grease — and it installs in a day, not a week of kitchen shutdown.

Bathroom accent wall (behind the vanity, the tub surround wall outside the shower) — panels win. This is the wall you look at, not the wall that gets hosed down. Stone-look and travertine-look panels bring the spa feeling without masonry, and in Florida humidity the absence of grout removes the weakest link. Which panel families behave best in this climate is set out in our guide to which wall panel material survives Florida humidity, and the moisture questions are answered honestly in our guide to wall panels in the bathroom: mold and moisture.

Inside the shower stall — tile wins, honestly. Constant direct spray, standing water at the joints and decades of daily soaking are tile's home ground, with properly built waterproofing under it. We do not sell panels as a shower-stall lining, and you should be suspicious of anyone who sells any single product as the answer to every wall.

A full-height feature wall in either room — panels win on drama per dollar. Tile at feature-wall scale multiplies every cost above; panels were sized for exactly this job, including mixed compositions — travertine-look beside glossy stone, for example — of the kind our living room wall panels guide builds room by room.

The five-year test

Cheaper on day one is not the same as cheaper over five years, so run both walls forward. The tiled wall asks for grout sealing, grout scrubbing and, in humid bathrooms, eventual grout repair where it cracks or stains. The panel wall asks for a cloth and mild cleaner — and if a section is ever damaged, a panel section can be replaced without demolishing the wall, a question we cover in can wall panels be removed without damaging the wall. Durability of the panel families themselves is in our guide to whether PVC wall panels are durable and how long they last. Counted over five years, the panel wall's lead usually grows rather than shrinks.

How to decide for your wall

  1. Name the wall honestly. Backsplash or accent wall → panels are the strong default. Inside the shower → tile.
  2. Count the whole chain, not the shelf price. Demolition, layers, days of labour and years of grout care are all part of tile's price.
  3. Count your days. If the kitchen or bathroom cannot be a construction site for most of a week, a one-day panel install settles it.
  4. Stay honest about humidity. Choose panel families rated for the room, and keep the shower stall to tile and proper waterproofing.
  5. See it before you spend. A backsplash looks different in a photo of your own kitchen — your cabinets, your light — than in any showroom.

See your kitchen or bathroom wall with panels — free

Send a photo through our wall form and see your own wall with panels in a free AI preview — glossy stone, travertine-look, or a mix — before anything is ordered or paid for. If the honest answer for your wall turns out to be tile, the preview costs you nothing and you will know your wall better either way.

WallPanels Studio — decorative wall panel design and installation across Broward County and Boca Raton, South Florida. AI concept imagery in this article is visualisation, not photography of completed work.

← Back to Blog

Blog

Entryway & Hallway Wall Panels: 🚪 The First-Impression Wall Your Guests Actually Remember

The entryway wall takes more hits than any wall in the house — bags, shoes, keys, deliveries — and flat paint shows every one. Panels give that wall a wipe-clean, textured surface that protects the rub zone and makes a narrow hall feel wider. Studio tiers from $850, $2,200–$2,700 fitted, from $9,999 custom. Send a photo of your wall through our wall form and see it with panels in a free AI preview.

Short answer (WallPanels Studio data): What is the best finish for an entryway or hallway wall? A wipe-clean decorative panel surface — not another coat of flat paint. The entryway is the highest-traffic wall in the home: every bag swing, shoe kick and key scratch lands on the same narrow band, and flat paint records all of it. Large-format panels (travertine-look, wood, slat, 3D textures) cover that rub zone with a surface that wipes clean in seconds, while their texture and vertical lines make a narrow hall read wider and calmer. A typical entryway accent wall is a one-day installation. Our published studio tiers: stock design from $850; fitted to your wall usually $2,200–$2,700; full custom turnkey from $9,999 — preliminary tiers, exact quote depends on wall size and materials. See your own entryway first: send a photo through our wall form for a free AI preview.

The wall nobody chooses — and everybody sees

Homeowners plan the living room, the TV wall, the bedroom. The entryway gets whatever paint was left over. Yet it is the first wall a guest reads and the last one you see leaving — and it works harder than any other wall in the house. Bags swing against it at hip height. Shoes kick it. Wet umbrellas, delivery boxes, stroller wheels and dog leads all land on the same square metres. Within a year or two, that band of wall is a grey archive of scuffs, no matter how good the paint was.

That is why the entryway question is different from the living room wall panels question. In the living room, panels are mostly about looks. In the hallway, they are about looks and survival.

The one-week wipe test

Here is the honest test we suggest before choosing anything. Clean one corner of your entryway wall properly — sponge, mild cleaner, ten minutes. Then watch it for a week of normal life. In most busy households the marks are back within days: a bag corner here, a shoe rubber streak there. If the clean patch does not survive a week, the problem is not your cleaning. The wall's surface is simply the wrong material for the traffic it carries, and repainting restarts the same clock.

Panels break the cycle because the surface itself changes: smooth stone-look and wood panels are non-porous at the face, so a scuff sits on the panel instead of soaking into paint, and one wipe with a damp cloth removes it. Day-to-day care is the same routine as in our guide to cleaning and maintaining wall panels — the difference is that in the hallway you will actually need it weekly, and it takes seconds.

Which panels work in an entryway — and why the mix matters

An entryway wall has two zones with two different jobs, and the designs that work best treat them differently:

1. The rub zone (floor to roughly hip height, and around the door swing). This band takes the physical hits. Dense, smooth-faced panels earn their place here: travertine-look and other stone-look sheets, wood panels, and glossy or matte stone finishes. They resist scuffing visually, too — a textured beige travertine hides a faint mark far better than flat white paint ever will.

2. The impression zone (eye level and above). This is where the first impression is made. Vertical slat panels stretch a low hall upward; a 3D wave or textured centre panel gives the eye something to land on; a mirror section doubles the light in the windowless halls most South Florida homes have. Mixing the two zones — a hard-wearing stone-look below and beside the door, warmth or texture at eye level — is what makes an entryway look designed rather than armoured.

Two honest limits. First, panels are not armour: a bicycle pedal dragged hard along any surface can mark it, and the right answer for a true impact corner is a corner profile, not a hope. Second, in a very narrow hall, thick 3D textures eat a little visual width — slim panels (most of our hallway mixes are low-profile) keep the passage feeling open, the same planning logic as a bedroom headboard wall, where the panel must never crowd the room.

Light: the hallway problem panels quietly solve

Most hallways in Broward and Boca Raton homes have no window at all. Flat paint in a windowless hall does nothing with the little light available — it just shows it as grey. Texture changes that. A slat wall turns one ceiling light into a rhythm of thin shadows; a stone-look with a satin face reflects a soft sheen down the length of the hall; a mirror panel opposite the living-room opening borrows real daylight from the next room. In our entryway installs, the "the hall feels wider" comment almost always comes from light behaviour, not from the colour — a point we also make in our guide to wall panel LED lighting, since a slim LED line along a hallway panel run is the single cheapest way to make the whole passage feel intentional at night.

Florida specifics: humidity at the front door

The entryway is also the house's humidity gate. Every door opening in a South Florida summer lets in a wave of wet air, and the hallway wall is the first surface it meets — often with air-conditioning condensation cycling on the same wall. Non-porous panel faces do not feed mildew the way a scuffed, micro-cracked paint film can, which is the same reasoning as our guide to wall panels in the bathroom: mold and moisture, applied to the front of the house. The wall behind the panels still needs to start dry and sound; panels over an already damp or damaged wall are a mistake we cover in panels over damaged walls.

The mistakes that ruin an entryway wall

  1. Repainting the rub zone and calling it fixed. The one-week wipe test exists precisely because paint loses this fight on a schedule.
  2. One dark colour in a windowless hall. Dark panels can look superb — with light planned for them. Without it, a narrow hall becomes a tunnel.
  3. Thick, deep-relief panels in the tightest passage. Slim profiles keep the width; save deep 3D for the wider impression zone or the living room.
  4. Ignoring the door swing and the switch plates. Panel layout is planned around the door's full swing, outlets and switches — cut-outs measured before the sheets arrive, exactly as with a TV wall's cable plan.
  5. Forgetting the skirting line. The bottom 15 cm takes the shoe kicks; the panel run and its trim should be detailed for it, not stopped hopefully above it.

What it costs, honestly

An entryway or hallway wall follows the same published studio tiers as any accent wall: stock design from $850; a design fitted to your wall usually $2,200–$2,700; full custom turnkey from $9,999. Hallways are often smaller walls, which is why they frequently land at the lower end — but the mix, the number of cut-outs and any lighting move the exact quote, as detailed in our guide to how much wall panel installation costs in South Florida. Most single entryway walls install in one day, on the pattern in our installation timeline guide.

See your entryway first — before you commit

Send a photo through our wall form and see your own hallway wall with a panel mix — travertine-look and wood, slats, or your own combination — in a free AI preview. Check the rub zone, the light and the door swing on your own wall first; then decide.

WallPanels Studio — decorative wall panel design and installation across Broward County and Boca Raton, South Florida. AI concept imagery in this article is visualisation, not photography of completed work.

← Back to Blog

Blog

Can You Mount a TV on Wall Panels? 📺 The Safe Way to Build a TV Wall That Holds

Yes, you can mount a TV on wall panels — safely, if the bracket anchors through the panels into studs or blocking, and cables are planned before the panels go up. The panel is the finish, not the structure. Studio tiers from $850, $2,200–$2,700 fitted, from $9,999 custom. Send a photo of your wall through our wall form and see it with panels in a free AI preview.

Short answer (WallPanels Studio data): Can you mount a TV on wall panels? Yes — and it is done every week — but the TV never hangs on the panel itself. The bracket is fixed through the panel into the wall studs, or into solid blocking installed behind the panel line before the panels go up. Cables run in a planned channel behind the panels, so no wires dangle and no panel has to be cut open later. Get those two things right — structure first, cables before panels — and a panel TV wall is as solid as any other TV wall, and much better looking. Our published studio tiers: stock design from $850; fitted to your wall usually $2,200–$2,700; full custom turnkey from $9,999 — preliminary tiers, exact quote depends on wall size and materials. See your own TV wall before you commit: send a photo through our wall form for a free AI preview.

The fear behind the question

The question usually comes with a picture in mind: a heavy 65- or 75-inch screen, a beautiful new panel wall — and the screen slowly pulling the panel off the wall at 2 a.m. That fear is healthy, because it points at the real rule: a decorative panel is a finish, not a structure. Slat panels, stone-look sheets and textile panels are made to look good and go up fast; none of them is designed to carry a television. The good news is that they never have to. Behind every panel wall there is still a real wall — drywall over studs — and that is what carries the TV.

The three safe ways a TV goes on a panel wall

1. Through the panel, into the studs (the standard way). The TV bracket is positioned so its lag bolts pass through the panel and bite into the wooden or metal studs behind it. The panel is drilled cleanly at the bolt points — a small, hidden hole behind the bracket — and the load travels into the framing, exactly as it would on a plain wall. This is how most panel TV walls are built, including the ones in our guide to wall panels behind a TV, with wires.

2. Blocking built in before the panels. When the perfect TV position falls between studs, or the screen is extra large, a section of plywood blocking is fixed between the studs first, the wall is closed, and then the panels go over it. The bracket bolts then anchor into solid wood wherever they land. Blocking costs a little planning on day one and removes every doubt afterwards — it is the professional answer for big screens and off-centre layouts.

3. Panels around a recessed mount niche. For a fully flush look, the TV zone is planned as a shallow recess: the mount sits in the niche, the screen sits almost flat against the panel faces around it, and a soft LED glow can be added behind the screen — the lighting approach is covered in our guide to adding LED lighting to wall panels.

What is not on this list: screwing a bracket into the panel alone, or into drywall anchors with no stud behind them, and hoping. If an installer suggests that, the honest answer is to find another installer.

Cables: decided before the first panel, not after

A TV wall fails visually long before it fails structurally — with a bundle of cables hanging under the screen. On a panel wall the cable plan is part of the design, not an afterthought:

  • A channel or conduit behind the panels carries power and HDMI from the screen down to the console or a low outlet, so the finished wall shows no wires at all.
  • Outlet position is set during planning — behind the TV or inside the console zone — never left to wherever the old outlet happened to be.
  • Panel layout respects the channel: slats and sheets are cut around the planned path, which is one more reason the TV position is fixed before installation day, in the sequence set out in our installation timeline guide.

Which panels work best behind a TV?

Almost every family can surround a TV; the choice is about look and light, not strength — the studs do the holding either way.

  • Wood slat panels are the classic TV wall: the vertical rhythm hides the screen's edges, and the dark felt backing makes a black screen look intentional, not parked. Room-by-room examples are in our living room wall panels guide.
  • Stone-look and continuous panels give a calm, gallery feel and reflect very little — good for bright Florida rooms with big windows.
  • Textile and padded panels soften the wall around the screen and take the echo out of movie dialogue — a comfort point, not a soundproofing claim, as our guide to whether wall panels reduce noise explains honestly.
  • Glossy panels look dramatic in the evening but can mirror windows and lamps opposite; in a sun-filled room, matte and satin finishes are usually the kinder choice — the material comparison is in PVC vs wood vs MDF wall panels.

Size, height and the mistakes that actually happen

The failures we hear about are rarely dramatic; they are planning shortcuts:

  1. TV position chosen after the panels. Then the bracket lands between studs and the cable path crosses a seam. Position first, panels second.
  2. Screen mounted too high. The centre of the screen should sit near seated eye level; a panel wall's symmetry should be designed around that height, not the other way round.
  3. No service access. A channel you cannot reach means a panel must come off to change a cable. Our guide to whether wall panels can be removed without damaging the wall covers how sections come away — but a reachable channel is better than any removal.
  4. Heat and sun ignored. A TV over a fireplace or in direct Florida sun is a question for the TV manual first and the panel second; neither product enjoys being baked.

What it costs, honestly

A panel TV wall follows the same published studio tiers as any accent wall: stock design from $850; a design fitted to your wall usually $2,200–$2,700; full custom turnkey from $9,999. What moves a specific quote is wall size, the panel mix, blocking or a recessed niche, LED work and the cable plan — the full cost picture is in our guide to how much wall panel installation costs in South Florida. We do not invent a separate "TV wall price," because there isn't one: there is a wall, planned properly.

See your TV wall before anything is drilled

Send a photo through our wall form and see your own living room wall with panels and your TV in place — slats, stone-look, or a mix — in a free AI preview. Check the height, the symmetry and the cable-free finish on your own wall first; then decide.

WallPanels Studio — decorative wall panel design and installation across Broward County and Boca Raton, South Florida. AI concept imagery in this article is visualisation, not photography of completed work.

← Back to Blog

Blog

Home Office Wall Panels: 💻 The Zoom Backdrop That Makes You Look Expensive

Your office wall is on camera more than you are. Flat paint blows out bright, echoes, and says nothing. Panels give your Zoom backdrop vertical lines that frame your face, texture that holds light softly, and a calmer sound — without soundproofing promises. Studio tiers from $850, $2,200–$2,700 fitted, from $9,999 custom. Send a photo of your wall through our wall form and see it with panels in a free AI preview.

Short answer (WallPanels Studio data): What is the best wall finish behind a desk for video calls? A matte, textured panel wall — vertical slats at the sides and a calm stone-look or soft centre panel behind you. Flat paint is the worst common backdrop: it reflects light unevenly, blows out white under a webcam, and gives the camera nothing to focus the scene around. A panel mix adds vertical lines that frame your face, a non-glossy surface that keeps light soft and even, and enough texture that the wall reads as a designed office, not a spare bedroom. A typical home-office accent wall is a one-day installation. Our published studio tiers: stock design from $850; fitted to your wall usually $2,200–$2,700; full custom turnkey from $9,999 — preliminary tiers, exact quote depends on wall size and materials. See your own office first: send a photo through our wall form for a free AI preview.

The wall that is on camera more than you are

Count your week honestly. Client calls, team meetings, interviews, webinars — for hours a day, the rectangle behind your shoulders is part of how people judge your work. A bare painted wall in that rectangle does three unhelpful things at once. It blows out: most webcams expose for your face, so a light flat wall behind you goes chalk-white and featureless. It echoes: a hard, flat surface bounces your voice straight back into the microphone. And it says nothing: no line, no texture, no signal that this is a considered workspace — the same problem, in a different room, as a flat living room wall that nobody remembers.

That is why the home office question is not really "which panels look nice?" It is "which wall makes me look and sound composed on camera, every day, in Florida light?"

The camera test: three walls, one desk

Here is the test we run with clients, and the one you can run yourself before choosing anything. Sit at your desk at your usual call time. Take three screenshots of yourself on camera: one as you are now, one with the strongest light in the room on, one in late-afternoon light. Most people see the same three faults in all three shots — a flat glare patch behind one shoulder, a shadow line where the wall meets the ceiling, and a background so plain the eye keeps drifting to the door or the closet.

Panels fix the first two faults mechanically, not cosmetically. A matte or satin panel face breaks the glare patch into soft, even light. Vertical slat lines give the frame structure, so the camera — and the viewer's eye — settles on you instead of wandering. This is the same light behaviour we describe for hallways in our entryway and hallway wall panels guide: texture does the work that colour alone cannot.

Which panels work on camera — and why the mix matters

A video-call backdrop has two zones with two different jobs, and the mixes that work best treat them differently:

1. The centre zone (directly behind you). This is the surface the camera sees most. Calm, low-contrast finishes earn their place here: travertine-look and other matte stone-look panels, soft padded panels, fine textile-look panels. They hold light evenly, never compete with your face, and hide the flat glare that paint produces. High-gloss and mirror finishes are the honest exception — behind a desk they reflect your window, your monitor and your ceiling light straight into the camera, which is why we keep them for other rooms, as in our kitchen wall panels guide.

2. The frame zone (the sides of the wall, at the edge of the camera frame). This is where vertical structure belongs. Wood slat panels on one or both sides draw two quiet vertical lines that frame you like a portrait — the effect clients describe as "it looks like a studio set". A single slat side can be enough in a narrow office; symmetry is a choice, not a rule.

Two honest limits. First, panels are a backdrop, not a broadcast studio: a ring light or a shaded lamp in front of you still matters more than any wall, and no panel fixes a camera pointed up at the ceiling. Second, very dark, very busy patterns directly behind your head can fight with your face on low-resolution calls — keep the centre calm and put the drama at the sides.

Sound: calmer, not soundproof

Home office calls expose echo fast, because the desk wall is usually the closest hard surface to the microphone. Textured and padded panel faces scatter and soften reflections, so your voice sounds less like it is coming from a bathroom. That is a real, noticeable improvement — and it is not soundproofing. Panels on one wall will not stop a dog barking in the next room or a partner's call through the door. We make exactly the same distinction in our guide to the soundproofing myth: panels improve the acoustics inside the room; they do not seal the room off. If true isolation is the goal, that is a construction conversation, not a panel choice.

Florida specifics: glare, humidity and the spare-room problem

Most South Florida home offices are converted bedrooms or dens, and they share two local traits. The first is hard, bright daylight for most of the year: a south- or west-facing window throws a glare band across a painted wall for hours, and a matte panel face is one of the few finishes that stays calm under it. Planned LED lighting in wall panels — a slim warm line at the panel edge — also gives you an even, camera-friendly glow for evening calls without a lamp in shot.

The second is humidity cycling: the office door opens and closes all day, air-conditioning runs, then stops at night. Non-porous panel faces tolerate that cycling without the micro-cracking and mildew risk of a tired paint film, the same reasoning as our guide to wall panels in the bathroom: mold and moisture. The wall behind must still start dry and sound; panels over a damp or damaged wall are a mistake we cover in panels over damaged walls.

The mistakes that ruin an office wall

  1. Gloss or mirror directly behind the desk. It reflects the window and the monitor into the camera. Keep shine at the sides or in another room.
  2. One loud, busy pattern behind your head. On a compressed video call it vibrates. Calm centre, structure at the sides.
  3. Ignoring the cable and outlet plan. Monitor arms, chargers and a standing-desk cable run all meet this wall. Cut-outs and cable routes are planned before the sheets arrive, exactly as with a TV wall's cable plan.
  4. Covering the only wall and forgetting light. A panel wall plus the same bare ceiling bulb still looks flat. One warm side light changes the whole frame.
  5. Choosing by daylight alone. Check the wall at your latest regular call time — evening light is where cheap finishes show.

What it costs, honestly

A home office accent wall follows the same published studio tiers as any accent wall: stock design from $850; a design fitted to your wall usually $2,200–$2,700; full custom turnkey from $9,999. Office walls are often single, modest walls, which is why they frequently land at the lower end — but the mix, the number of cut-outs and any lighting move the exact quote, as detailed in our guide to how much wall panel installation costs in South Florida. Most single office walls install in one day, on the pattern in our installation timeline guide.

See your office first — before you commit

Send a photo through our wall form and see your own office wall with a panel mix — slats framing a calm stone-look centre, soft padded panels, or your own combination — in a free AI preview. Sit in your chair, check the frame the way your clients see it, then decide. If you are also planning the wall behind your bed, start with our bedroom headboard wall panels guide — the calm-centre rule is the same in both rooms.

WallPanels Studio — decorative wall panel design and installation across Broward County and Boca Raton, South Florida. AI concept imagery in this article is visualisation, not photography of completed work.

← Back to Blog

Blog

Fluted Panels vs Wood Slat Panels: 🪵 Same Stripes, Completely Different Wall

They look like cousins in photos and behave like strangers in a room. Fluted panels are one continuous grooved surface; wood slat panels are real individual slats on felt, with real gaps and real shadow. Which belongs on your wall depends on light, dust, moisture and curves — the honest side-by-side, with studio tiers from $850, $2,200–$2,700 fitted, from $9,999 custom. Send a photo of your wall through our wall form and see it with panels in a free AI preview.

Short answer (WallPanels Studio data): What is the difference between fluted panels and wood slat panels, and which should you choose? A fluted panel is one continuous sheet with rounded grooves milled across its face — the stripes are carved into a single surface. A wood slat panel is many individual narrow slats fixed side by side on a dark felt backing — the stripes are real separate battens with real gaps between them. Choose fluted for a softer, more continuous look, for stone-look and plaster-look finishes, and for gently curved walls and columns. Choose wood slats for real depth and shadow, warmer natural grain, and the felt backing that takes the edge off echo in a living room, bedroom or office. Both install as full-height sheets, typically in one day for a single accent wall. Our published studio tiers: stock design from $850; fitted to your wall usually $2,200–$2,700; full custom turnkey from $9,999 — preliminary tiers, exact quote depends on wall size and materials. See both on your own wall first: send a photo through our wall form for a free AI preview.

Why everyone confuses them

Scroll any design feed and the two finishes blur together: vertical stripes, warm light, a sofa underneath. Clients send us a photo and ask for "those slat things", and half the time the photo shows fluted board. The confusion is understandable — from across the room, both read as rhythm and shadow. The difference only appears when you stand close, touch the wall, live with the dust, or try to bend it around a corner. This guide separates them properly, the way we do when a client is choosing for a real room — the same side-by-side approach we used for PVC vs wood vs MDF wall panels.

How each one is actually built

Fluted panels. One sheet — MDF, PVC or a stone-look/plaster-look board — with a repeating pattern of narrow, rounded, concave grooves (the "flutes") running vertically across the whole face. There are no separate pieces and no gaps: your fingernail follows one continuous surface in and out of the grooves. Because the pattern is milled into the sheet, the rhythm is perfectly even from edge to edge, and the joints between sheets can be aligned so the stripes continue across the wall.

Wood slat panels. Individual narrow battens — real wood veneer or wood-look slats — fixed in a row onto a dark acoustic felt backing. Our slat sheets are typically about 2400 × 600 mm and roughly 22 mm thick overall: slat, gap, slat, gap, with the black or dark felt showing in every gap. The depth is not an illusion printed or milled into a surface; it is the real thickness of the wood standing off the wall.

That one construction difference drives everything else in this guide.

Light and shadow: soft stripes vs real depth

Fluted grooves catch light gently. The shadow inside each rounded groove is soft and shallow, so the wall reads calm and tailored — closer to fabric or carved plaster than to timber. It is the easier of the two to live with behind a screen or a bed, because nothing on the surface shouts.

Slat panels make hard, graphic shadow. Every gap is a dark line and every slat edge throws its own thin shadow, which is why slat walls change so much between morning and evening light — the same light-play we build living room panel walls around. In a dull, flat room that drama is exactly the point. In a small, already busy room it can be one pattern too many.

Sound: the felt is the difference

This is the point brochures blur, so let us be precise. The felt backing behind wood slats absorbs some of the sound energy that hits the wall and takes the sharp edge off echo and flutter in a hard room — voices on video meetings sound less "bathroom". Fluted panels, being one hard continuous surface, shape reflections with their grooves but absorb far less; the acoustic effect is mostly diffusion, not absorption.

Neither product is soundproofing. As we explain in our guide to the soundproofing myth, panels improve how a room sounds from inside; they do not stop sound passing to the next room. If echo is your main complaint — a home office, a media wall, a dining room where dinner conversation stacks up — slats on felt are the honest choice of the two. Our home office wall panels guide uses them as the frame for exactly this reason.

Dust, cleaning and real life

Grooves and gaps both collect dust; the question is how you get it out. A fluted wall wipes and vacuums as one surface — a soft brush attachment follows the grooves, and a damp cloth works on stone-look and PVC fluted boards. Slat walls need the brush to travel along each gap, and the felt itself cannot be wet-cleaned; it vacuums, it does not mop. In practice: fluted is the lower-maintenance face in a kitchen-adjacent or entryway setting, slats are fine in living rooms and bedrooms where a weekly brush pass is realistic. Our general care rules are in how to clean and maintain wall panels.

Moisture and Florida humidity

South Florida air sorts materials quickly. Wood and wood-veneer slats are a dry-room product: living rooms, bedrooms, offices. In a bathroom or a steamy kitchen zone, humidity cycling works on real wood edges and felt backing over time. Stone-look and PVC fluted panels are non-porous and tolerate that air far better — the same logic as our guide to wall panels in the bathroom: mold and moisture. Whichever you choose, the wall behind must start dry and sound; panels are a finish, not a repair for a damp wall.

Curves, corners and columns

Fluted panels win this round outright. Many fluted boards flex gently and are made to wrap a curved wall, a rounded corner or a column, keeping the groove rhythm continuous around the bend — a signature look in newer South Florida interiors. Slat panels are rigid sheets of straight battens; they turn flat corners with mitred trims, but they do not bend around a curve. If your wall has a curve in it, the choice has effectively been made for you.

Which one for which room

  • Living room TV wall: slats for drama and echo control either side of the screen; fluted stone-look for a calmer, more tailored media wall.
  • Bedroom, the wall behind the bed: both work — slats for warmth and shadow, fluted for a softer, quieter rhythm; we compare headboard layouts in our bedroom headboard wall panels guide.
  • Home office backdrop: slats at the sides for frame and felt, or fine fluted board behind you for a continuous, camera-friendly texture.
  • Bathroom and kitchen splash zones: fluted, in a non-porous stone-look or PVC board — not wood slats.
  • Curved wall or column: fluted, no contest.
  • Entryway: fluted stone-look in the scuff zone wipes clean; slats are better kept out of the bag-and-shoe traffic line.

What it costs, honestly

The two finishes sit in the same studio tiers as any accent wall: stock design from $850; a design fitted to your wall usually $2,200–$2,700; full custom turnkey from $9,999. Within a tier, real wood veneer slats generally cost more per sheet than fluted MDF, while stone-look fluted boards can cost more than basic slats — material, wall size and cut-outs decide the exact quote, as detailed in our guide to how much wall panel installation costs in South Florida. A single wall in either finish is normally a one-day installation, on the pattern in our installation timeline guide.

Still torn? Put both on your wall — on screen first

This is the rare choice you do not have to make from a sample board. Send a photo through our wall form and see your own wall twice in a free AI preview: once in wood slats, once in fluted board, in your own light, with your own furniture underneath. The right answer is usually obvious in about ten seconds — and it is your wall, not a showroom wall, that gives it.

WallPanels Studio — decorative wall panel design and installation across Broward County and Boca Raton, South Florida. AI concept imagery in this article is visualisation, not photography of completed work.

← Back to Blog

Blog

Are Wall Panels Still in Style? 🔥 The 2026 Trends South Florida Homes Are Actually Choosing

Yes — wall panels are still in style in 2026, but the look moved on: one honest accent wall, mixed materials (wood beside stone-look, padded centres, thin metal lines), warm minimalism and texture that plays with light. Studio tiers from $850, $2,200–$2,700 fitted, from $9,999 custom. Send a photo of your wall through our wall form and see it with panels in a free AI preview.

Short answer (WallPanels Studio data): Are wall panels still in style in 2026? Yes — more than ever, but the style itself changed. What faded: panels on every wall, cold grey everything, and busy feature walls fighting the furniture. What is winning in Fort Lauderdale, Hollywood, Hallandale Beach, Pembroke Pines, Coral Springs and Boca Raton in 2026 is one honest accent wall per room, built as a mix — warm wood beside calm stone-look or travertine, a soft padded centre where people lean, and one thin metal line to catch the light. On price, our published studio tiers are: stock design from $850; a design fitted to your wall usually $2,200–$2,700; full custom turnkey from $9,999. Those are preliminary tiers — the exact quote depends on your wall size and materials. One accent wall typically installs in about a day. Before you commit: send a photo through our wall form and see your own wall in a 2026 design, free.

Why the question itself changed

Three years ago people asked "are wall panels a trend?" the way they ask about a colour of the year — something that arrives, peaks and embarrasses you later. In 2026 the question we actually hear in South Florida is different: "which panel look will still feel right in five years?" That is a better question, and it has a practical answer. Panels stopped being a novelty decoration and became what stone, wood and upholstery have always been — a way to build one wall properly instead of painting it and hoping furniture saves it. The designs that date quickly are the ones copied from a single photo; the designs that last are built from your room, your light and how you actually sit, sleep and work against that wall.

What faded — honestly

  • Panels everywhere. Four panelled walls in one room read as a showroom, not a home. 2026 does one wall per room, done properly.
  • Cold grey on grey. The blue-grey slat wall with cool white light was the 2021 uniform. Warm greige, warm oak, taupe and stone tones replaced it.
  • The busy feature wall. Three clashing textures, LED strips on every edge and a logo-sized TV floating in the middle — visual noise, not design.
  • Fake luxury overload. Mirror plus gold plus high gloss plus crystal-look in one composition. One reflective accent is elegance; four are a casino.

If your saved inspiration photos are mostly from that list, do not copy them wall-for-wall. Keep the layout you like, and rebuild the material mix with the directions below.

Trend 1: Mixed materials on one wall

The strongest 2026 direction — and the one our own recent projects keep proving — is a single wall composed of two or three different panel families: warm wood sections at the sides, a calm stone-look or travertine centre, a padded section where bodies actually lean, and a thin metal line marking one join. Mixing is not decoration for its own sake: each material does a different job — wood warms, stone calms, padding comforts, metal catches lamplight. Our guides to living room wall panels and the wall behind your bed both build their best compositions this way.

Trend 2: Padded comfort walls

Upholstered padded panels moved from hotel lobbies into ordinary bedrooms and quiet home offices. The reason is physical, not photographic: a padded centre behind pillows or behind a desk chair is a wall you lean against. Our Padded Panels range (ND610–624) runs from slim 0.4″ tailored profiles to deep 2.15″ cushion sections, and in 2026 it is most often combined — padded in the middle, wood or stone-look around it — rather than used wall-to-wall.

Trend 3: Warm minimalism

Fewer lines, warmer tones, nothing shouting. Thin slats in cream and light oak, fluted travertine-look in warm beige, matte stone with soft veining — the 2026 wall is quieter than the 2023 wall, and deliberately so: it is designed to make the room feel calm on an ordinary Tuesday evening, not just to photograph well once. This is also the safest direction if you are worried about resale taste: warm neutral texture ages far more slowly than a bold colour block.

Trend 4: Texture that plays with light

3D wave and skin-relief panels are chosen in 2026 less for how they look at noon and more for what evening light does to them: one warm floor lamp turns a flat wall into moving shadow. The rule that makes it work is restraint — relief panels get one light source planned for them, and the rest of the wall stays calm. How lighting is built into panel walls properly is covered in our guide to adding LED lighting to wall panels.

Trend 5: The honest accent wall — Florida edition

South Florida adds its own filter to every trend: humidity, air conditioning and strong sun. A 2026 panel wall here has to survive all three, which is why material choice comes before the mood board. Which families behave best in this climate is set out in our guide to which wall panel material survives Florida humidity — and if air quality in a bedroom matters to you, read whether wall panels smell or off-gas before ordering, not after.

What a 2026 panel wall costs in South Florida

Our published studio tiers have not changed with the trends, and they are the honest frame for any design above:

  • Stock design from $850 — a ready composition from the catalogue, as designed.
  • Fitted to your wall — usually $2,200–$2,700 — the design adapted to your exact wall size, layout and light.
  • Full custom turnkey from $9,999 — an individual project designed from scratch.

What moves a quote inside those tiers is wall size, the number of different materials in the mix, and detailing such as lighting. What the full cost picture looks like — and which factors are worth paying for — is broken down in our guide to how much wall panel installation costs in South Florida. One accent wall typically installs in about a day; the sequence is in our installation timeline guide.

How to choose a 2026 design that will not date

  1. Start from the room's job, not a photo. A wall you lean against, a wall behind a TV and a wall behind a desk want different mixes.
  2. Pick two materials, maybe three. Warmth plus calm, plus at most one accent line.
  3. Stay warm-neutral. Taupe, warm oak, warm beige stone — the tones that replaced cold grey for a reason.
  4. Plan one light source for the texture. Relief without planned light is wasted money.
  5. See it on your own wall first. A design that looks right in a showroom photo can fight your floor, your window side and your ceiling height.

See your wall in a 2026 design — free

Send a photo through our wall form and see your own wall with panels in a free AI preview — mixed materials, your light, your room — before anything is ordered or paid for. That preview is our free design consultation, and it is the fastest honest test of whether a 2026 design belongs in your home.

WallPanels Studio — decorative wall panel design and installation across Broward County and Boca Raton, South Florida. AI concept imagery in this article is visualisation, not photography of completed work.

← Back to Blog

Blog

Wall Panels Over Your Old Tile? 🧱 Yes — If the Tile Passes These 4 Checks

Demolition is the part of a bathroom or kitchen refresh everyone dreads. If your old tile is solid, flat and dry, wall panels can often go straight over it — no dust, no dumpster, no week without a bathroom. The four checks that decide it, the cases where tile must come off, and how the install day actually runs. Studio tiers from $850, $2,200–$2,700 fitted, from $9,999 custom. Send a photo of your wall through our wall form and see it with panels in a free AI preview.

Short answer (WallPanels Studio data): Can wall panels be installed over existing tile? Often, yes — if the tile passes four checks: it is solidly bonded (no hollow or loose tiles), flat enough, dry with no moisture or mold behind it, and properly prepared (deep-cleaned, degreased, and primed or mechanically fixed through it). When those hold, panels go straight over the tile and the demolition stage disappears: no dust cloud, no dumpster, no week without a bathroom. When any check fails — loose tiles, hidden damp, a badly uneven surface — the tile has to come off first; panels are a finish, not a repair. Best over-tile candidates are non-porous stone-look and PVC panels, the same families we compare in wall panels vs tile for kitchen and bathroom. A single accent wall installed over tile is normally a one-day job. Our published studio tiers: stock design from $850; fitted to your wall usually $2,200–$2,700; full custom turnkey from $9,999 — preliminary tiers; the exact quote depends on wall size and materials. See it on your own tiled wall first: send a photo through our wall form for a free AI preview.

Why everyone asks this first

Almost nobody dreams about demolition. They dream about the finished bathroom — and then picture the week before it: a sledgehammer, tile shards, a dust film over every surface in the house, and a bathroom or kitchen out of service. So the first question in many consultations is not about colour or material. It is: "Do we really have to take the old tile off?"

Often, honestly, no. Tile that was installed well is one of the flattest, hardest, most stable surfaces in the house. The question is never whether panels can physically cover tile — they can cover almost anything — but whether your tile deserves to stay. Four checks decide it.

Check 1: Is every tile solidly bonded?

This is the tap test, and it is not optional. Run a knuckle or the handle of a tool across the wall, tile by tile, listening. A bonded tile answers with a dense, solid tok. A debonded tile answers hollow — a drum-like pock — because air sits between the tile and the wall.

Panels fitted over hollow tile inherit the problem: the finish is only as sound as what it is fixed to, and a tile that lets go later takes your new wall with it. One or two isolated loose tiles can sometimes be removed and the spot levelled. A wall that sounds hollow in patches across its whole face fails the check — that tile comes off, and the job becomes the standard sequence in our installation timeline guide.

Check 2: Is the surface flat enough?

Panels are large, stiff sheets; they bridge small irregularities but telegraph big ones. Old tile is usually flat across the field — the risks concentrate at the edges: a proud border tile, a lippage step between two tiles, a bulge where an old repair sits. A long spirit level across the wall tells the truth in seconds. Small steps can be ground or filled; a wall that waves needs either levelling work or removal. This is the same flatness logic we apply to any imperfect surface in our guide to wall panels over damaged or uneven walls — the panel never hides a problem it cannot bridge.

Check 3: Is it dry — all the way through?

A bathroom wall can look dry while moisture sits behind the tile, especially around old grout lines that have cracked and around shower plumbing. Panels are non-porous on their face; fitted over a damp wall, they seal that moisture in, and mould will find it. This is the one check where optimism is expensive. Any sign — a musty smell, soft grout that crumbles, staining that returns after cleaning, a history of leaks — means opening the wall and fixing the cause first, exactly as in our guide to wall panels in the bathroom: mould and moisture. Dry, sound tile passes. Anything else waits.

Check 4: Is it prepared for fixing?

Tile is glazed, and glaze is designed to repel — including adhesives. An over-tile install therefore never skips preparation: a deep clean and degrease (years of soap film and kitchen grease are bond-killers), then either a bonding primer made for non-porous surfaces or a fixing pattern that goes mechanically through the tile into the wall behind. Which route depends on the panel's weight. Lightweight PVC and stone-look sheets bond well on primed tile; heavier constructions are screwed through, with the fixings hidden in joints and trims. Skipping prep to save an hour is how panels end up on the floor — the preparation is the installation.

When the answer is simply no

  • Loose, cracked or hollow tile across the wall — the substrate has already failed; covering it builds on failure.
  • Moisture or mould behind the tile — fix the water first, always.
  • Badly uneven tile or thick, rustic, heavily reliefed tile — the surface cannot be made flat enough to trust.
  • A floor — this guide is about walls. Panels are not a floor finish, over tile or anything else.
  • Direct high-heat zones — behind a gas hob without the required clearances, material limits rule; we check appliance clearances case by case rather than promising.

Which panels work best over tile

  • Stone-look and continuous panels — the natural choice for bathrooms and kitchen splash zones: non-porous, no grout lines of their own, and their large format covers tile joints completely. Seams are sealed with sanitary silicone, as in any wet-zone install.
  • PVC panels — light, fully waterproof and forgiving; their lifespan and care are covered in our guide to PVC wall panel durability.
  • Wood slat panels — possible on a dry feature wall over tile (a vanity wall, not a wet shower wall), but they are the heavy option: fixing goes through tile into the structure, and real wood stays a dry-room product in Florida humidity.

How an over-tile install day runs

  1. Checks — tap test, level, moisture judgement (the four checks above, on your actual wall).
  2. Prep — deep clean, degrease, prime or set out mechanical fixings; electrics and fittings masked or removed.
  3. Cut and fit — panels cut to the wall, openings for taps, sockets and the mirror marked and cut.
  4. Fix — panel by panel across the wall, joints aligned over the old tile grid without following its pattern.
  5. Seal and finish — wet-zone seams siliconed, trims fitted, fittings and mirror reinstated.

No skip bin, no tile dust in the hallway, and the bathroom is usable the same evening in most single-wall projects.

What it costs, honestly

Skipping demolition removes a real chunk of labour and disposal, but the panel tiers themselves are the studio's usual ones: stock design from $850; a design fitted to your wall usually $2,200–$2,700; full custom turnkey from $9,999. What moves a specific quote is wall size, material and cut-outs — the full breakdown is in our guide to how much wall panel installation costs in South Florida. If the tile fails its checks and must come off, that removal is quoted openly as its own line, before work starts — never discovered mid-job.

The Florida footnote

South Florida adds one local twist: humidity. A tiled bathroom wall here lives with steam and air-conditioning cycles all year, so the dry-check and the seam sealing matter more, not less, than in a dry climate. Get those right and an over-tile panel wall shrugs off the same air that stained the old grout — with no grout lines of its own left to stain.

Not sure if your tile passes? Send the photo

The four checks take minutes on site — and the first one starts with a picture. Send a photo through our wall form and see your tiled wall wearing panels in a free AI preview. If it looks right, we come and tap-test the real wall before quoting. If your tile should come off, we will tell you that plainly — and show you what the room looks like either way.

WallPanels Studio — decorative wall panel design and installation across Broward County and Boca Raton, South Florida. AI concept imagery in this article is visualisation, not photography of completed work.